Sew along blog for the Paula pattern

Welcome to the sew along blog for the Paula pattern! The story of how this sewing pattern came to be is a little different than usual. Normally I know what direction I want to go in when I create a pattern, but not this time! I was working on a different (unreleased) dress pattern. About a week before I left on vacation to Ibiza I started playing around with it, and out came this cropped wrap top - it wasn’t really planned but I liked how it looked. I hadn’t even tried it on yet, and off I went to Spain with my best friend Paula. We got a few drinks in and she put on the outfits I brought with me to photograph. I’m very lucky because she doesn’t mind modeling for me at all - which I really appreciate! The second outfit was the Eva Wide Leg Trousers pattern with the wrap top. We knot it in front and it was so, so cute! I don’t know if it was the drinks or the outfit but we thought it looked absolutely stunning haha. I decided right away to name the pattern after her because it looked so beautiful on her. I emailed my pattern maker and we got the project started, and a new sewing pattern was born!

Paula in the Paula top! Paired with the Eva Wide Leg Trousers.
This sew along blog features photos instead of technical illustrations for anyone who prefers it. This post is written to accompany the sewing instructions in the pattern, which include some more beginner info in each step. Let’s get started!
What you’ll need to get started
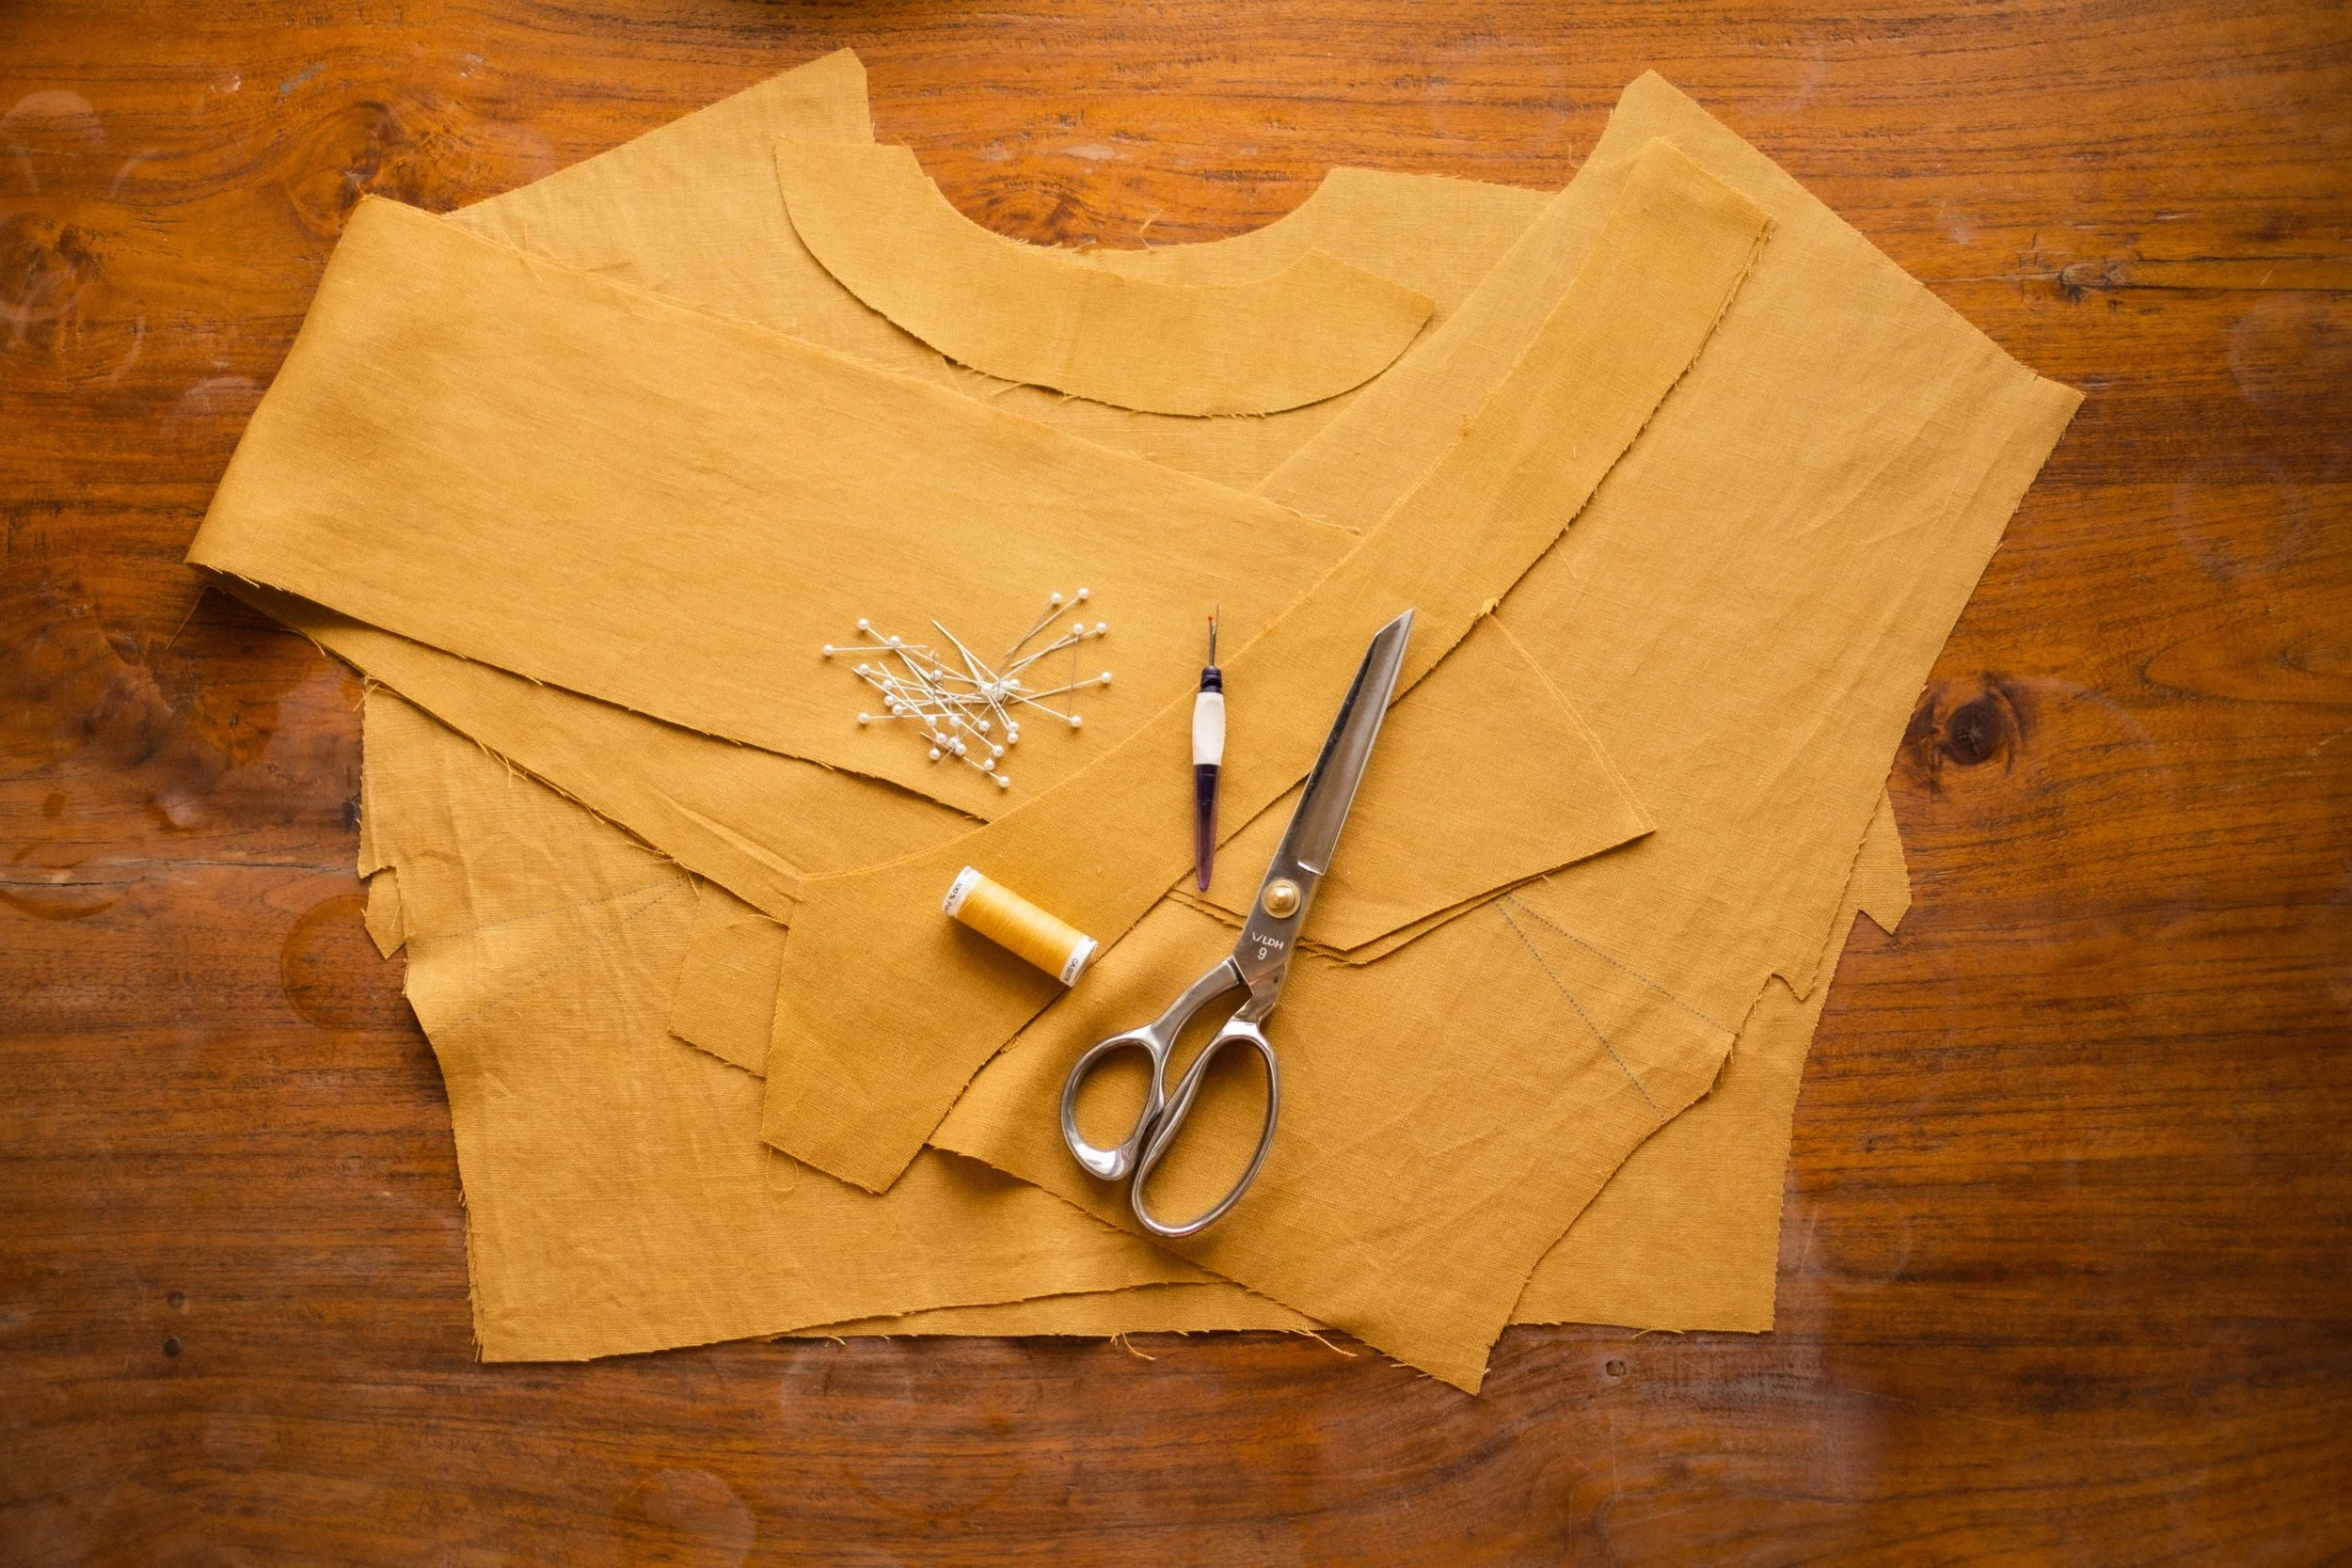
Besides a working sewing machine, you will need the following things: your fabric (washed, line dried & ironed), matching thread, pins and fabric scissors. I always keep my seam ripper close by, just in case.
Start by printing out your pattern, or have it printed at a copy shop. If you’re printing at home, make sure to print at 100% or ‘actual size’. The first page of my patterns have a 10x10cm square to help you check if it’s come out right. Stick the pages together and cut out the pattern pieces along the lines. Look at the text on the pattern pieces, sometimes you need to cut on the fold, for example.
Make sure to lay your ironed fabric folded over once, selvedge to selvedge. Iron the folded side flat and check if it’s straight. Otherwise, cutting on the fold isn’t going to work. You need to cut pattern pieces on the grain line, so the garment doesn’t warp when you wear it. Lay your pattern pieces out with the arrows parallel to the selvedge edge(s) to achieve this.
Cut all your pieces out, and mark all pattern markings on your fabric. This pattern features notches (the little lines on the pattern outlines) and bust darts. If you like a looser look & fit, you can make the dartless version. Make sure you’ve printed out the right version of the pattern, one features bust darts and the other doesn’t.
Step 1 - stay stitching

Stay stitch the neckline of the front & back panel within the seam allowance. Stay stitching is stitching along the curved neckline within the seam allowance to prevent the curve from stretching. Backstitch (a couple of stitches in the opposite direction so the thread doesn’t come loose) at the beginning and the end of the stitch line.
Step 2 - sew the darts

If you’re making the dartless version, you can skip this step of course.
Pin the dart from the side seam toward the point. Pull the threads from the machine a little longer, you’ll need them to tie a few knots. Start sewing from the point (don’t backstitch here!) - put the needle down as close to the side as possible. Sew carefully along the marked line, and backstitch at the end. Tie a few knots with the threads at the point to keep it from coming undone.
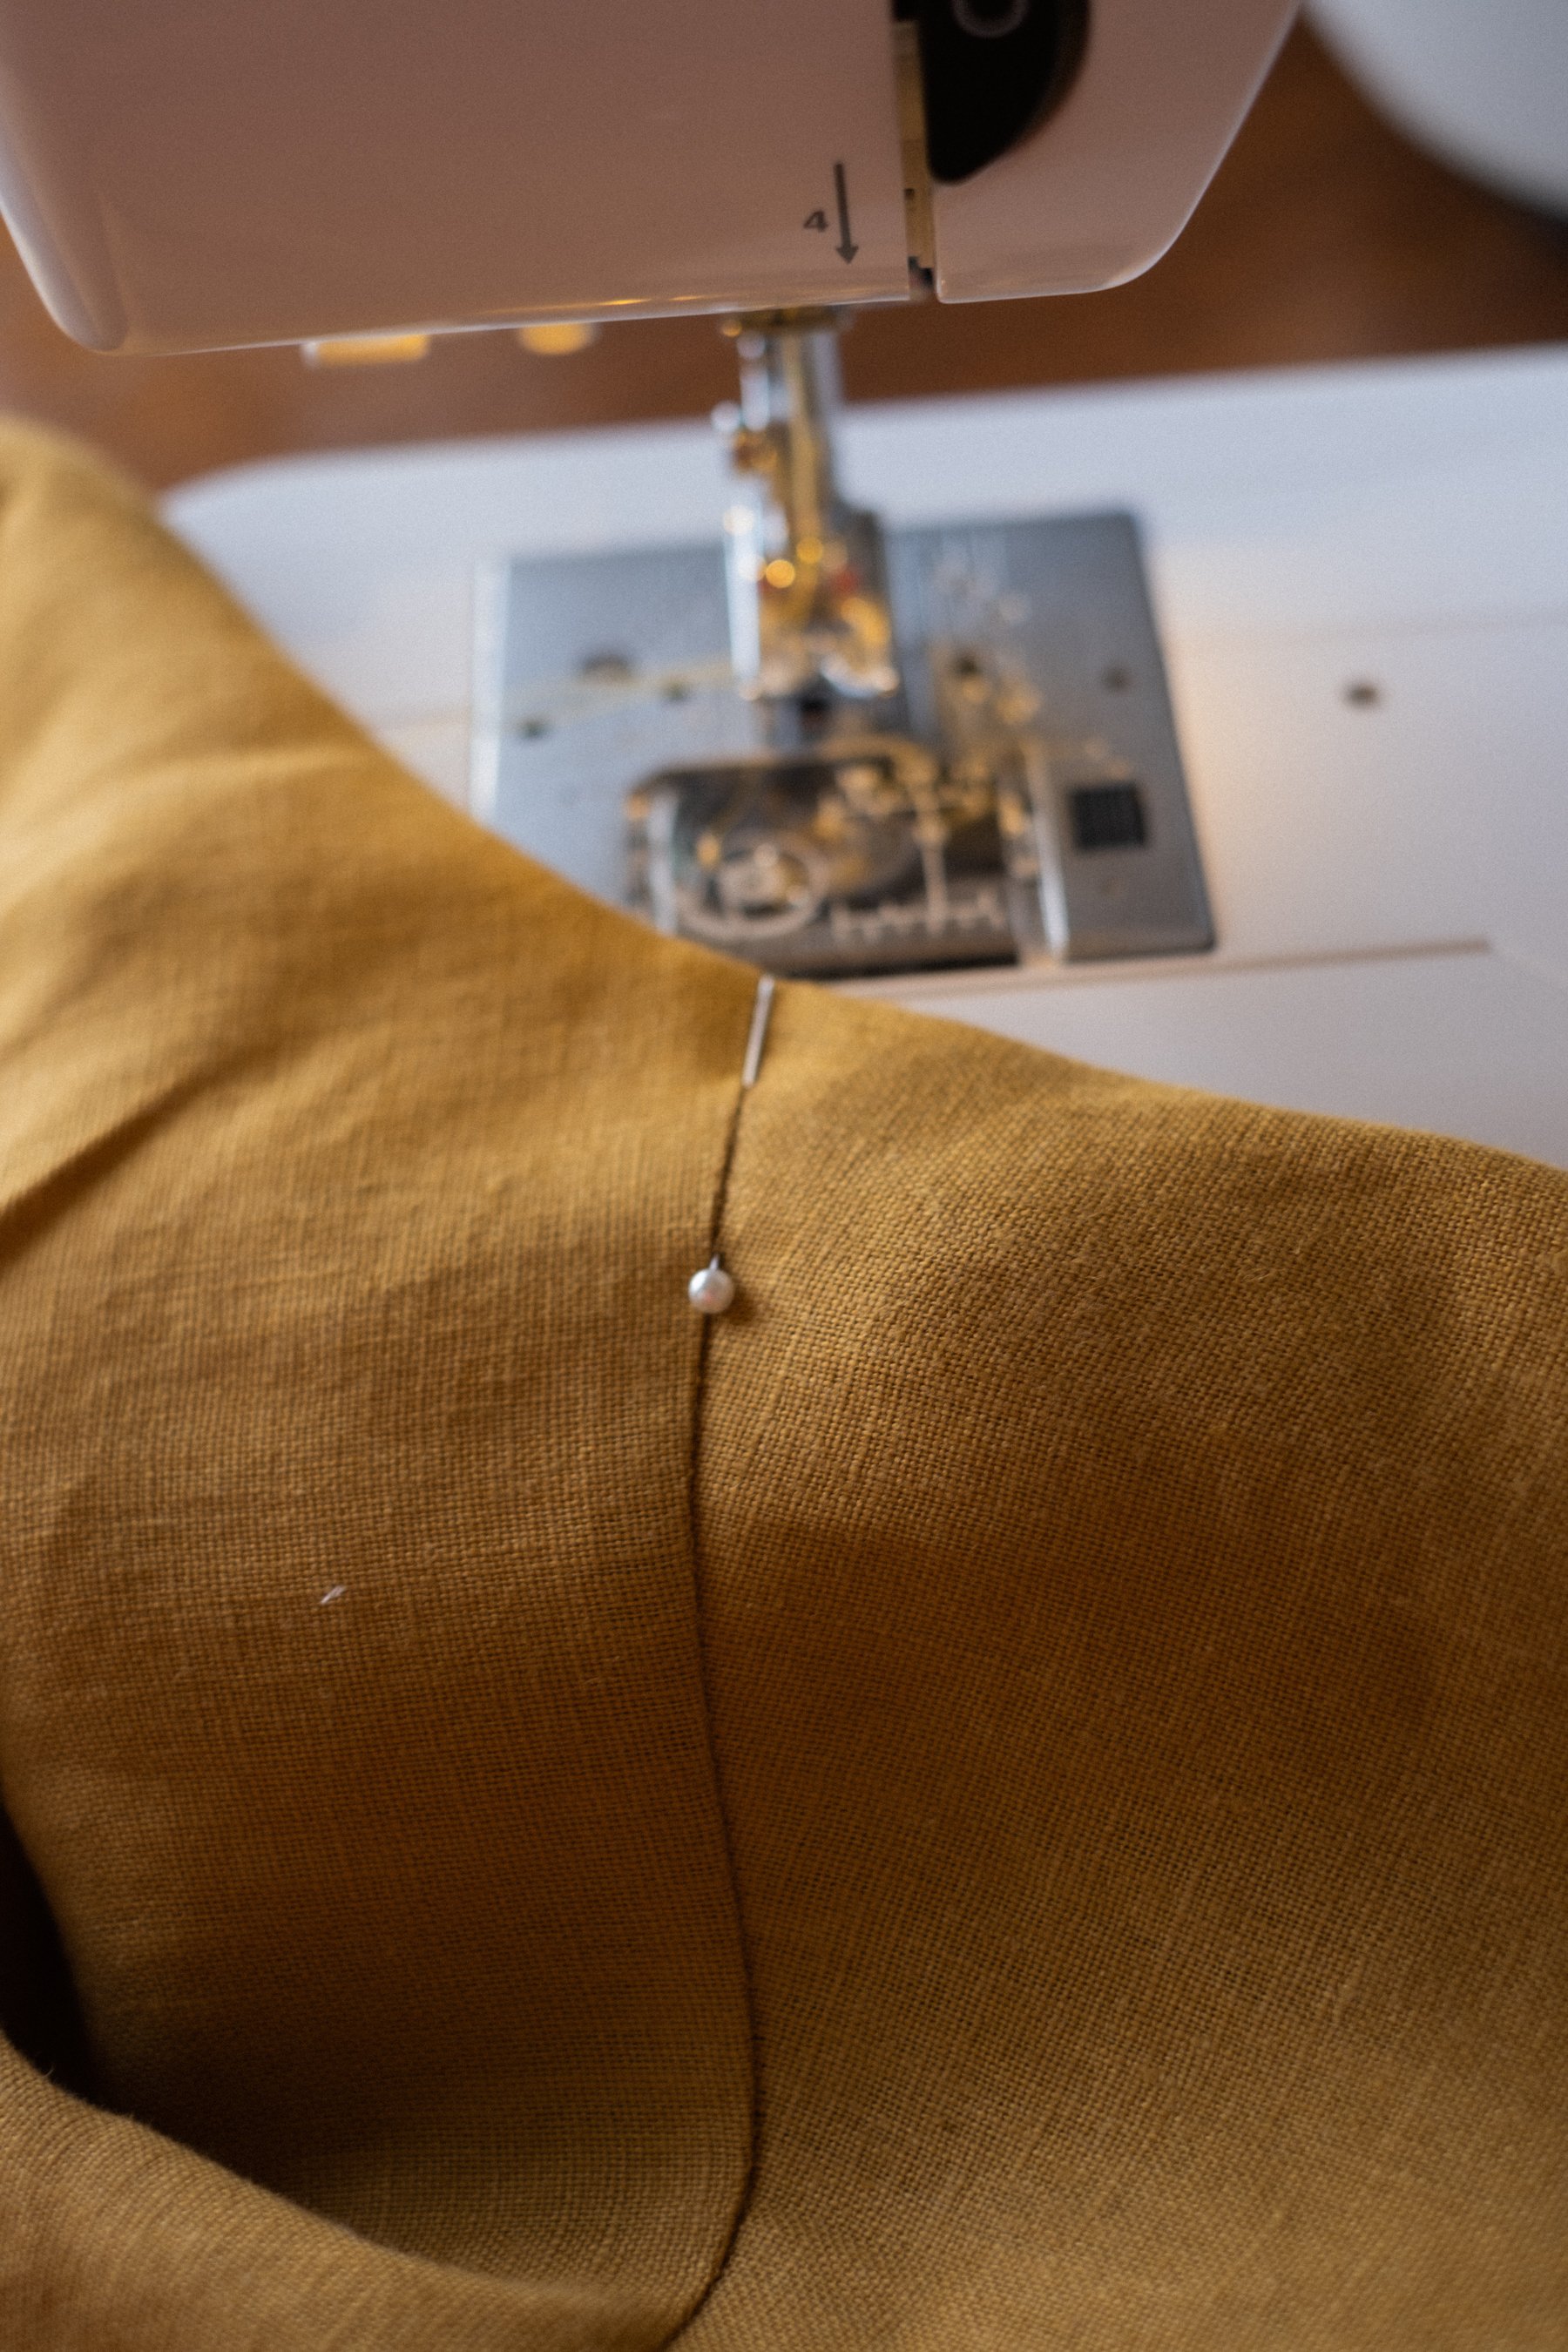
Step 3 - sew the shoulder seams
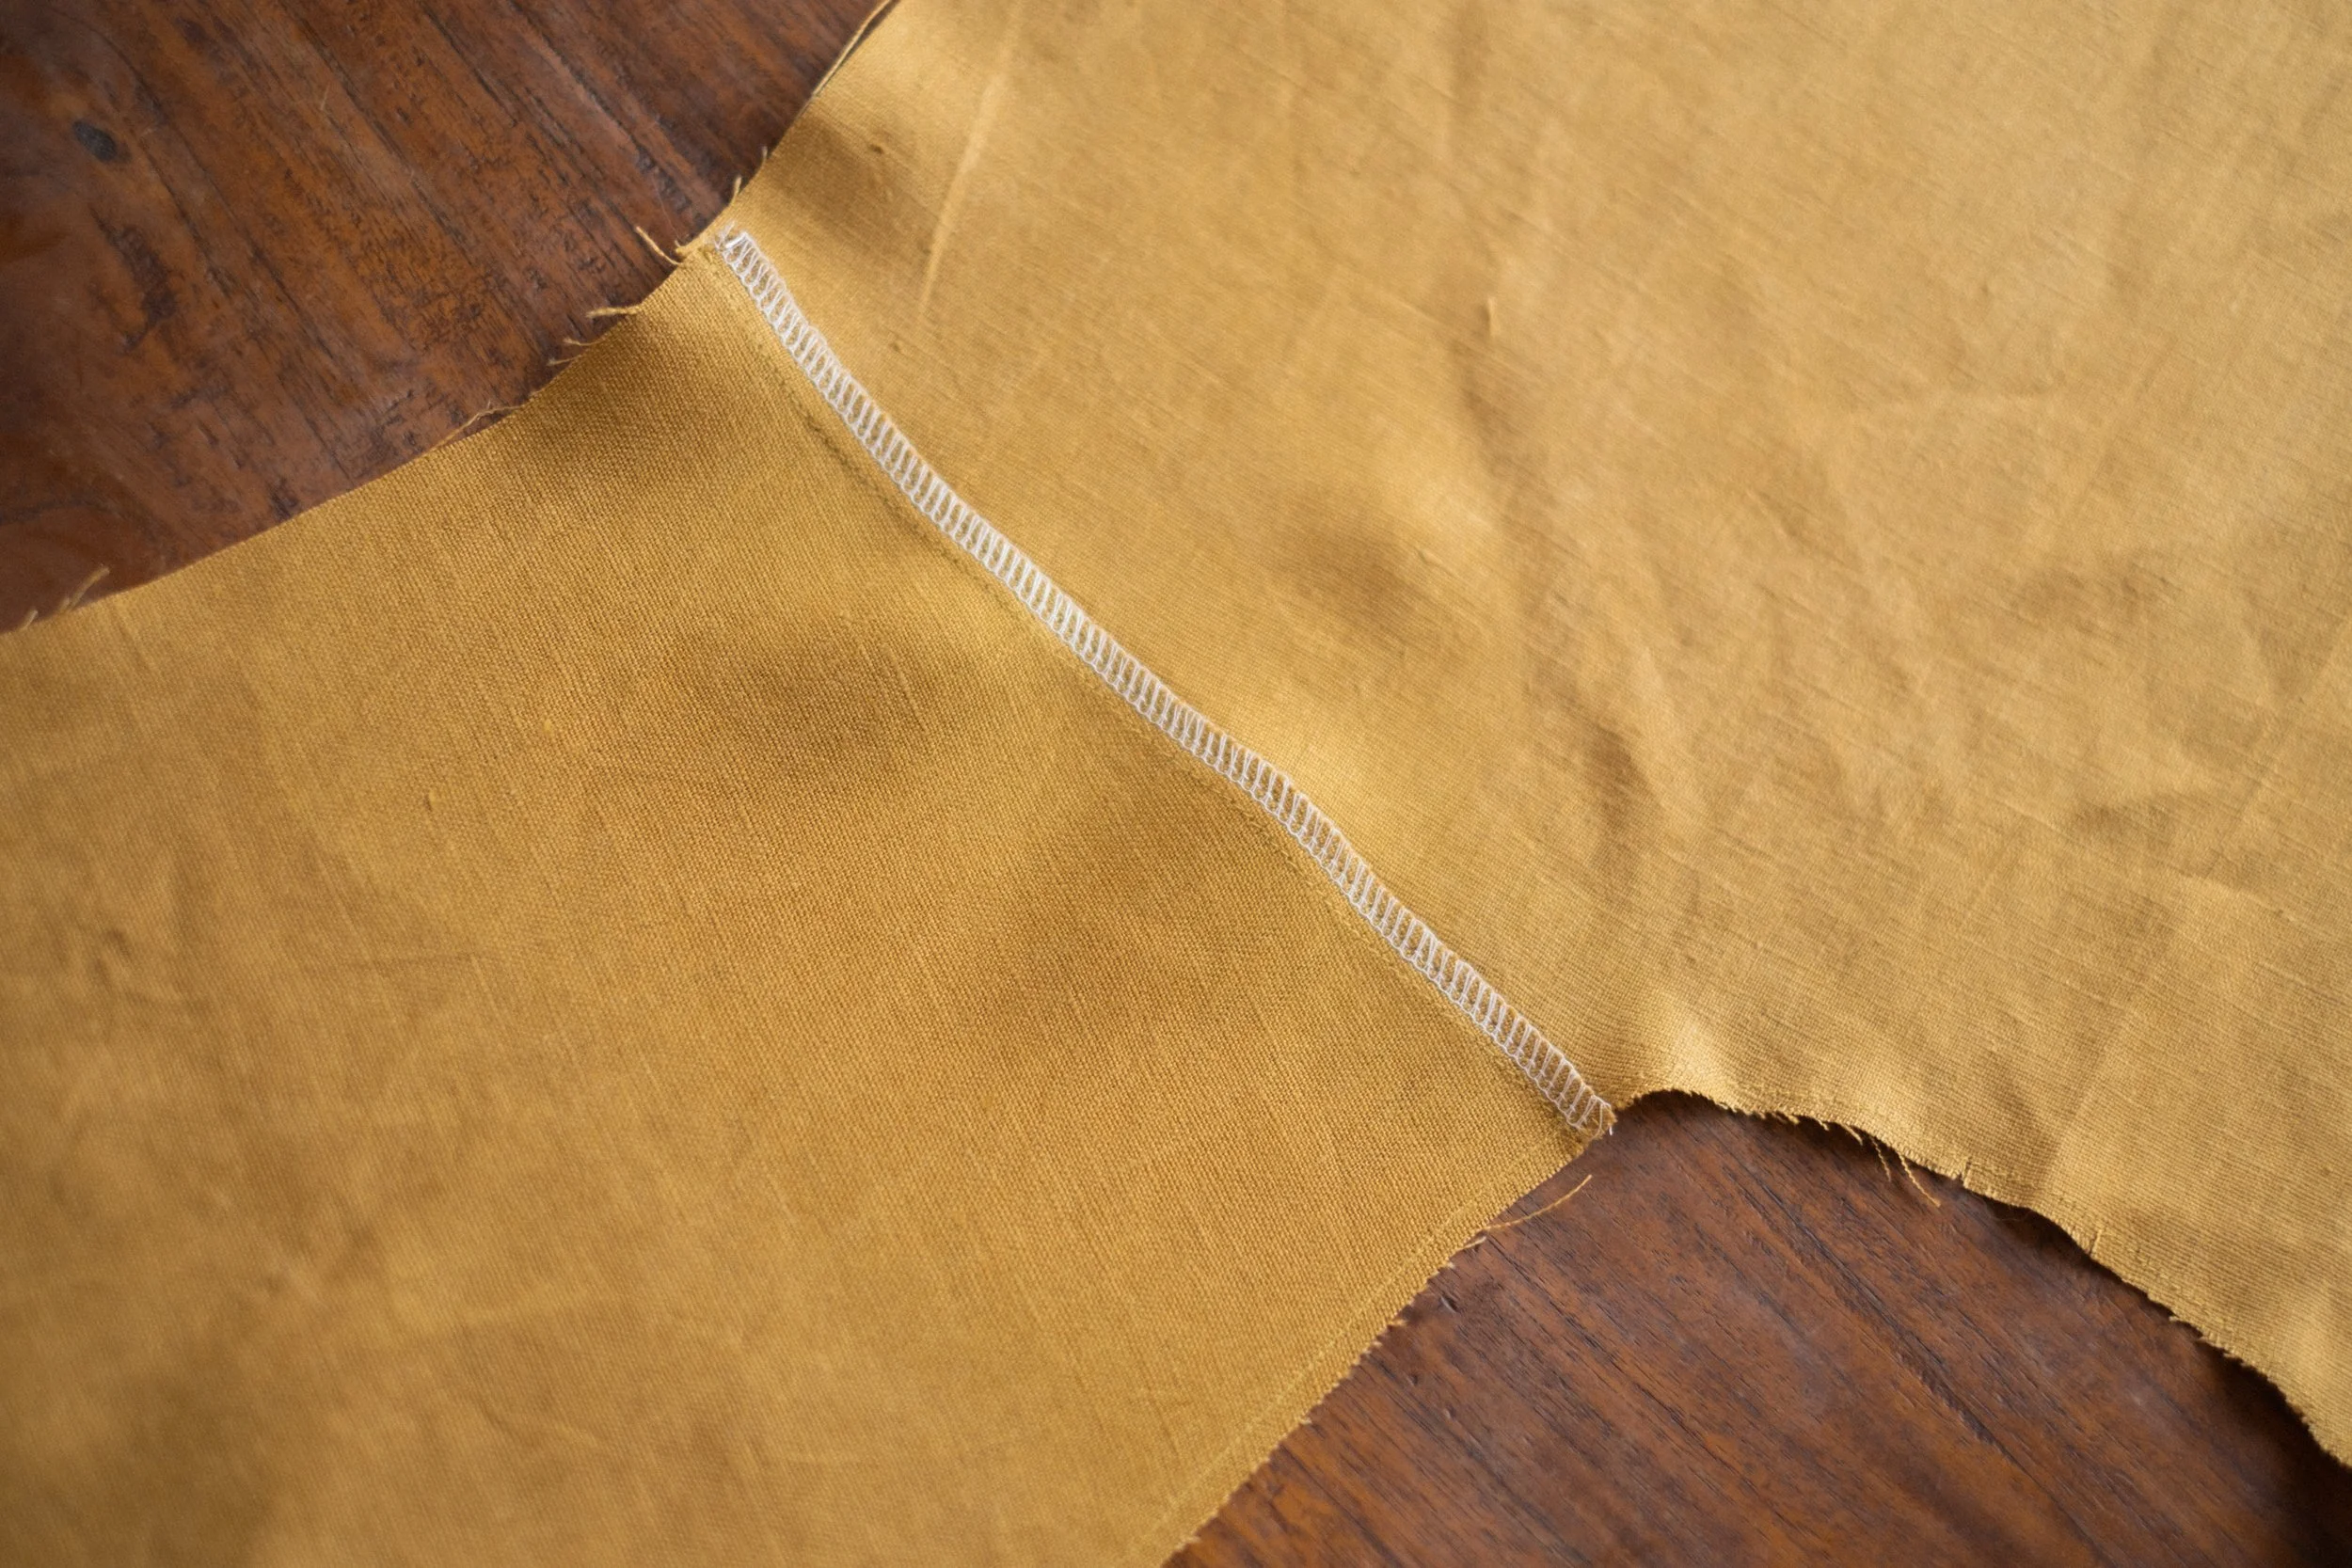
Sew the shoulder seams. Pin the front panels to the back panel, right sides together (rst) and sew them at 1cm (3/8”). Finish the seam with a zig/zag stitch or with an overlocker machine. Iron the shoulder seam towards the back bodice (2).
Beginners instruction: ‘Finishing’ a seam is done by making a zig/zag stitch within the seam allowance, to prevent your fabric from fraying.
step 4 - sew the ties
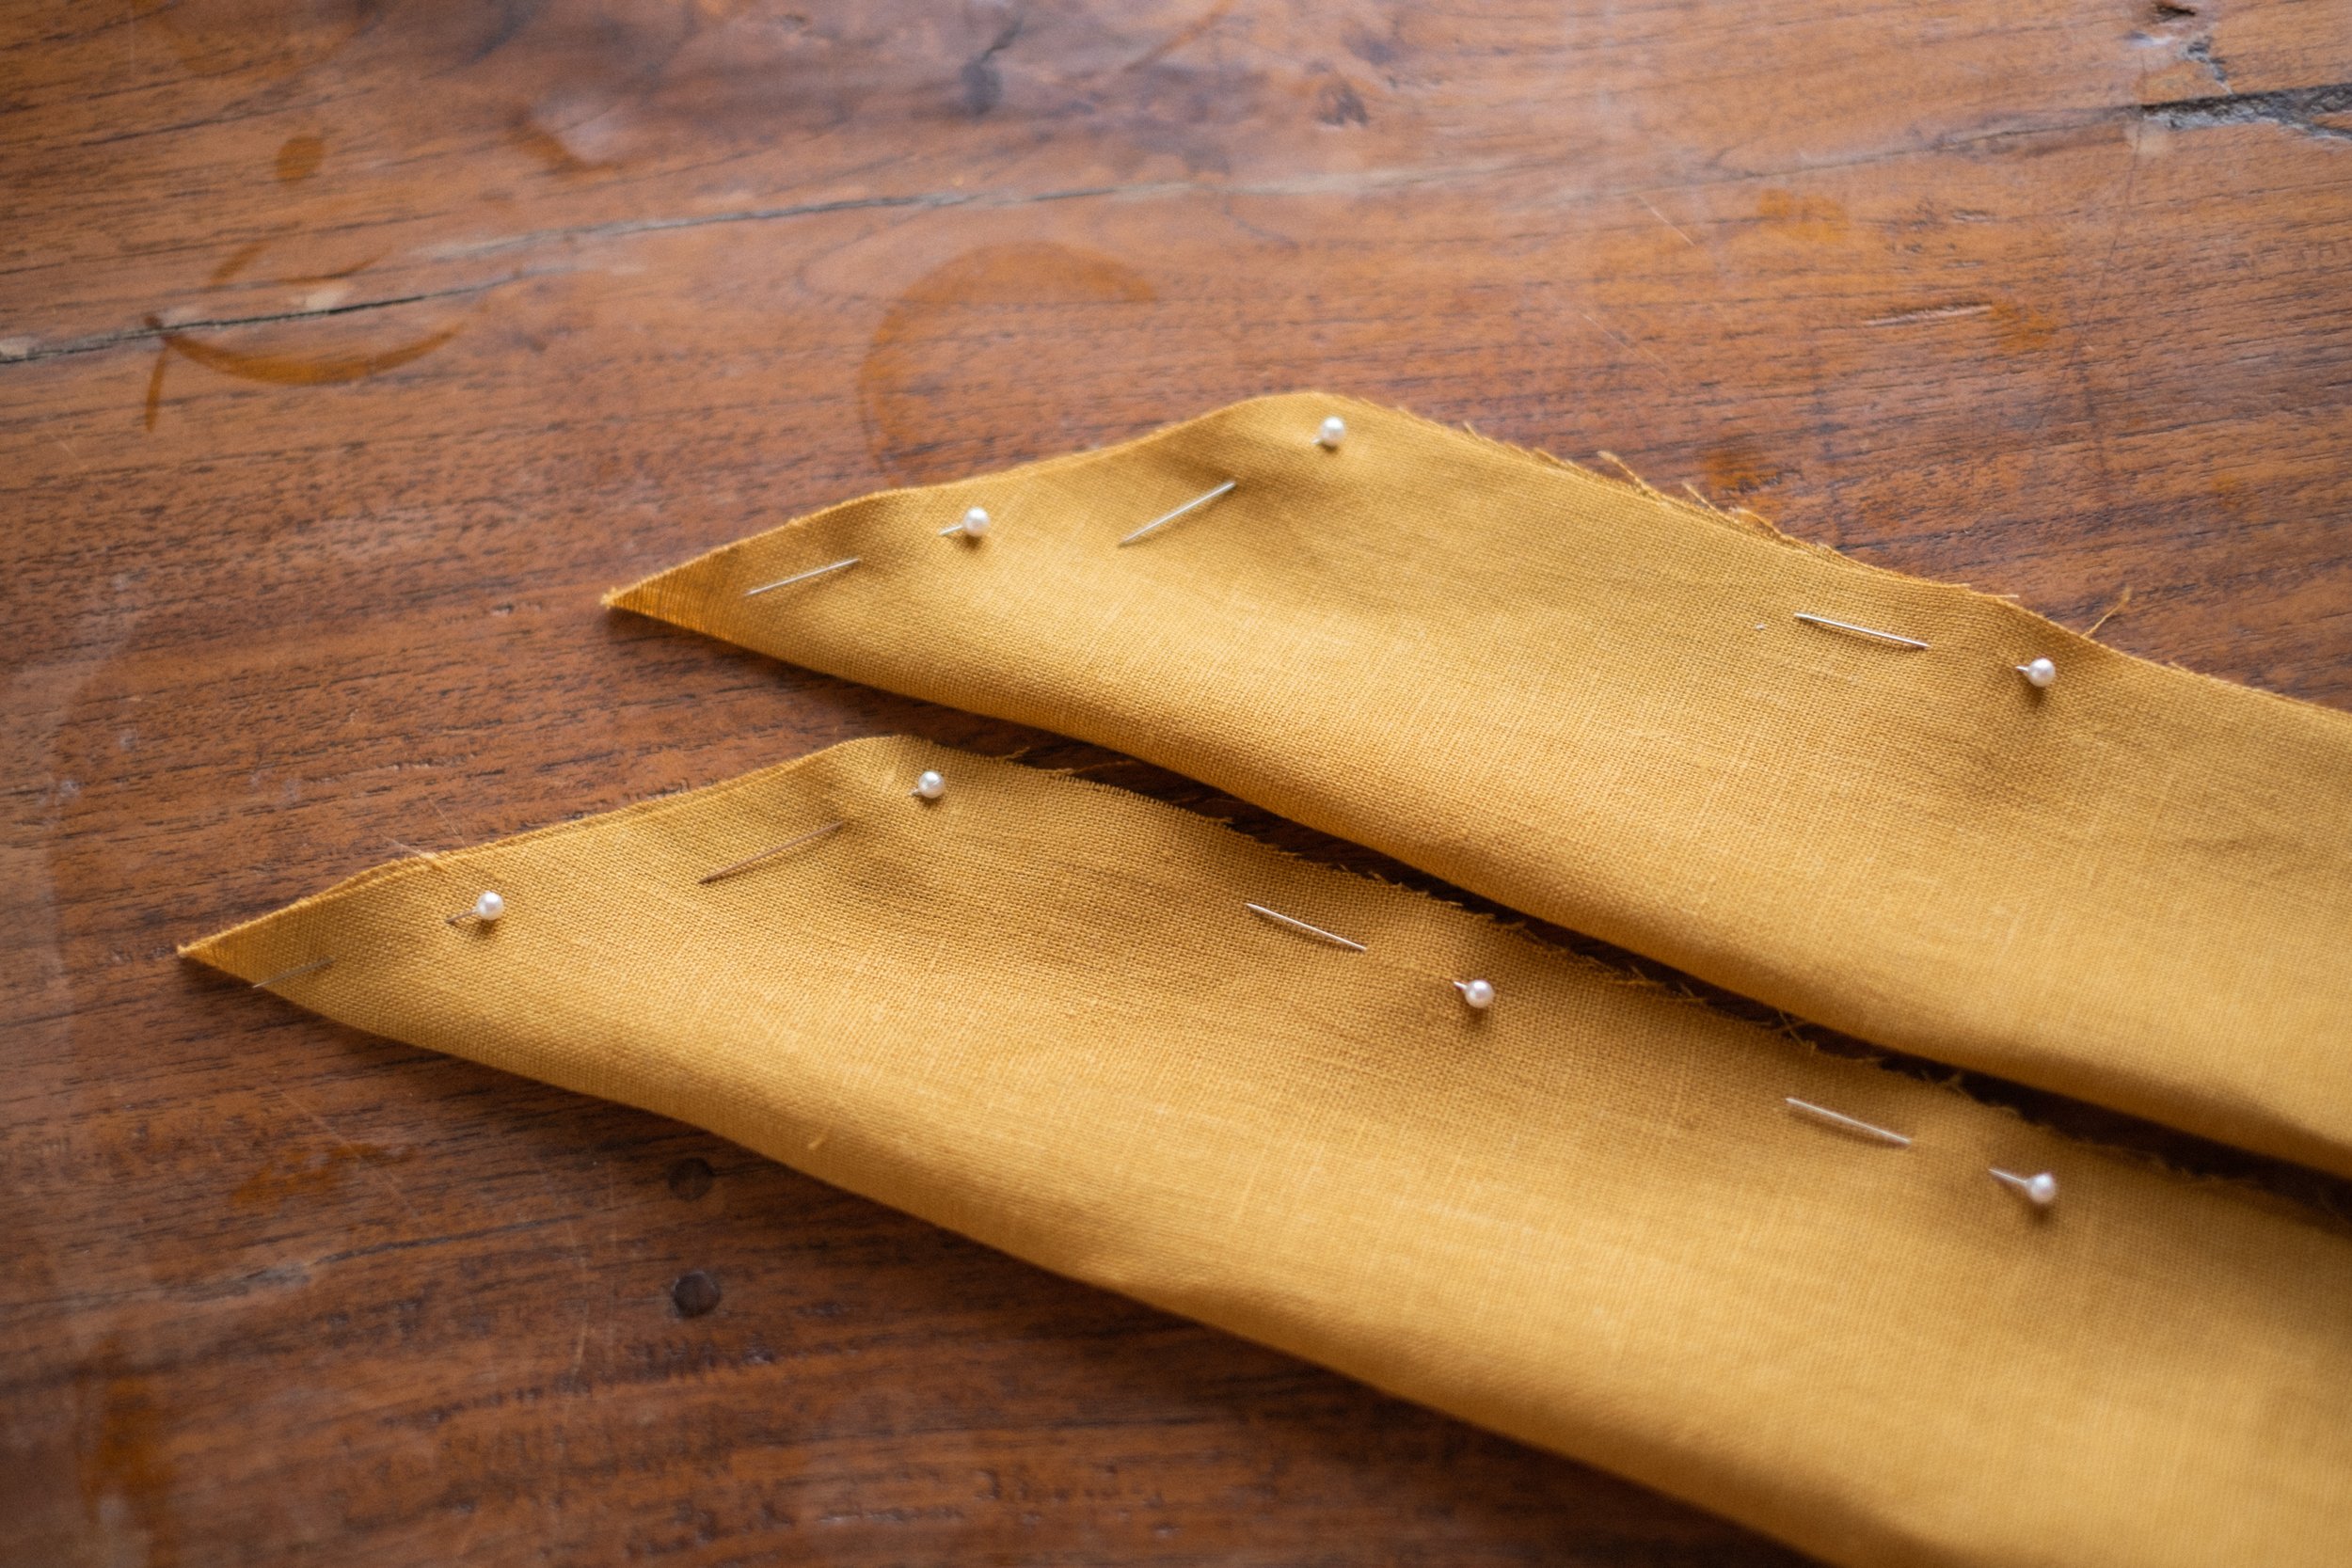
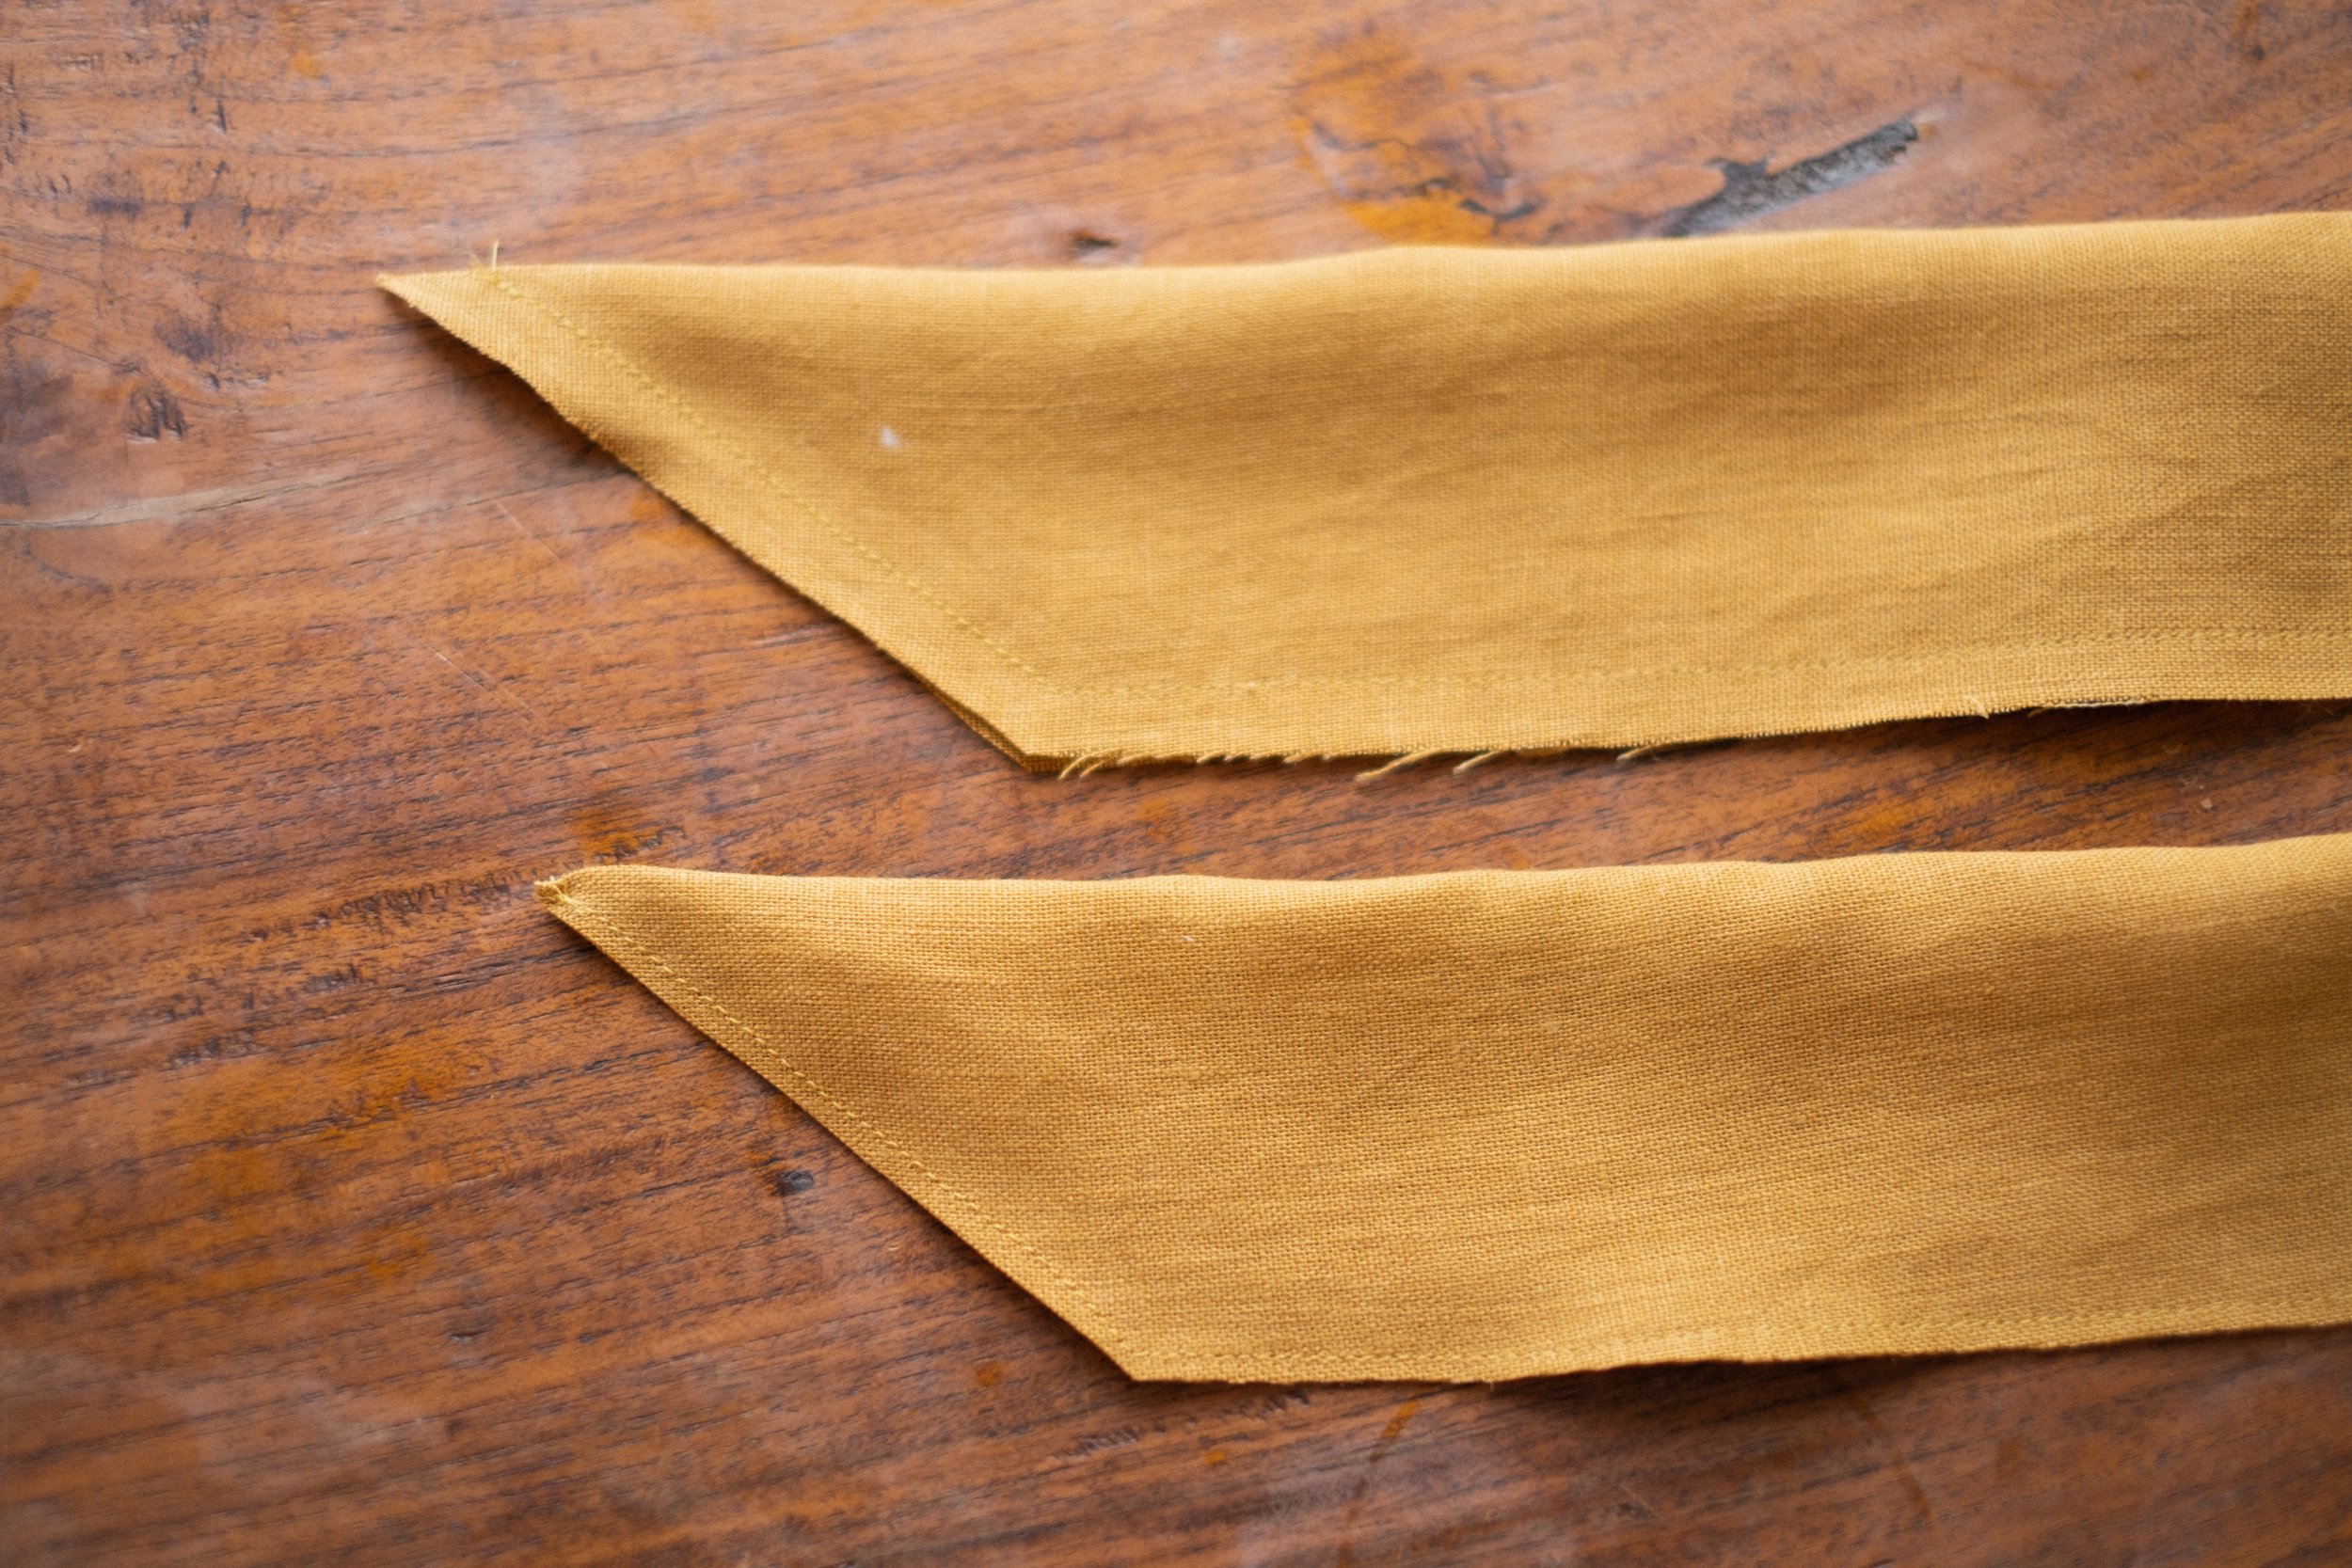
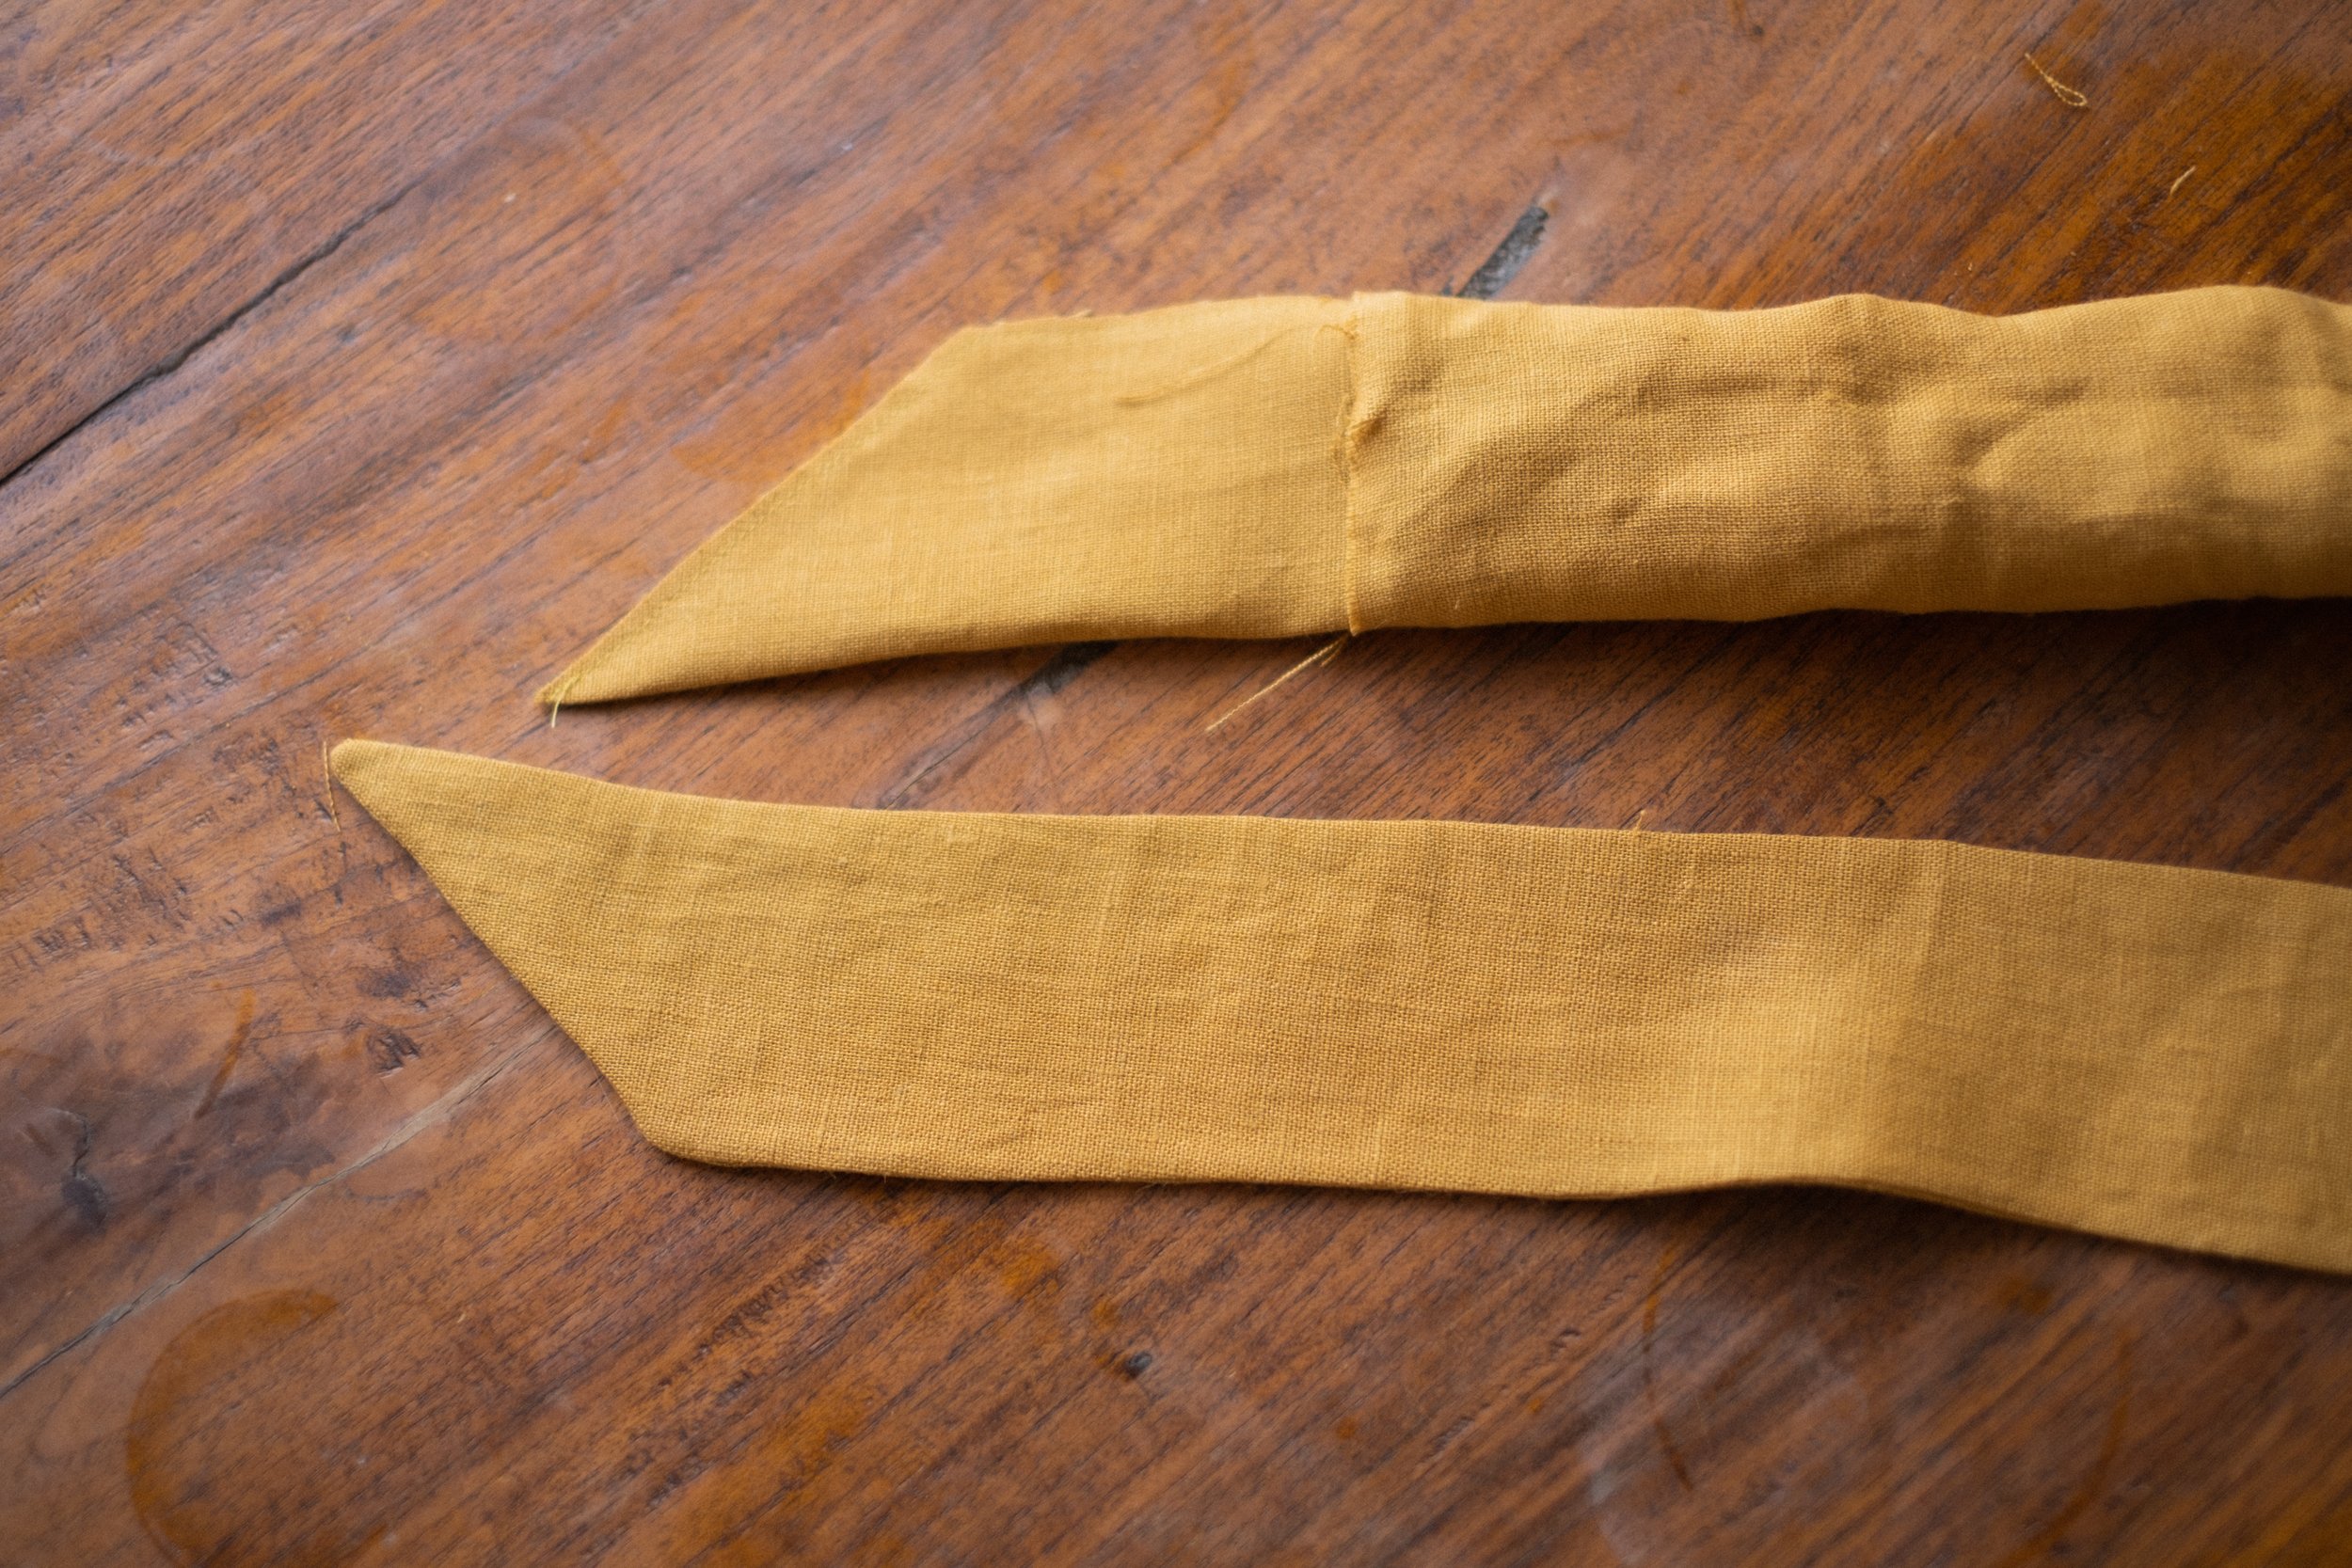
Fold the fabric over so right sides are on the inside. Start stitching at the point (1cm or 3/8’’ seam allowance), rst. Don’t stitch the opening closed. Clip the seam allowance to 0.5cm or 0.2’’ Pull the fabric through the opening, iron the ties.
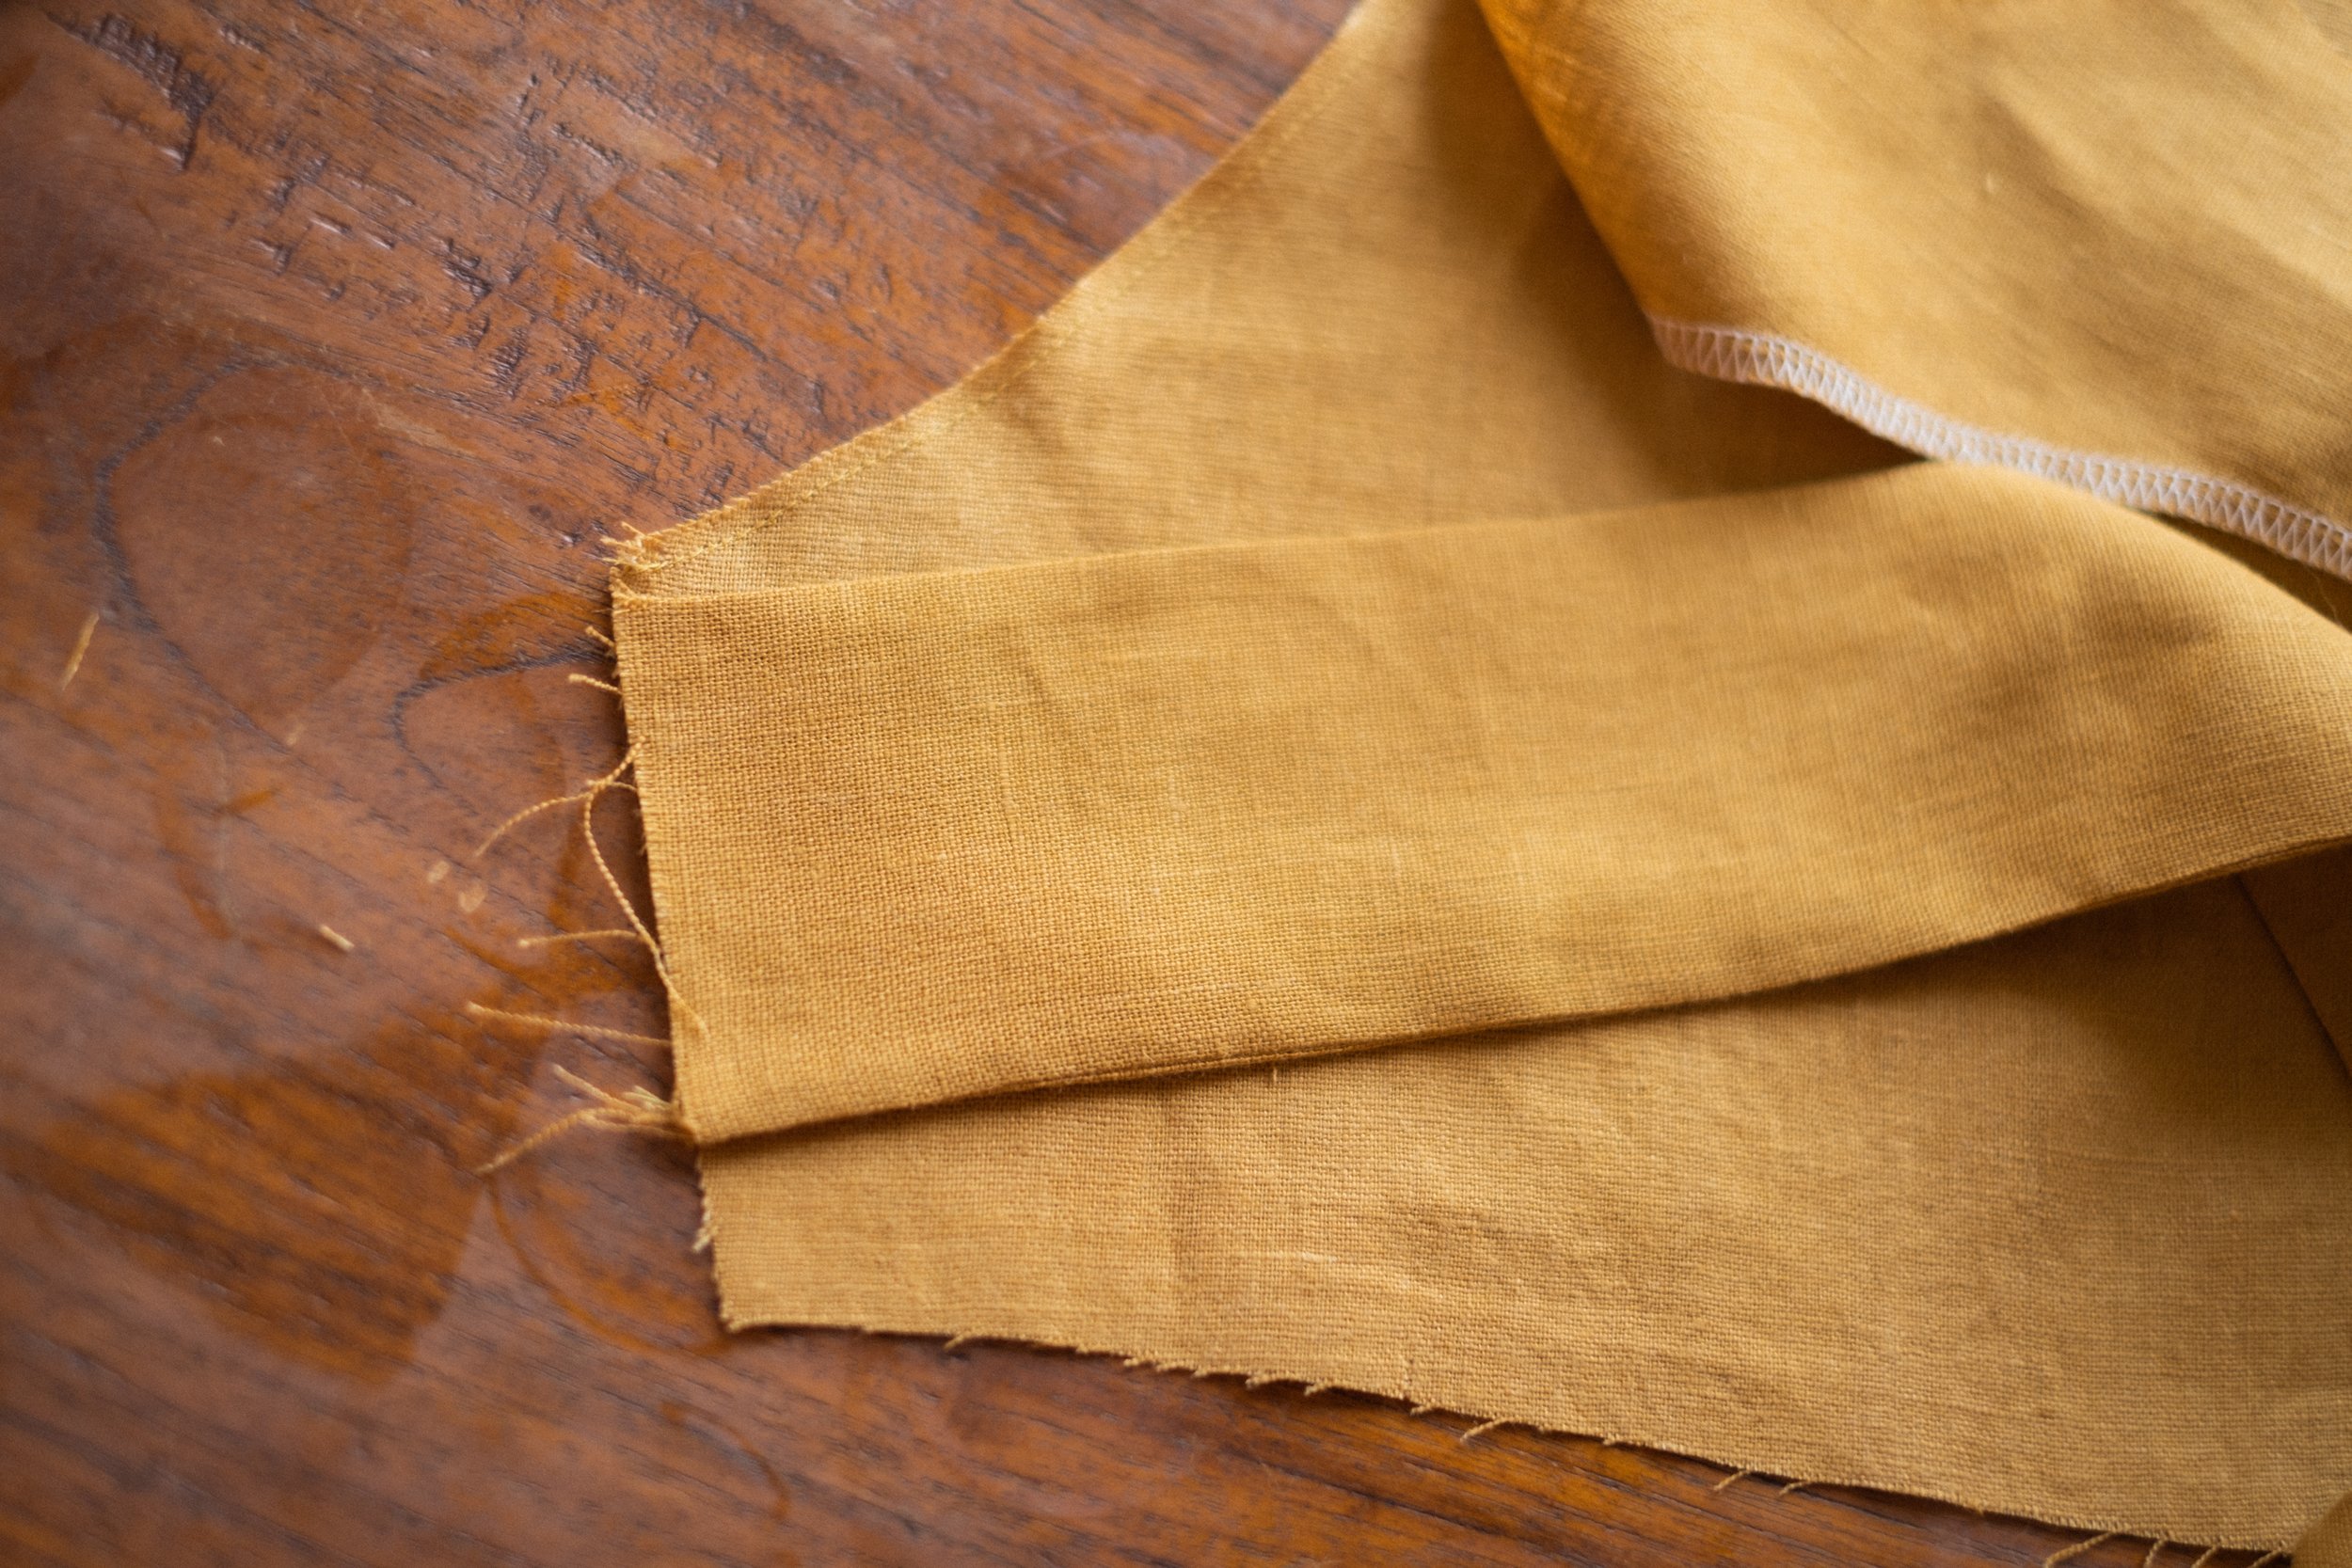
step 5 - facings

Pin and sew the facings (4 & 5) rst at the short sides. Finish the seams & iron the seam towards the front facing (4). Finish the outer edge.
step 6 - sew the facing to the bodice
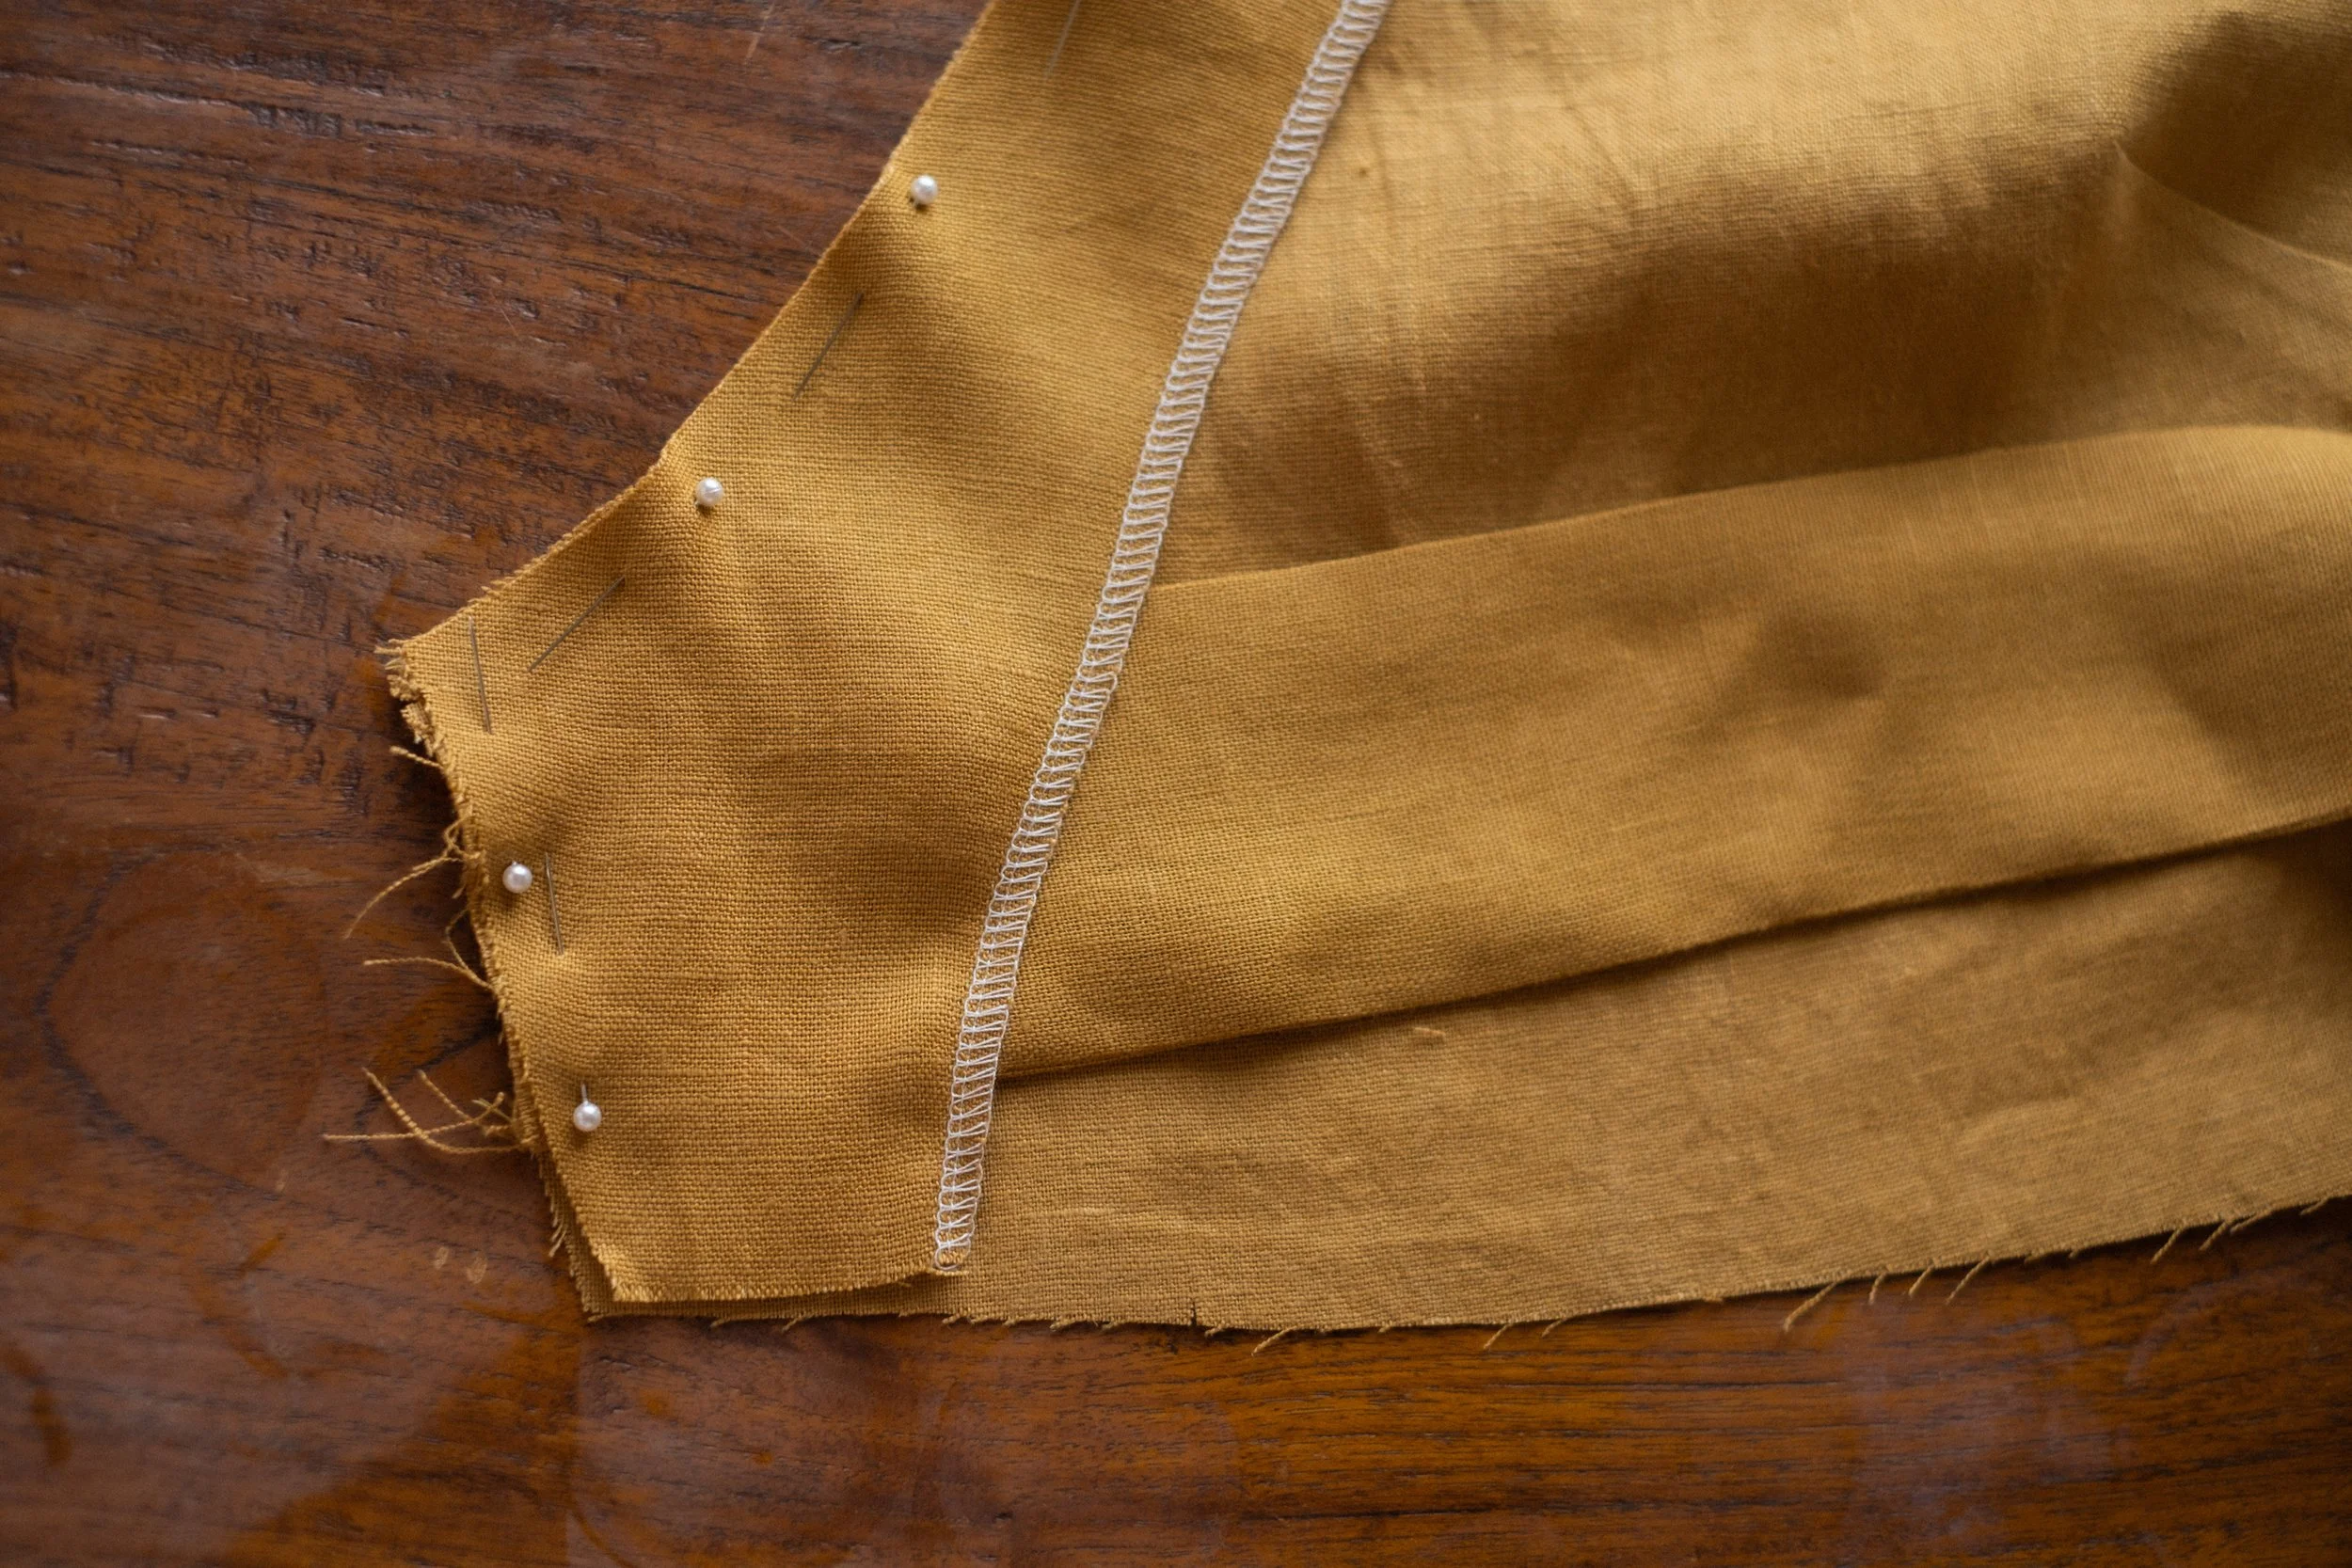
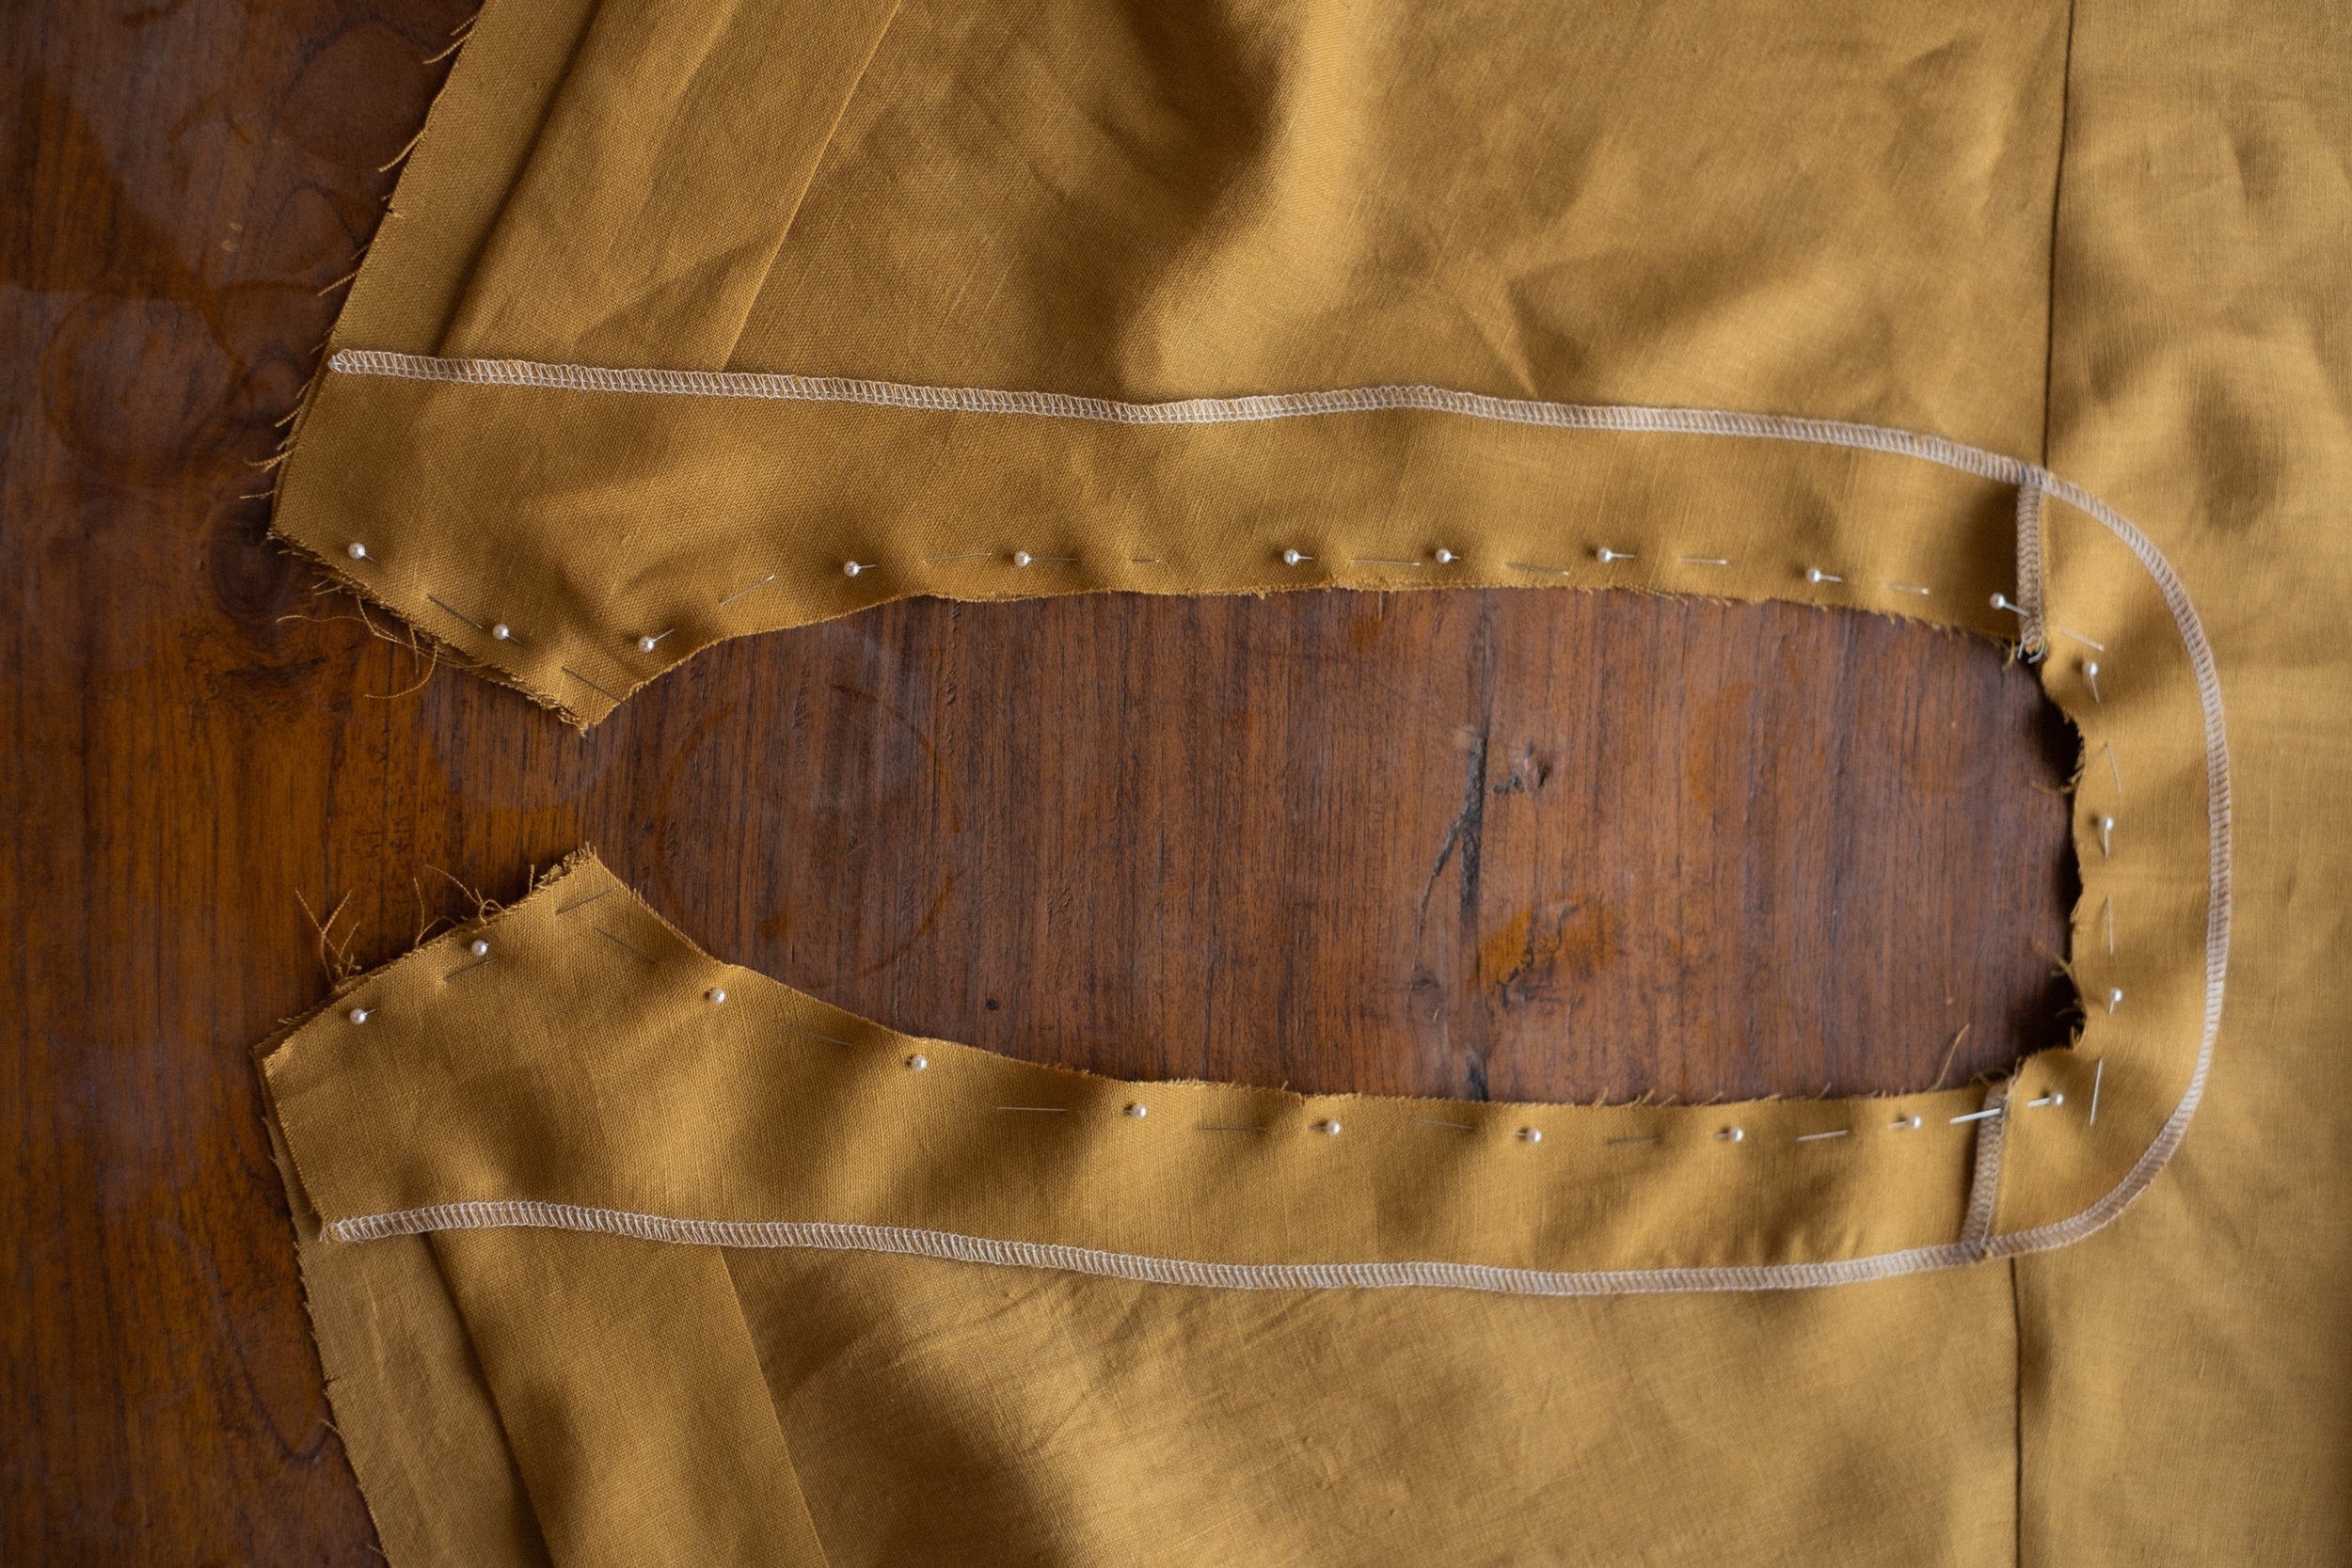
Sew the facing to the bodice. Take your facing and pin it to the bodice, rst. Make sure you match the notches and shoulder seams. Pin the ties in between the bodice and the facing, raw edges should be aligned. Sew the facing to the bodice and finish the seam. Make sure you push the ties up to the notch (photo 1), so you leave enough room at the bottom to turn it twice at 1cm/3/8’’.
step 7 - understitching
Press the facing away from the bodice. Sew the facing to the seam allowance close to the stitch line (photo 1). Next, turn the facing back inside and iron it down.
Optional: stitch the facing down in the shoulder seam (aka stitch in the ditch) so that it stays in place. It depends on your fabric if this is needed (photo 2).
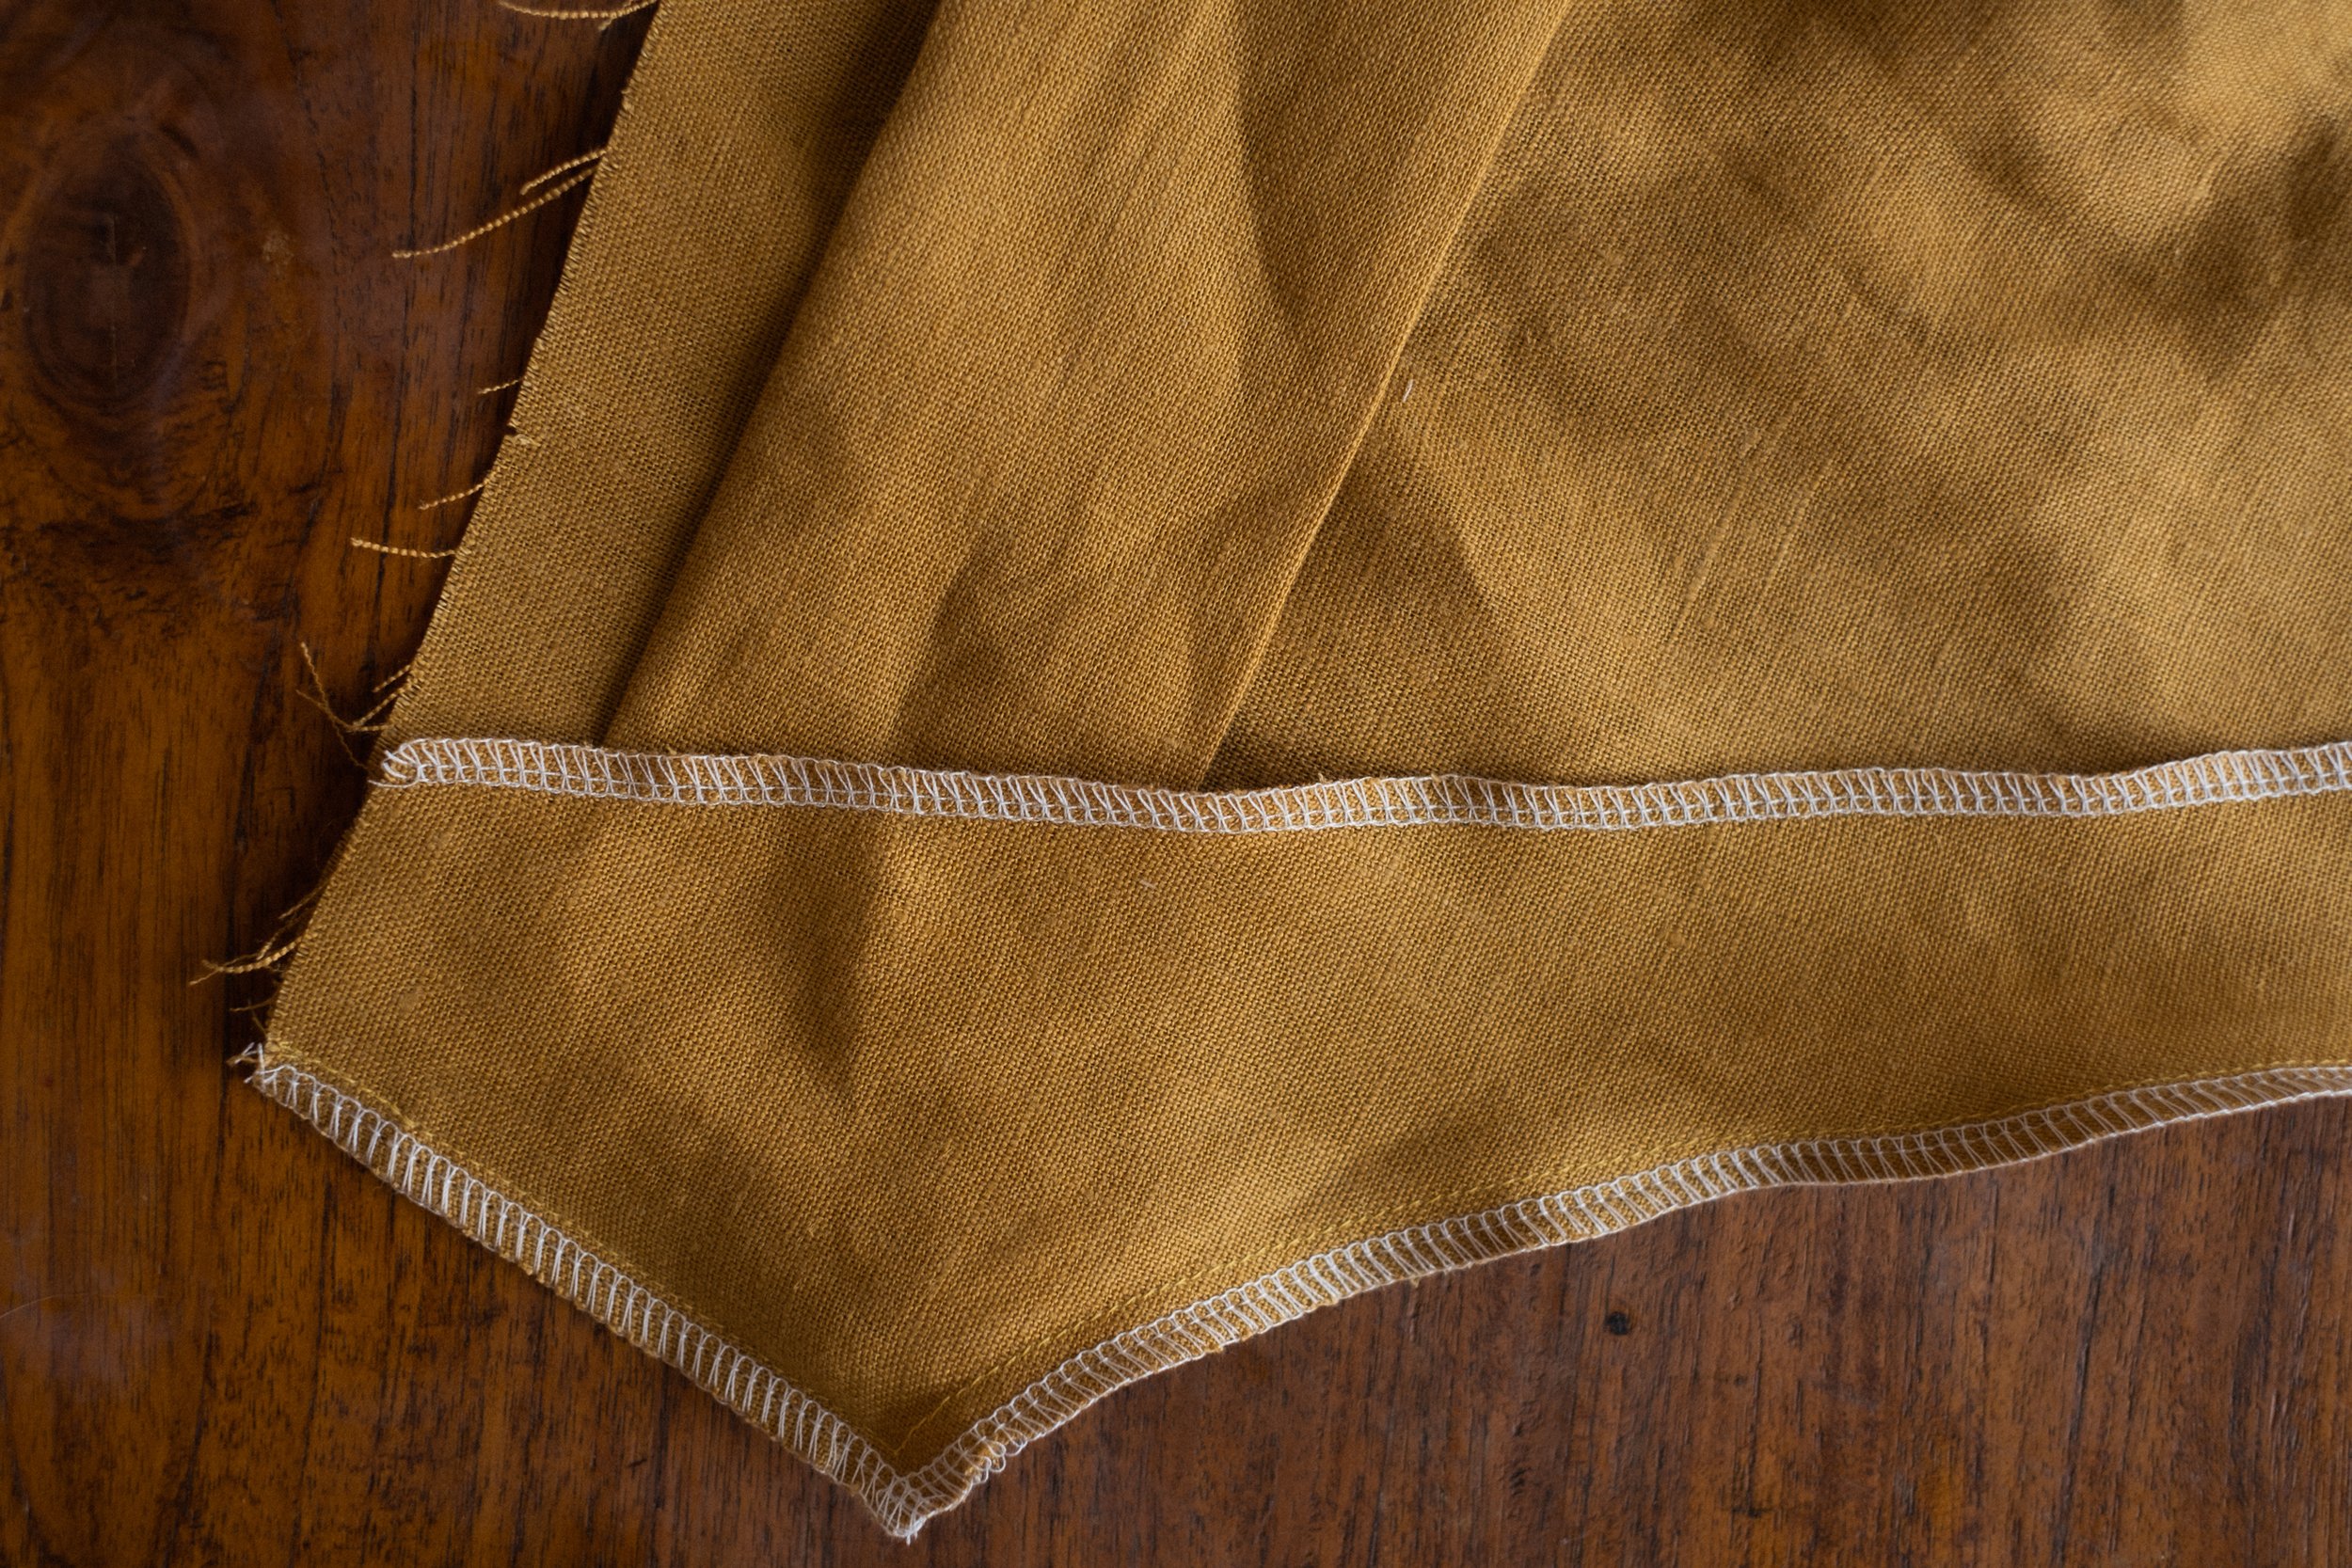
step 8 - hem the sleeves
Lay your bodice wrong side up. Fold the seam allowance up at the first point (1cm or 3/8’’), press down as you go. Fold it over again, press down again and stitch down at the edge.
You can also mark the shoulder seam allowance at 2cm or 3/4’’ and then fold it up twice to meet that line.
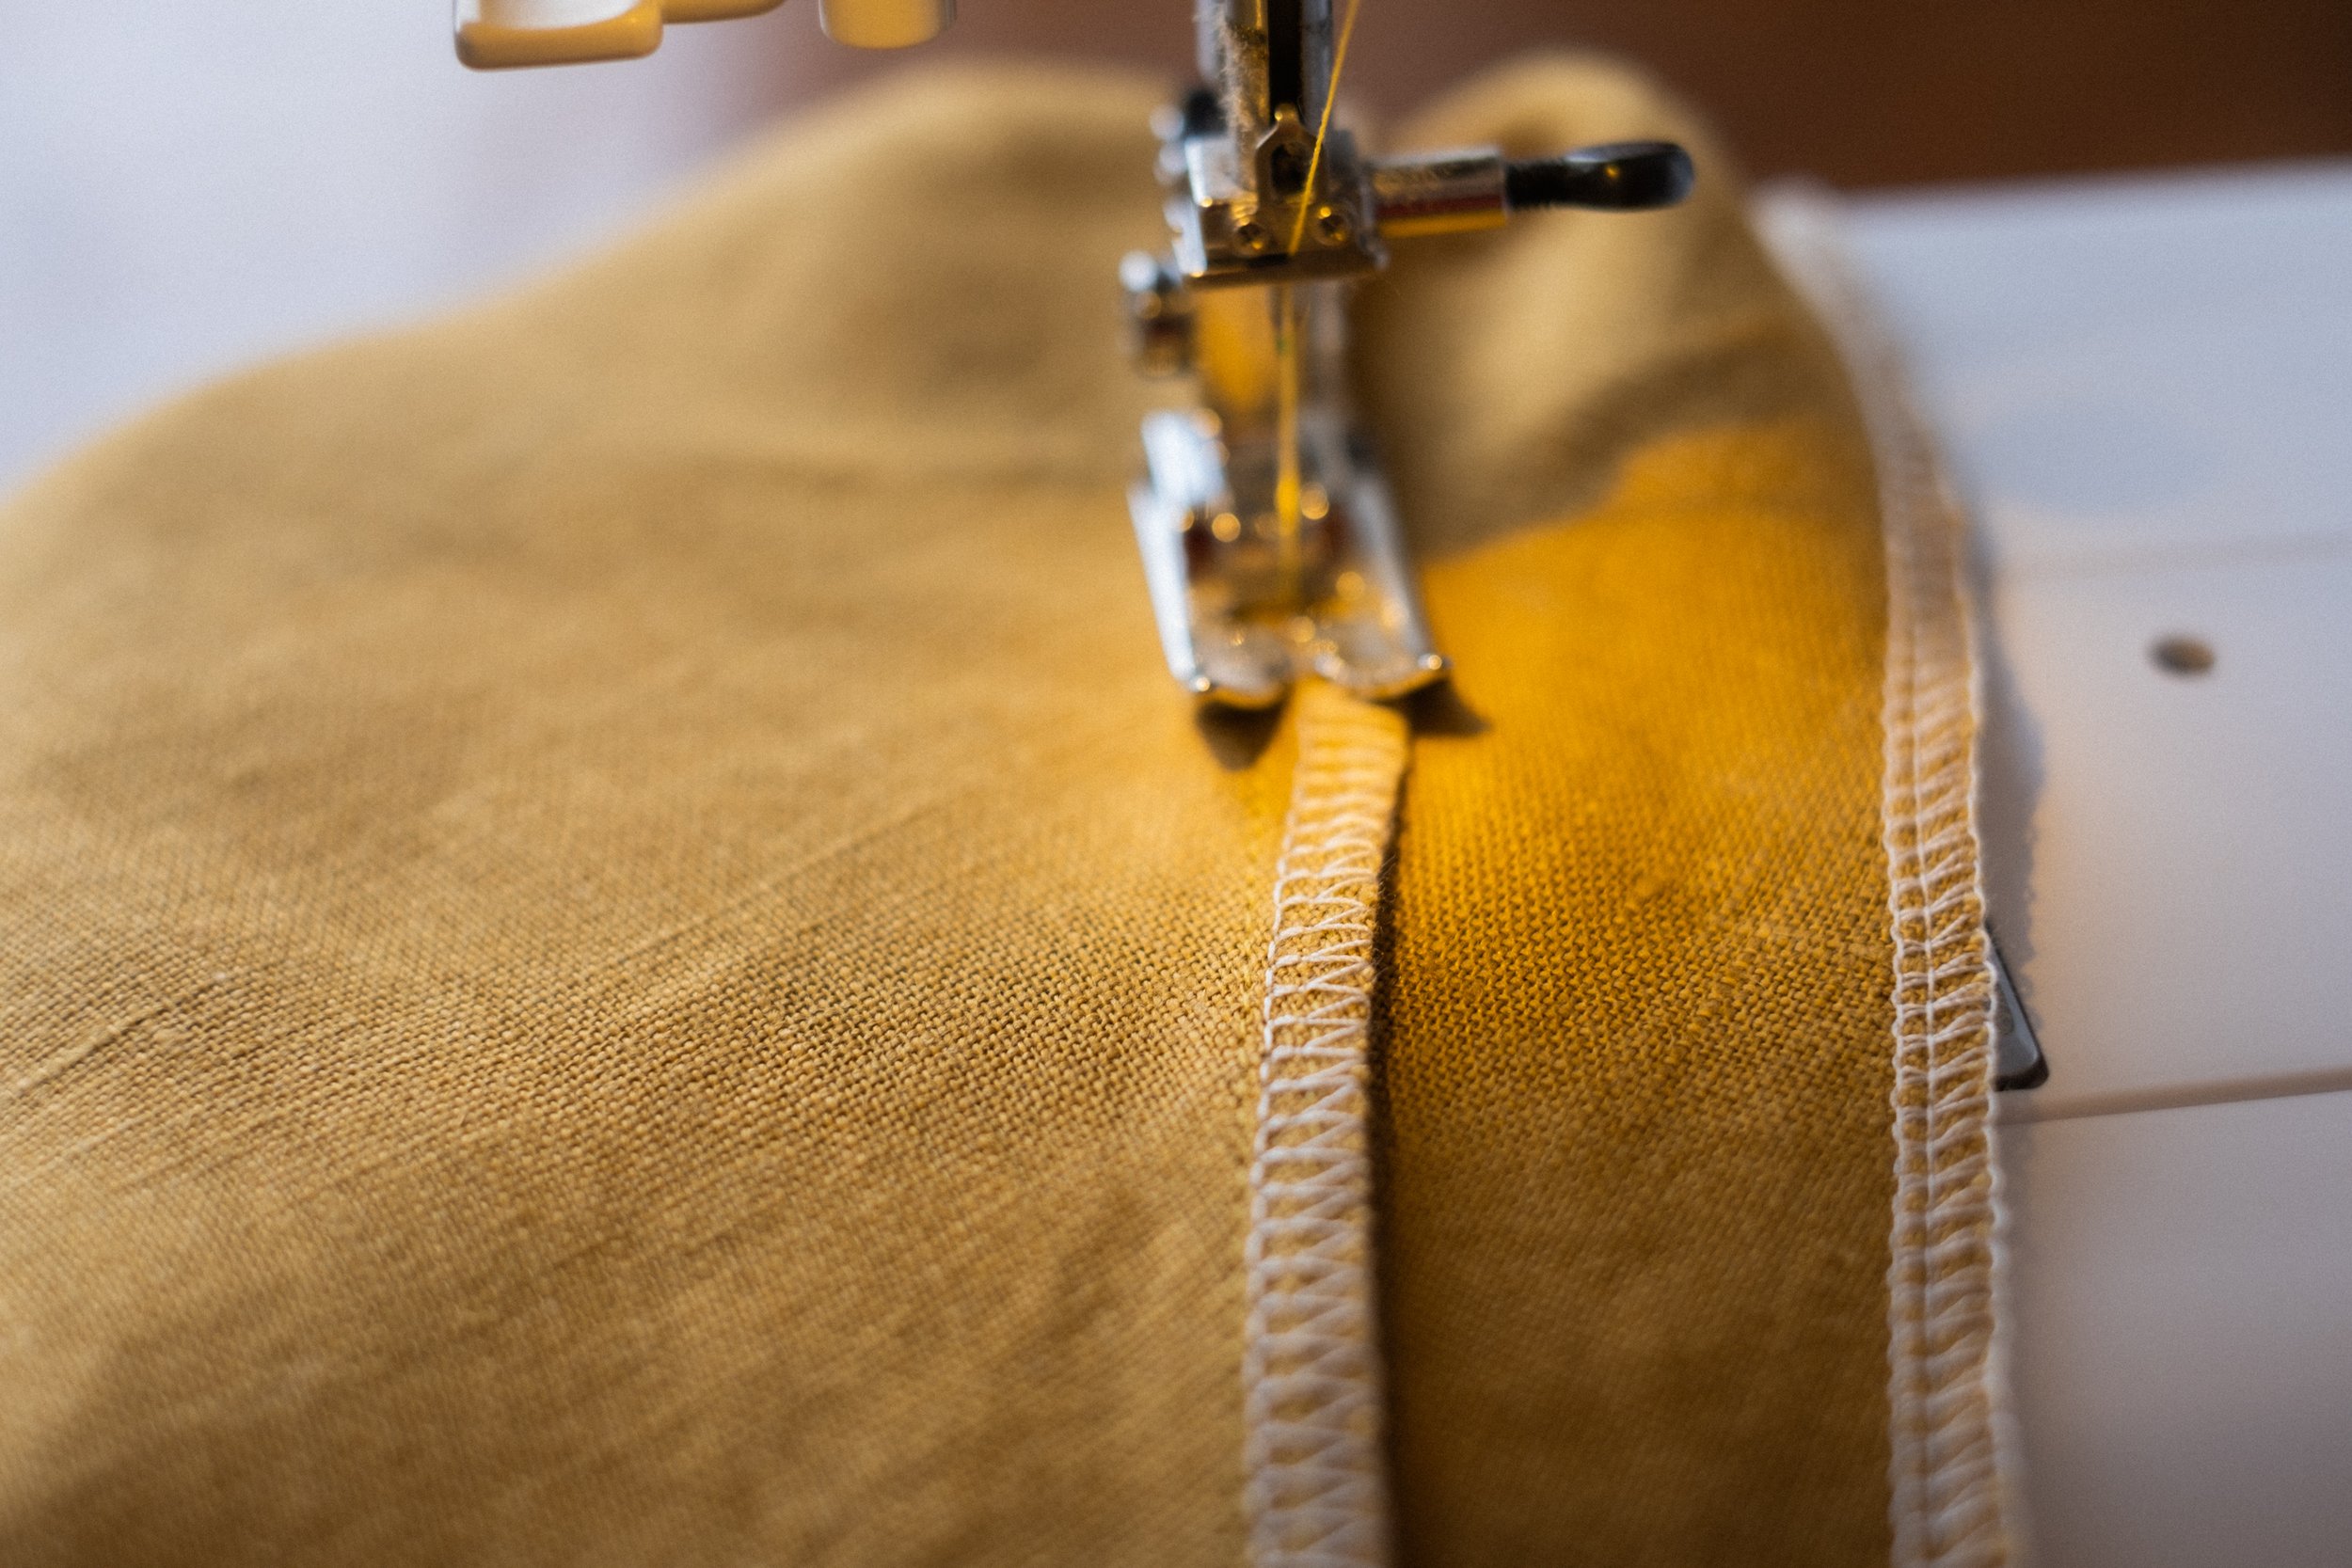
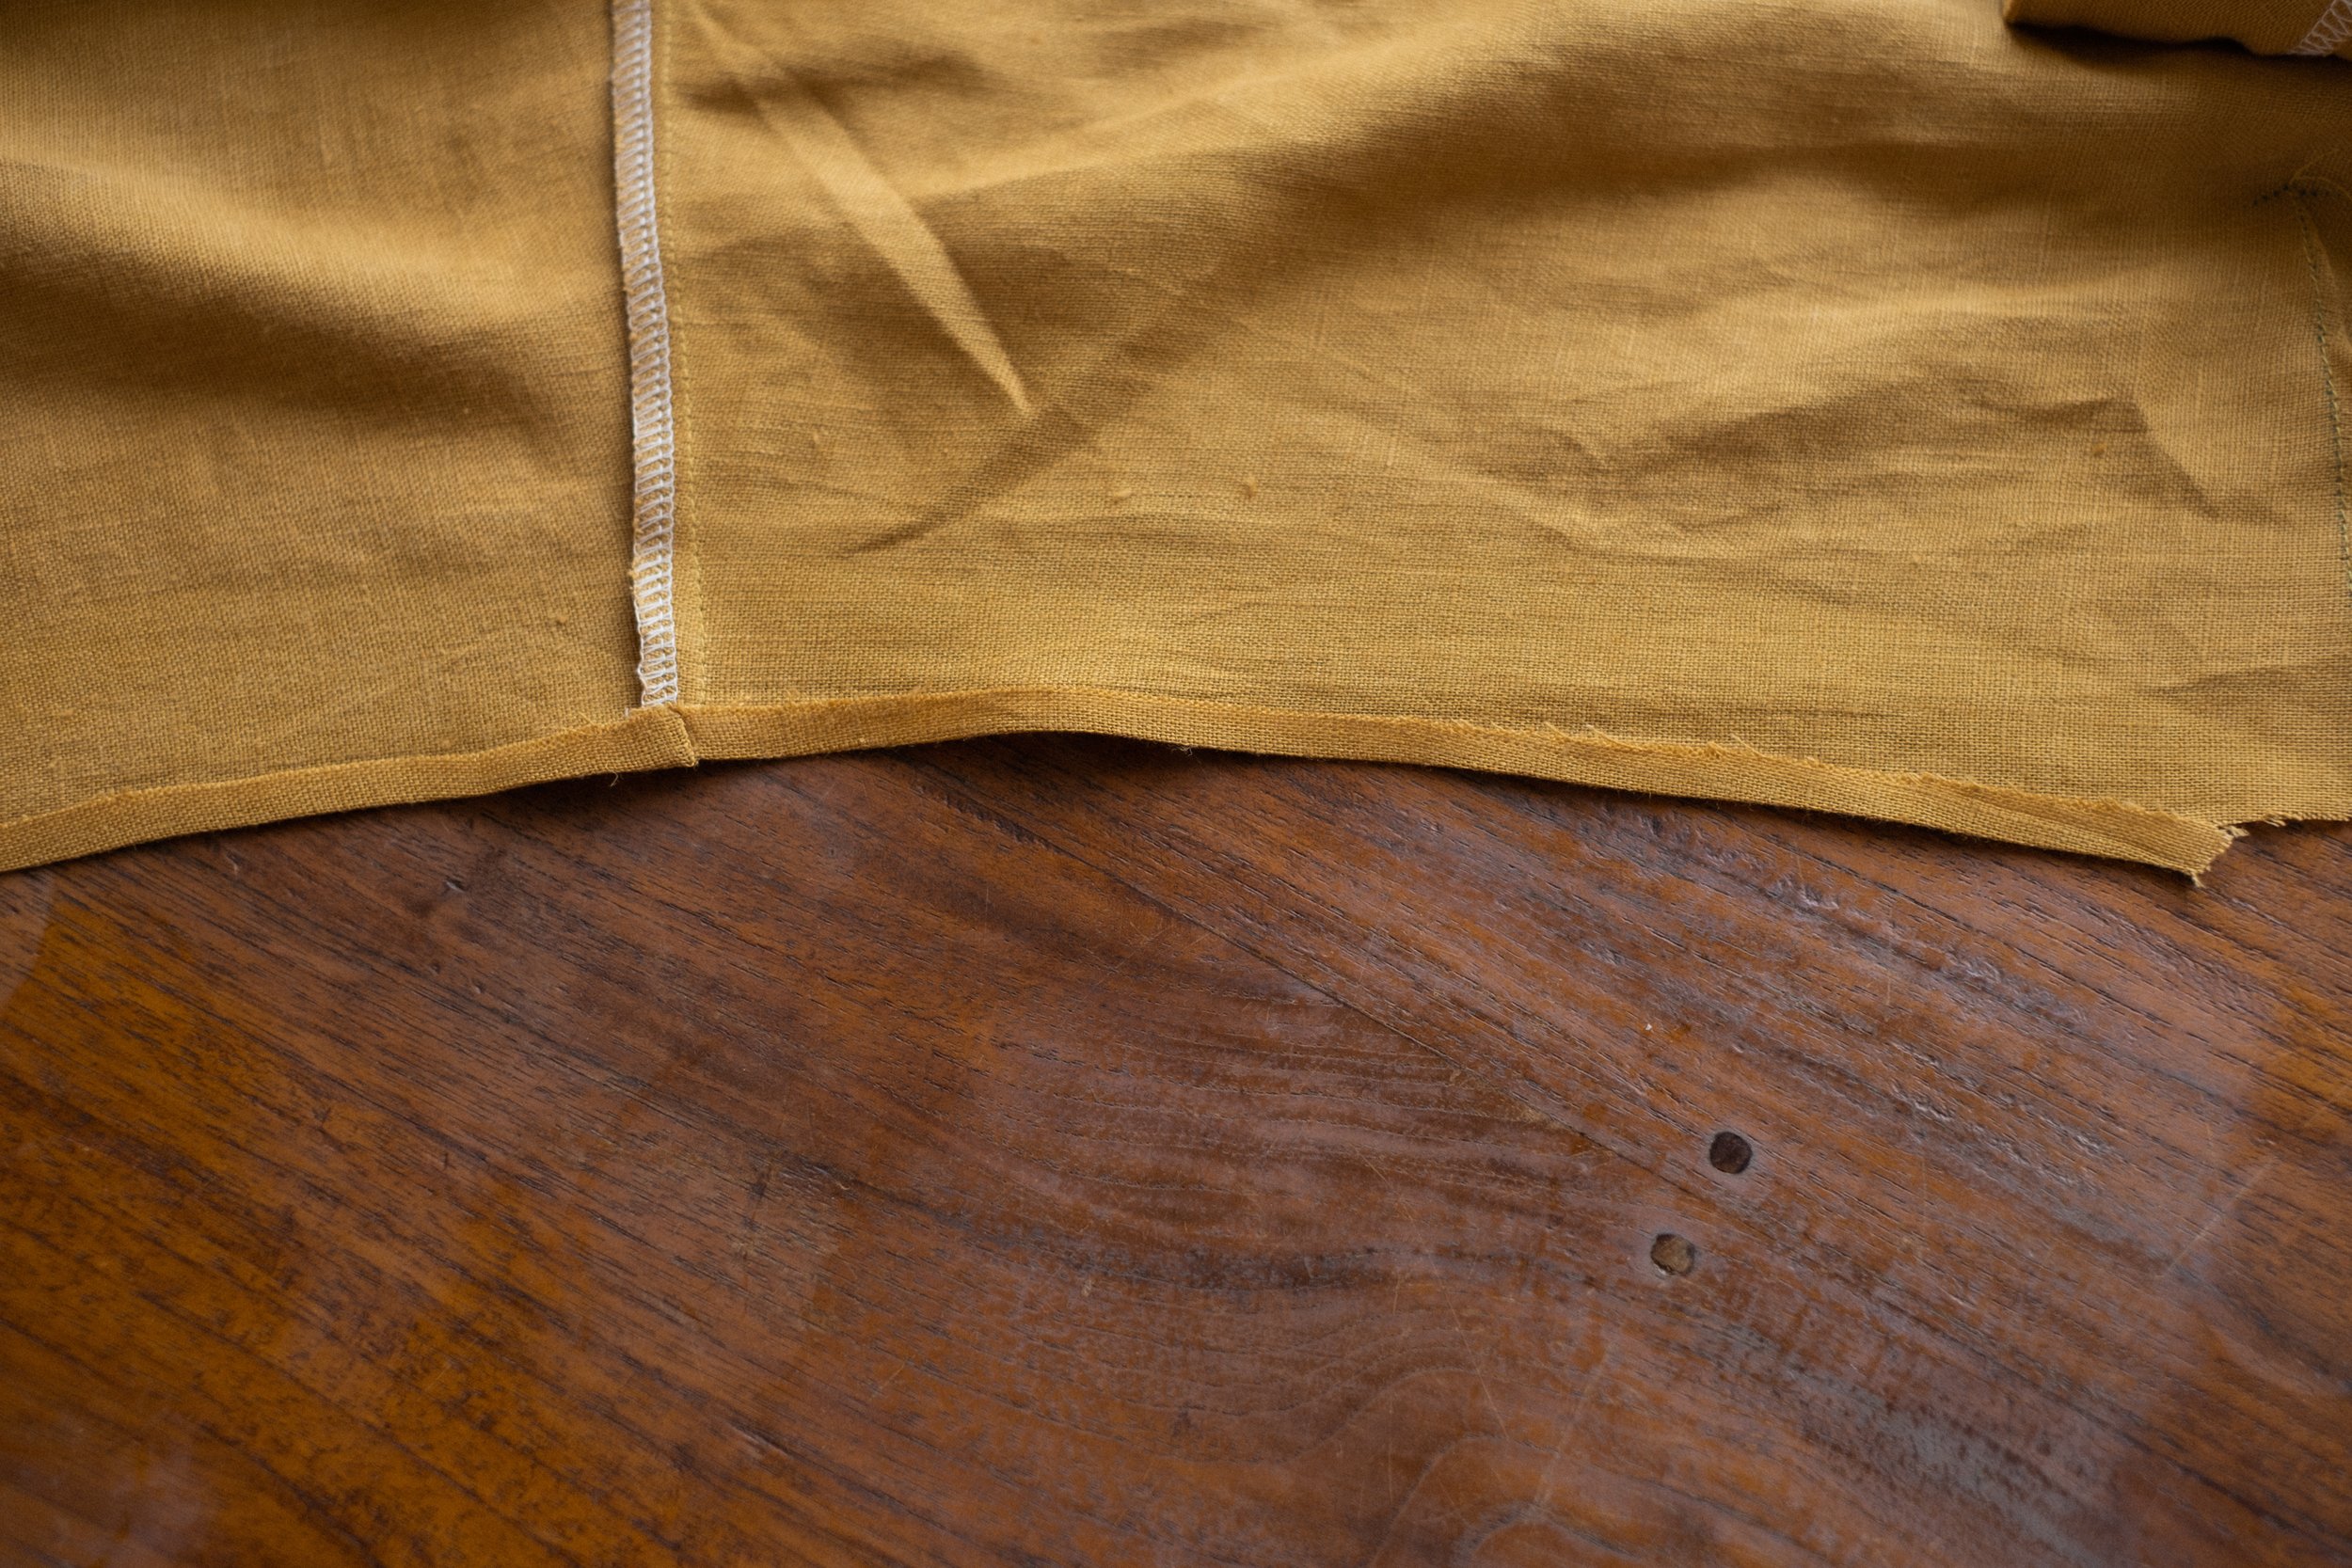
step 9 - side seams
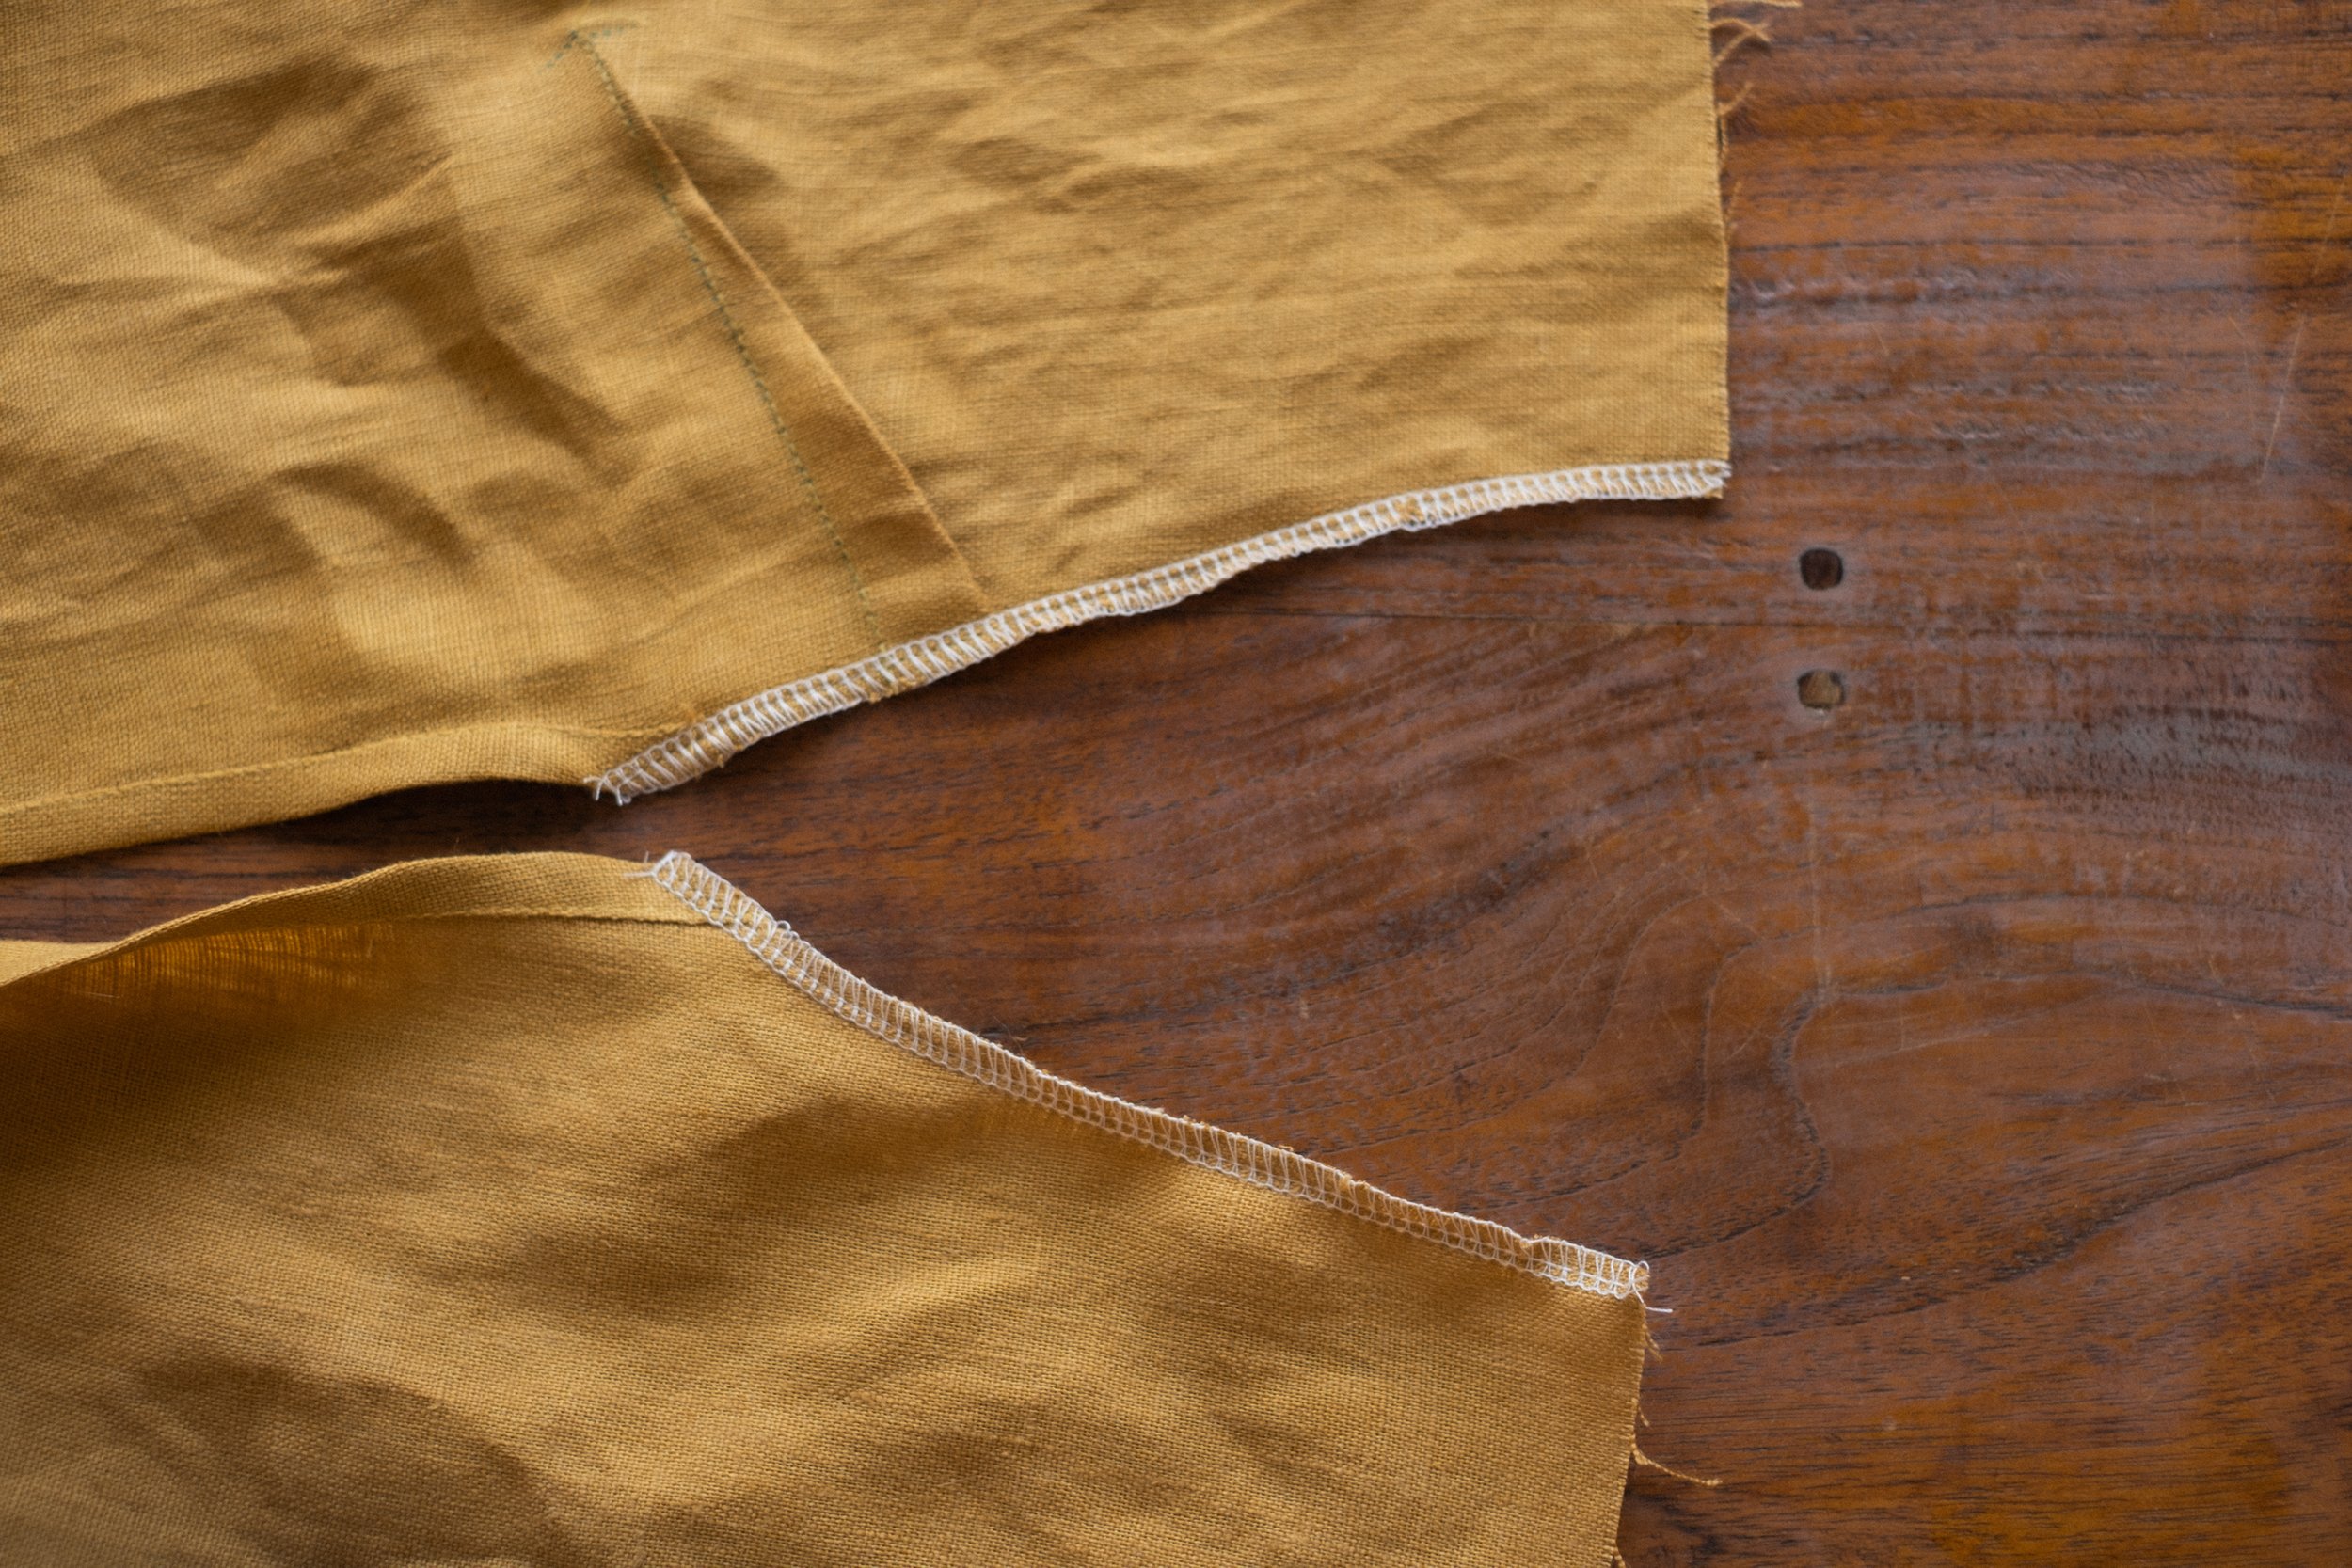
Finish (zig/zag or overlock) the side seams before stitching them together of both front & back bodice (photo 1).
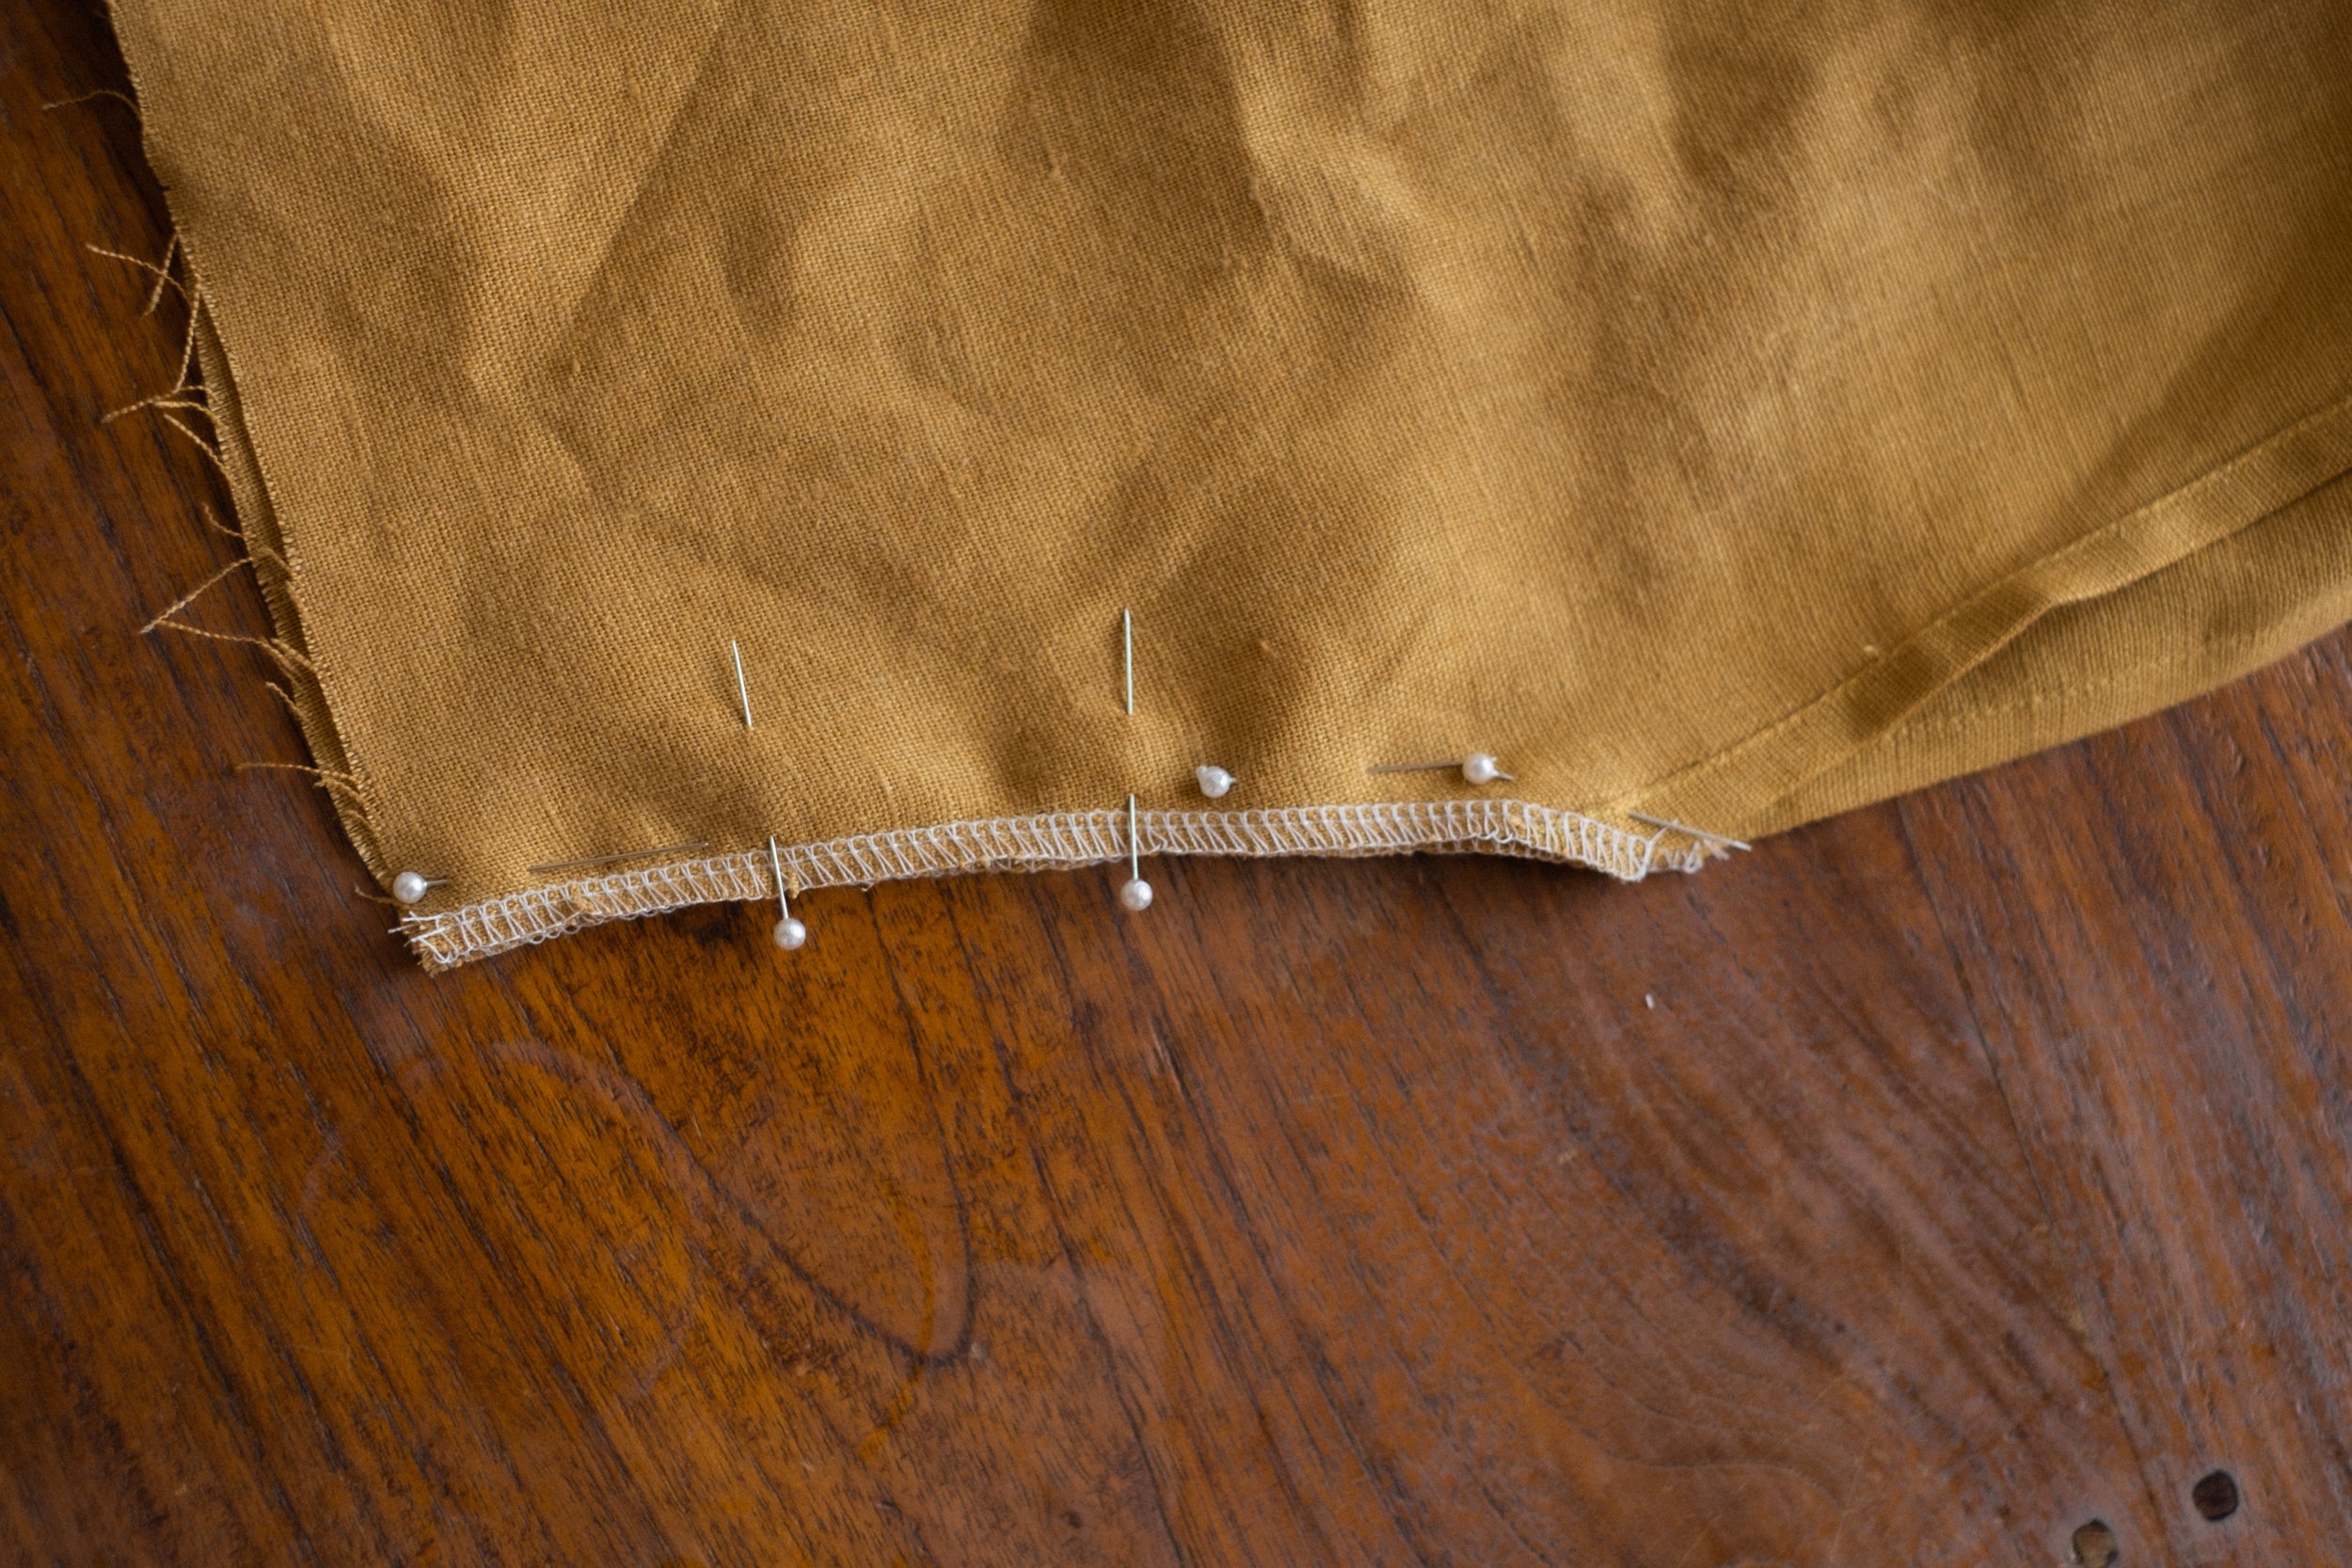
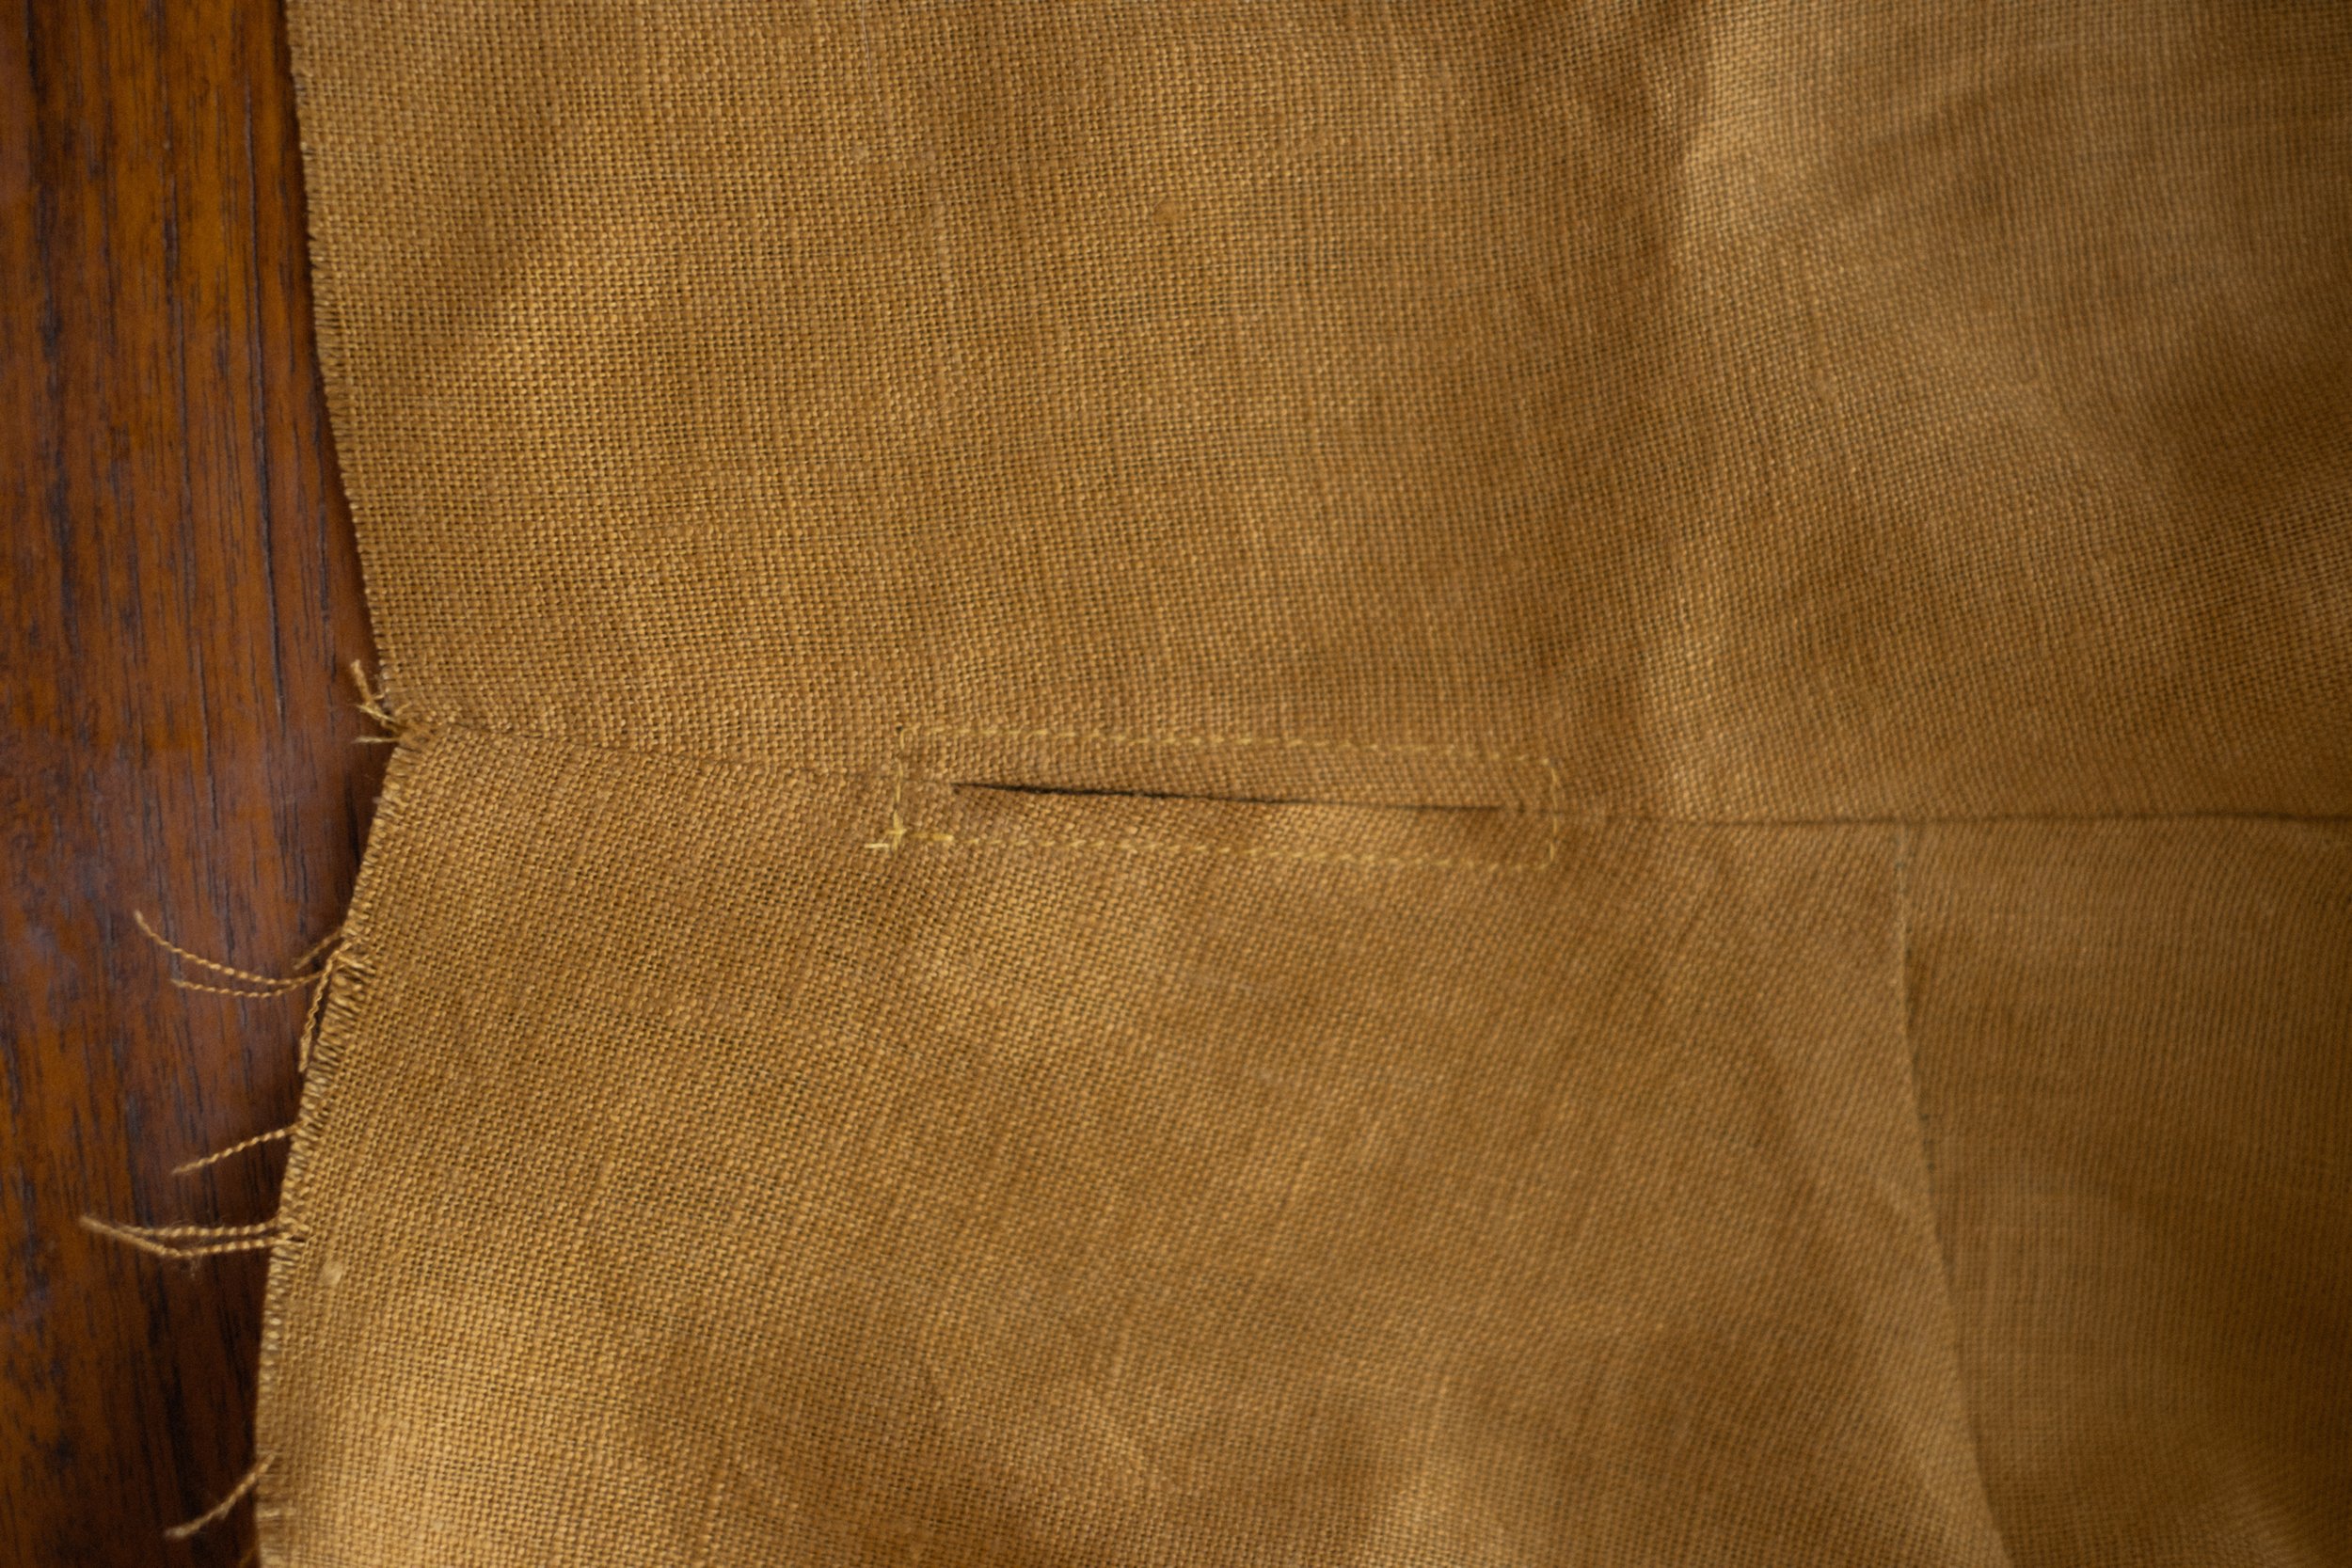
Next, pin the side seams rst - make sure to mark the opening on each side so you can still easily see it after overlocking (photo 2). Sew up to the first marked point, backstitch a few times. The ties will go through the openings in the side seams, so they need to be strong (hence the extra backstitching). Lift your needle and foot & pull the garment through until you reach the second marked point. Put the needle back down, 1cm/3/4’’ from the edge, then the foot. Backstitch a few times again & sew the last piece of side seam. Repeat on the other side.
Press the side seam open with your iron. Optional: topstitch the opening down by stitching a narrow rectangle within the seam allowance (photo 3). That way, the seam allowance won’t peep out of the opening. It also reinforces the stitches.
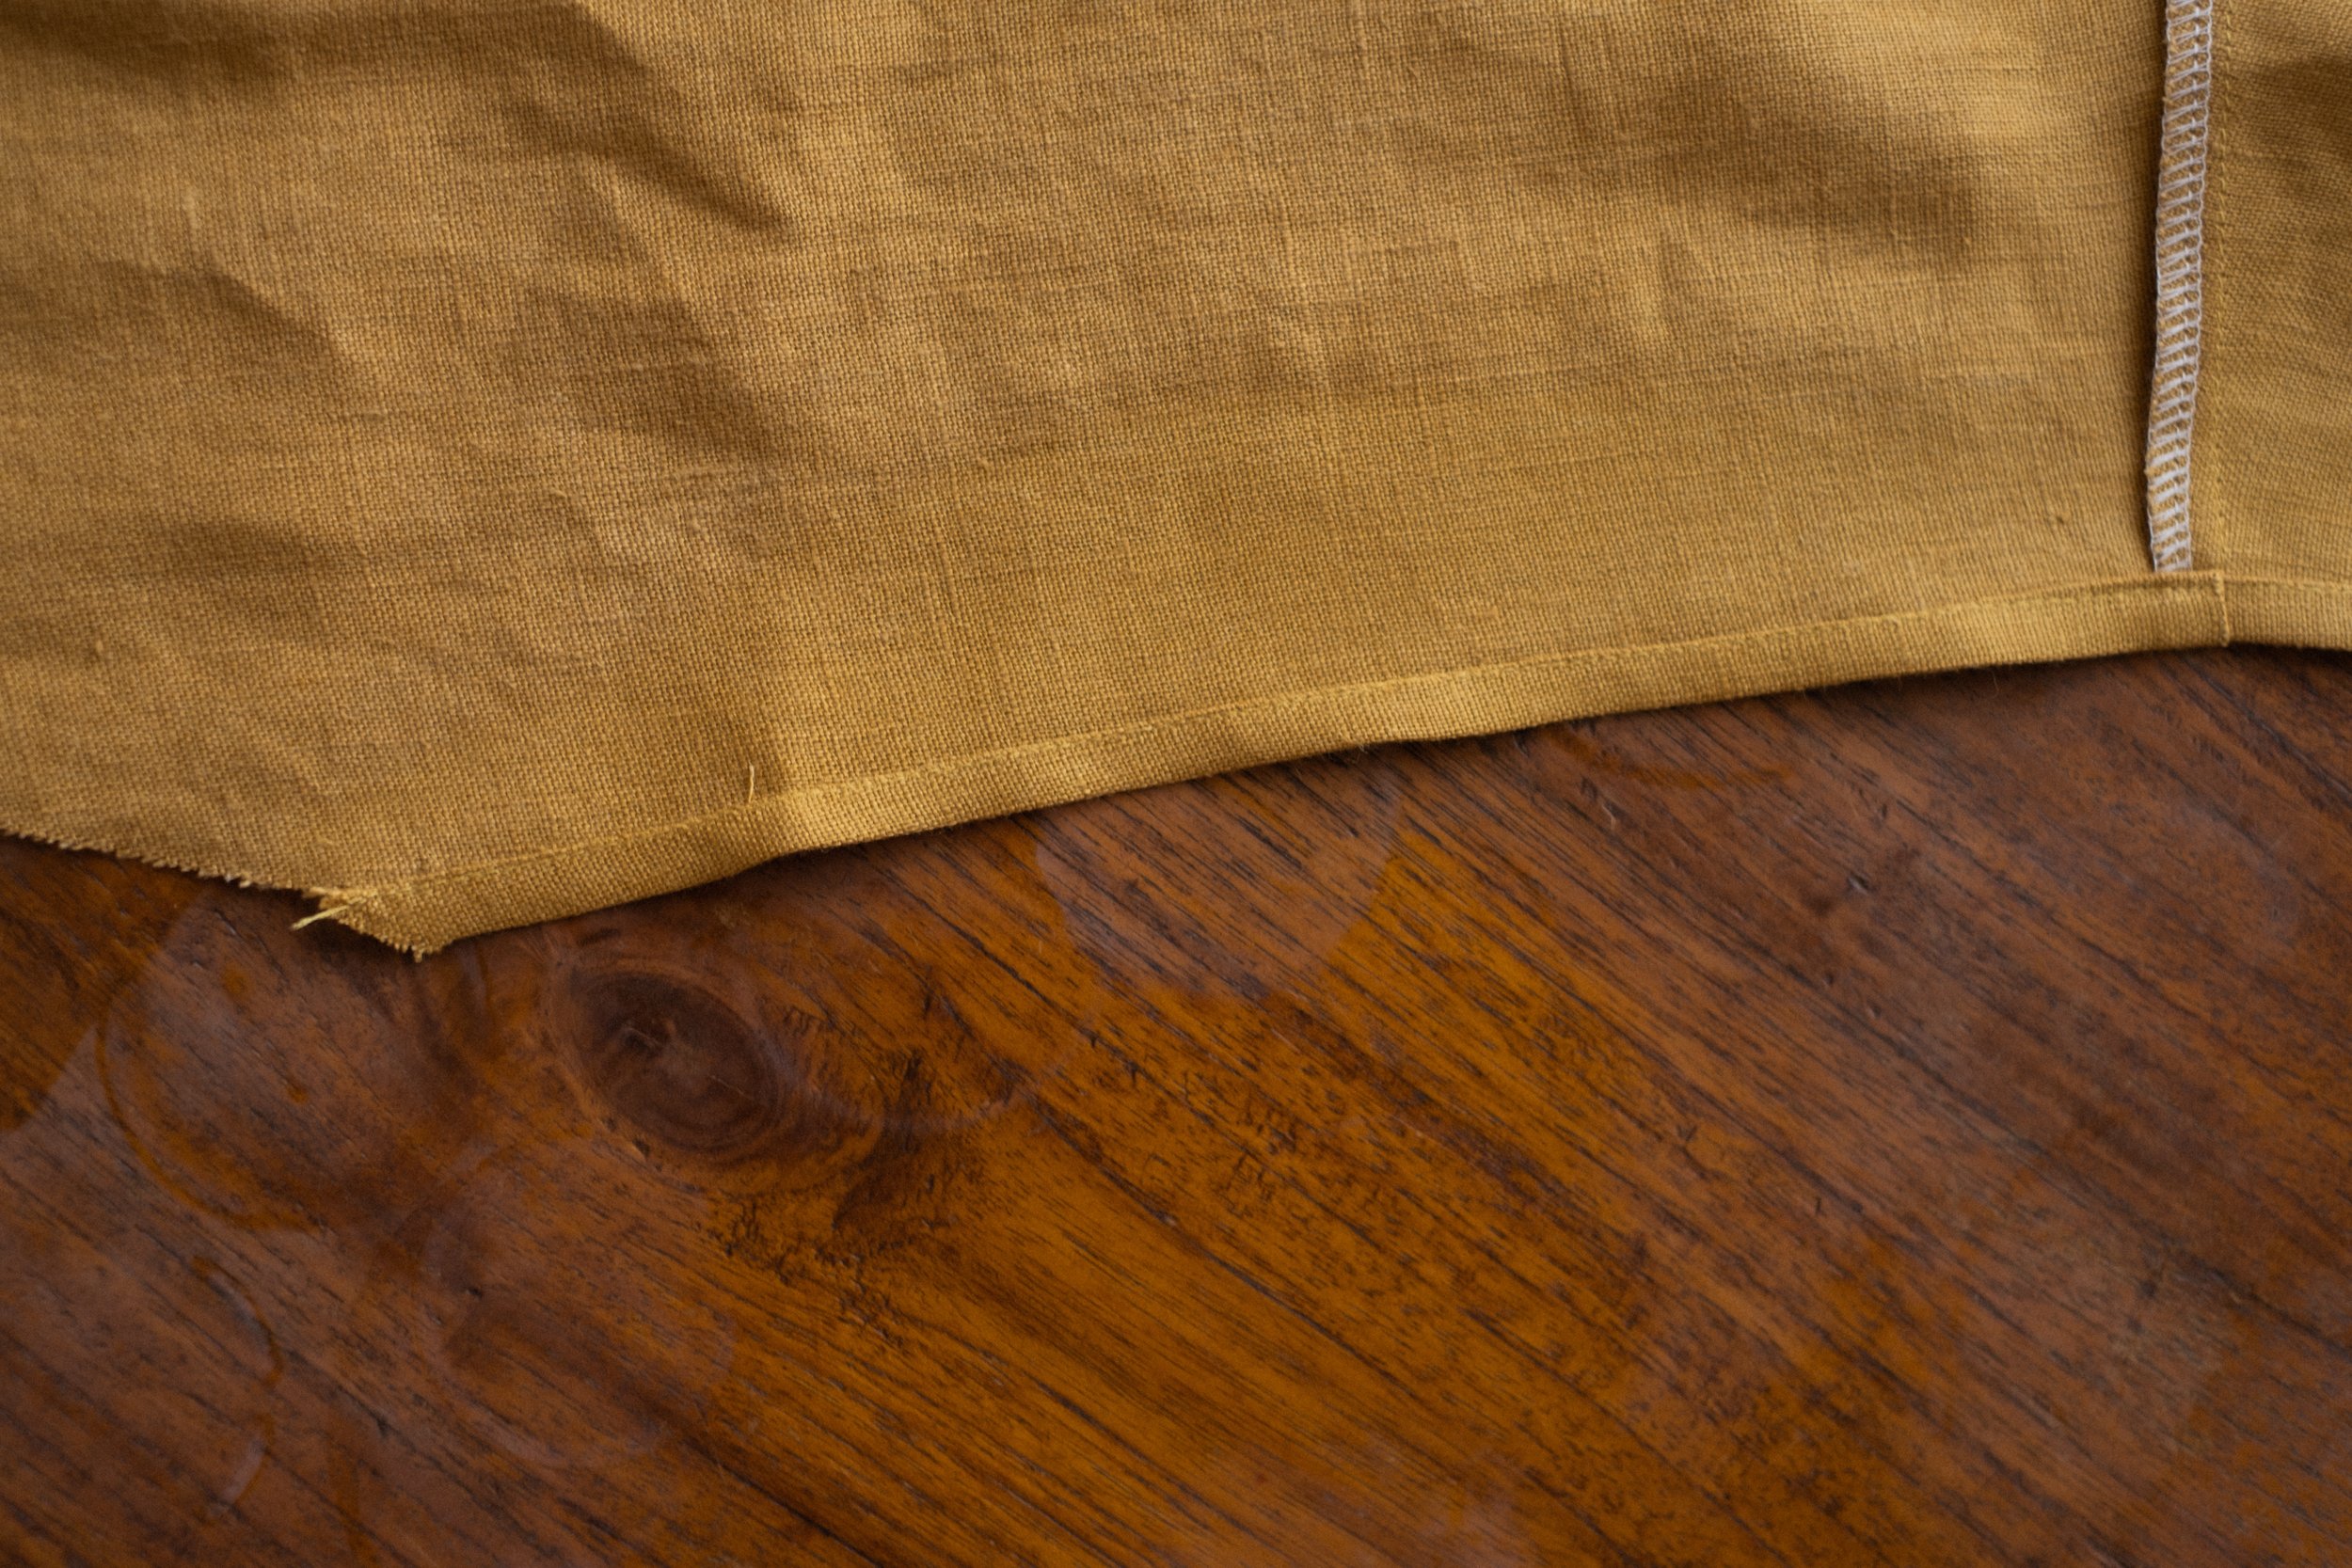
step 10 - hem the bottom
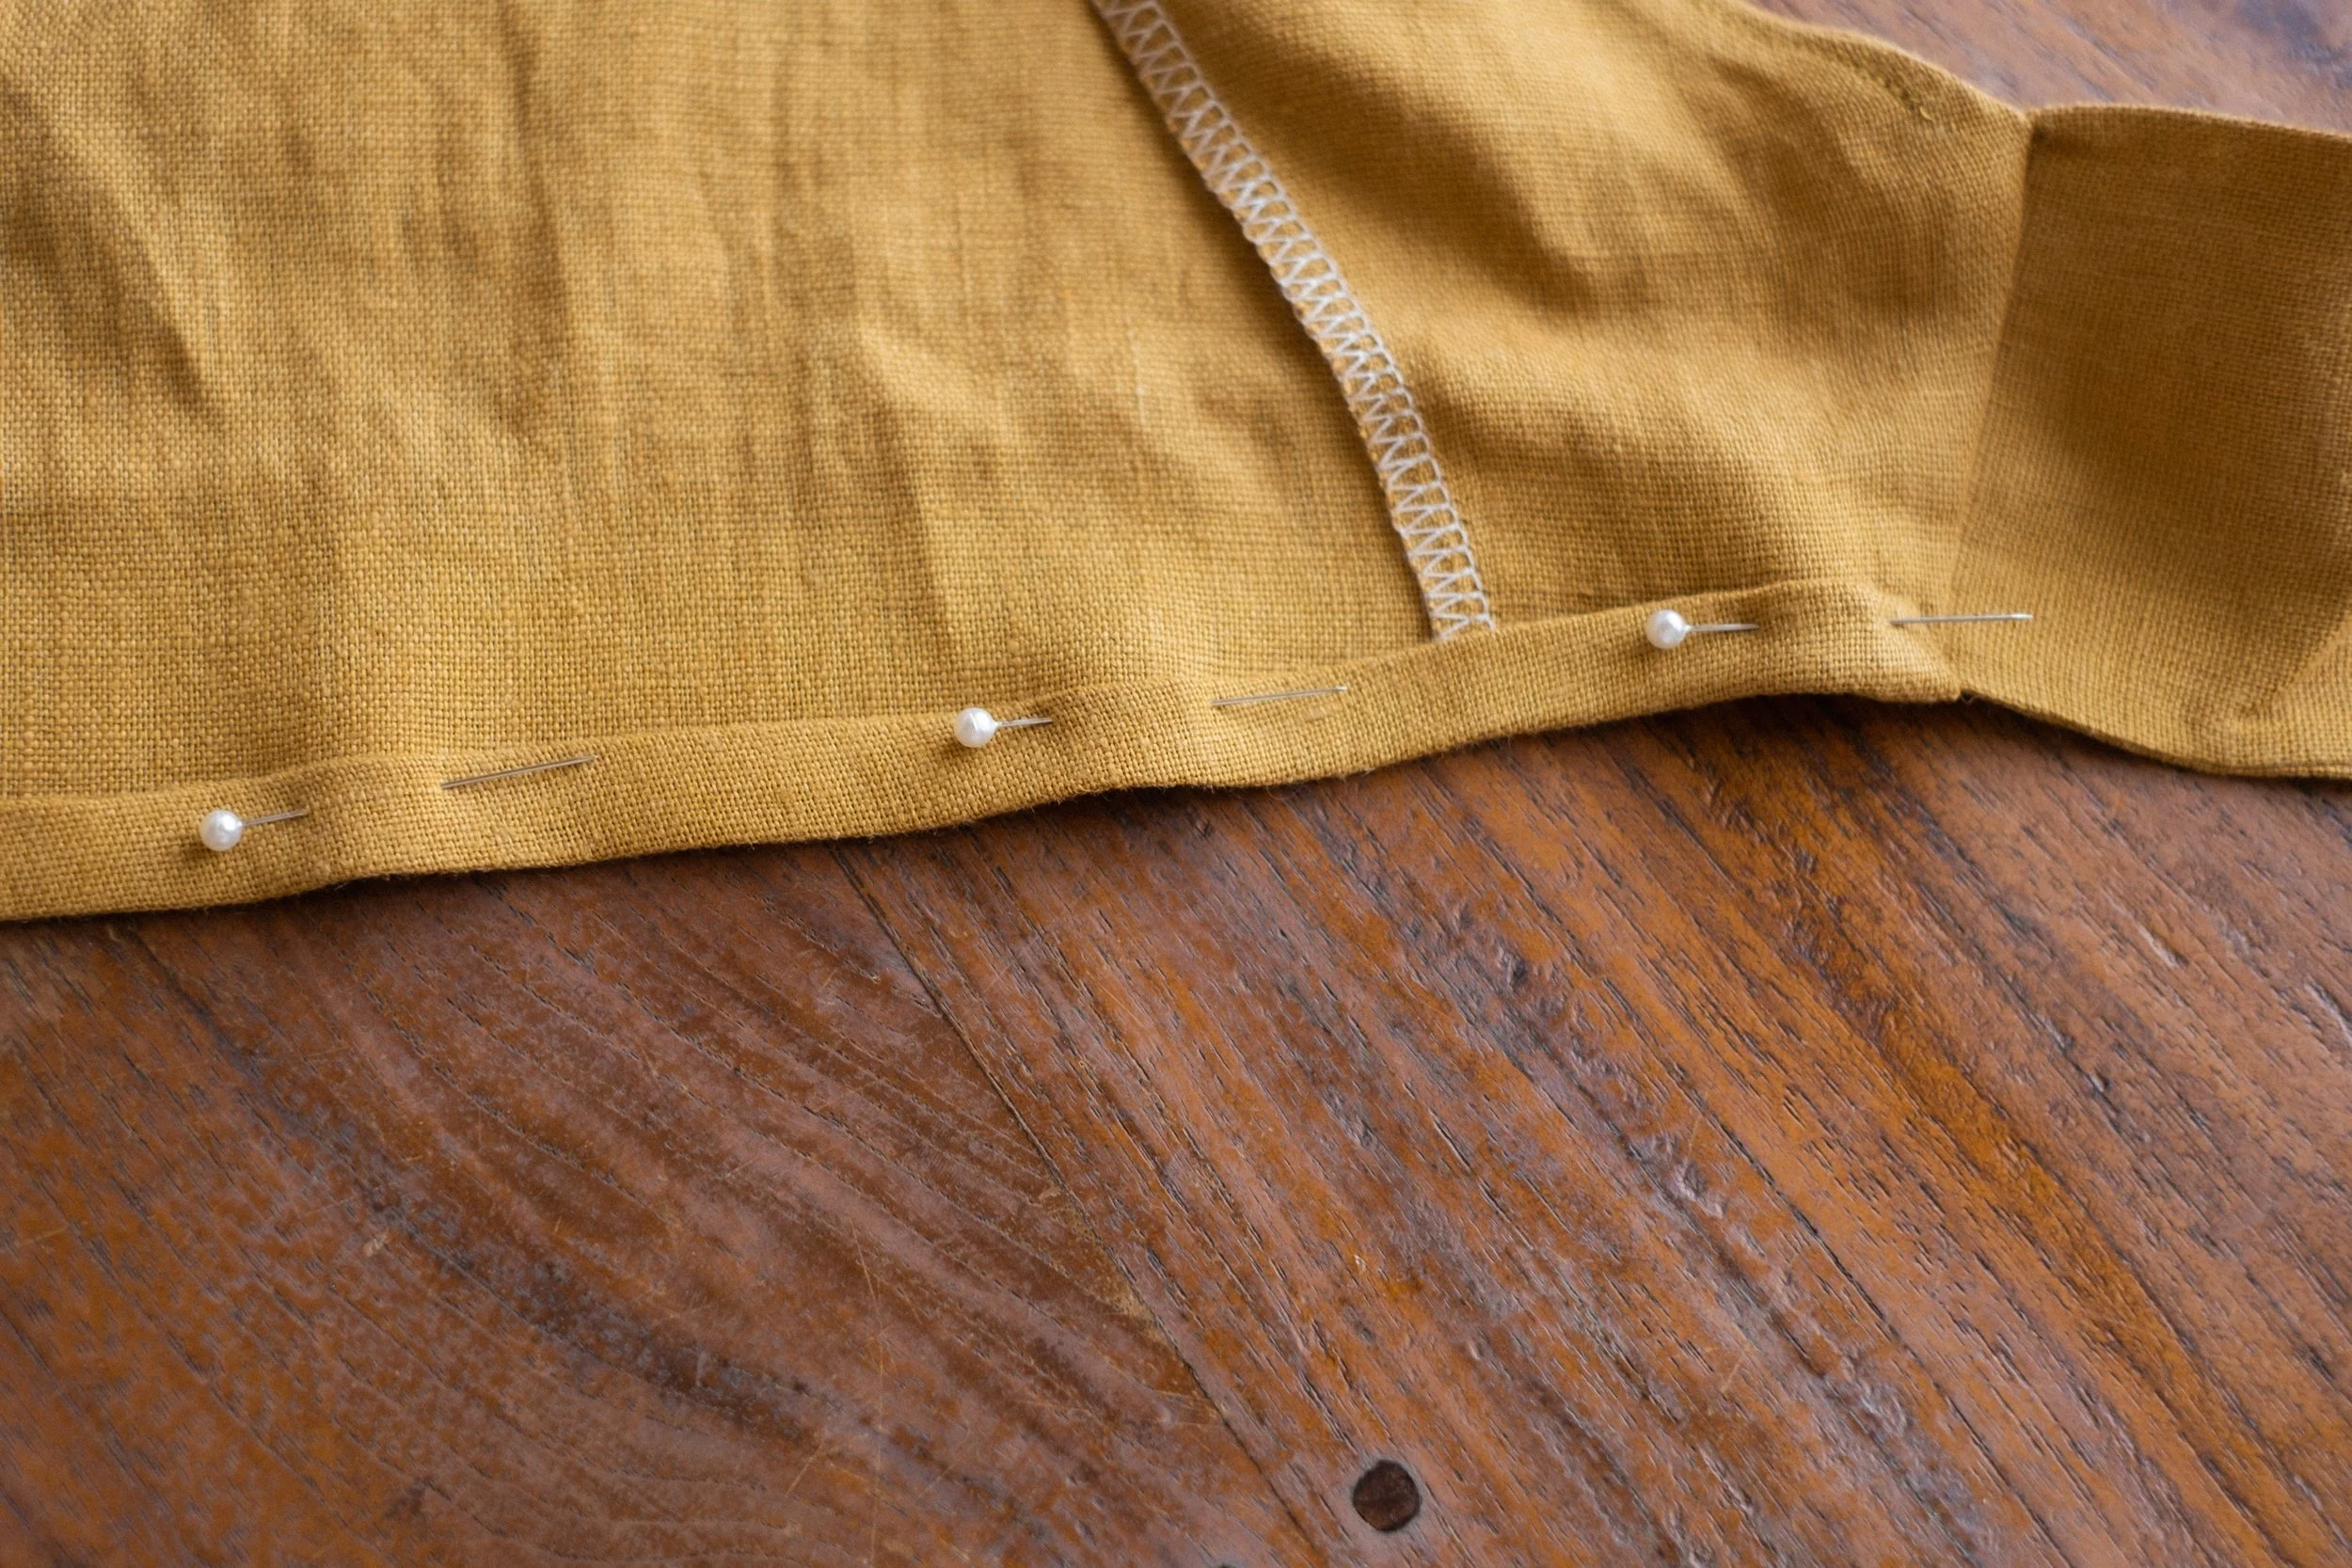
The bottom of the hem is finished in the same way as the sleeves. Turn once at 1cm/3/8’’, then turn again and stitch down at the edge. Make sure that the bottom of the tie is aligned with the bottom of the front bodice.
All done! Great job! Don’t forget to tag your makes with #SRpaula so I can see your version :)