Hacking the Sienna sweatshirt pattern
In this post, I will be sharing two ways to hack the Sienna Sweatshirt pattern: a raglan sleeve, and a side slit instead of a waistband. It’s quite a versatile pattern as it’s unisex and the design is simple, which makes it really easy to add some features if you like. Color blocking, shortening or lengthening, topstitching in different ways… There are a ton of things you can do to personalise your sweatshirt pattern!

#1 Raglan sleeve hack
How to turn a regular sleeve into a raglan sleeve
My favourite hack is turning the regular sleeve of this sweatshirt pattern into a raglan sleeve. I made this version for my partner when I was in the middle of creating the Carmen Coat pattern, and I was seeing raglan sleeves everywhere. I love how raglan sleeves make oversized garments more elegant.
step 1 - determine your new sleeve seam line
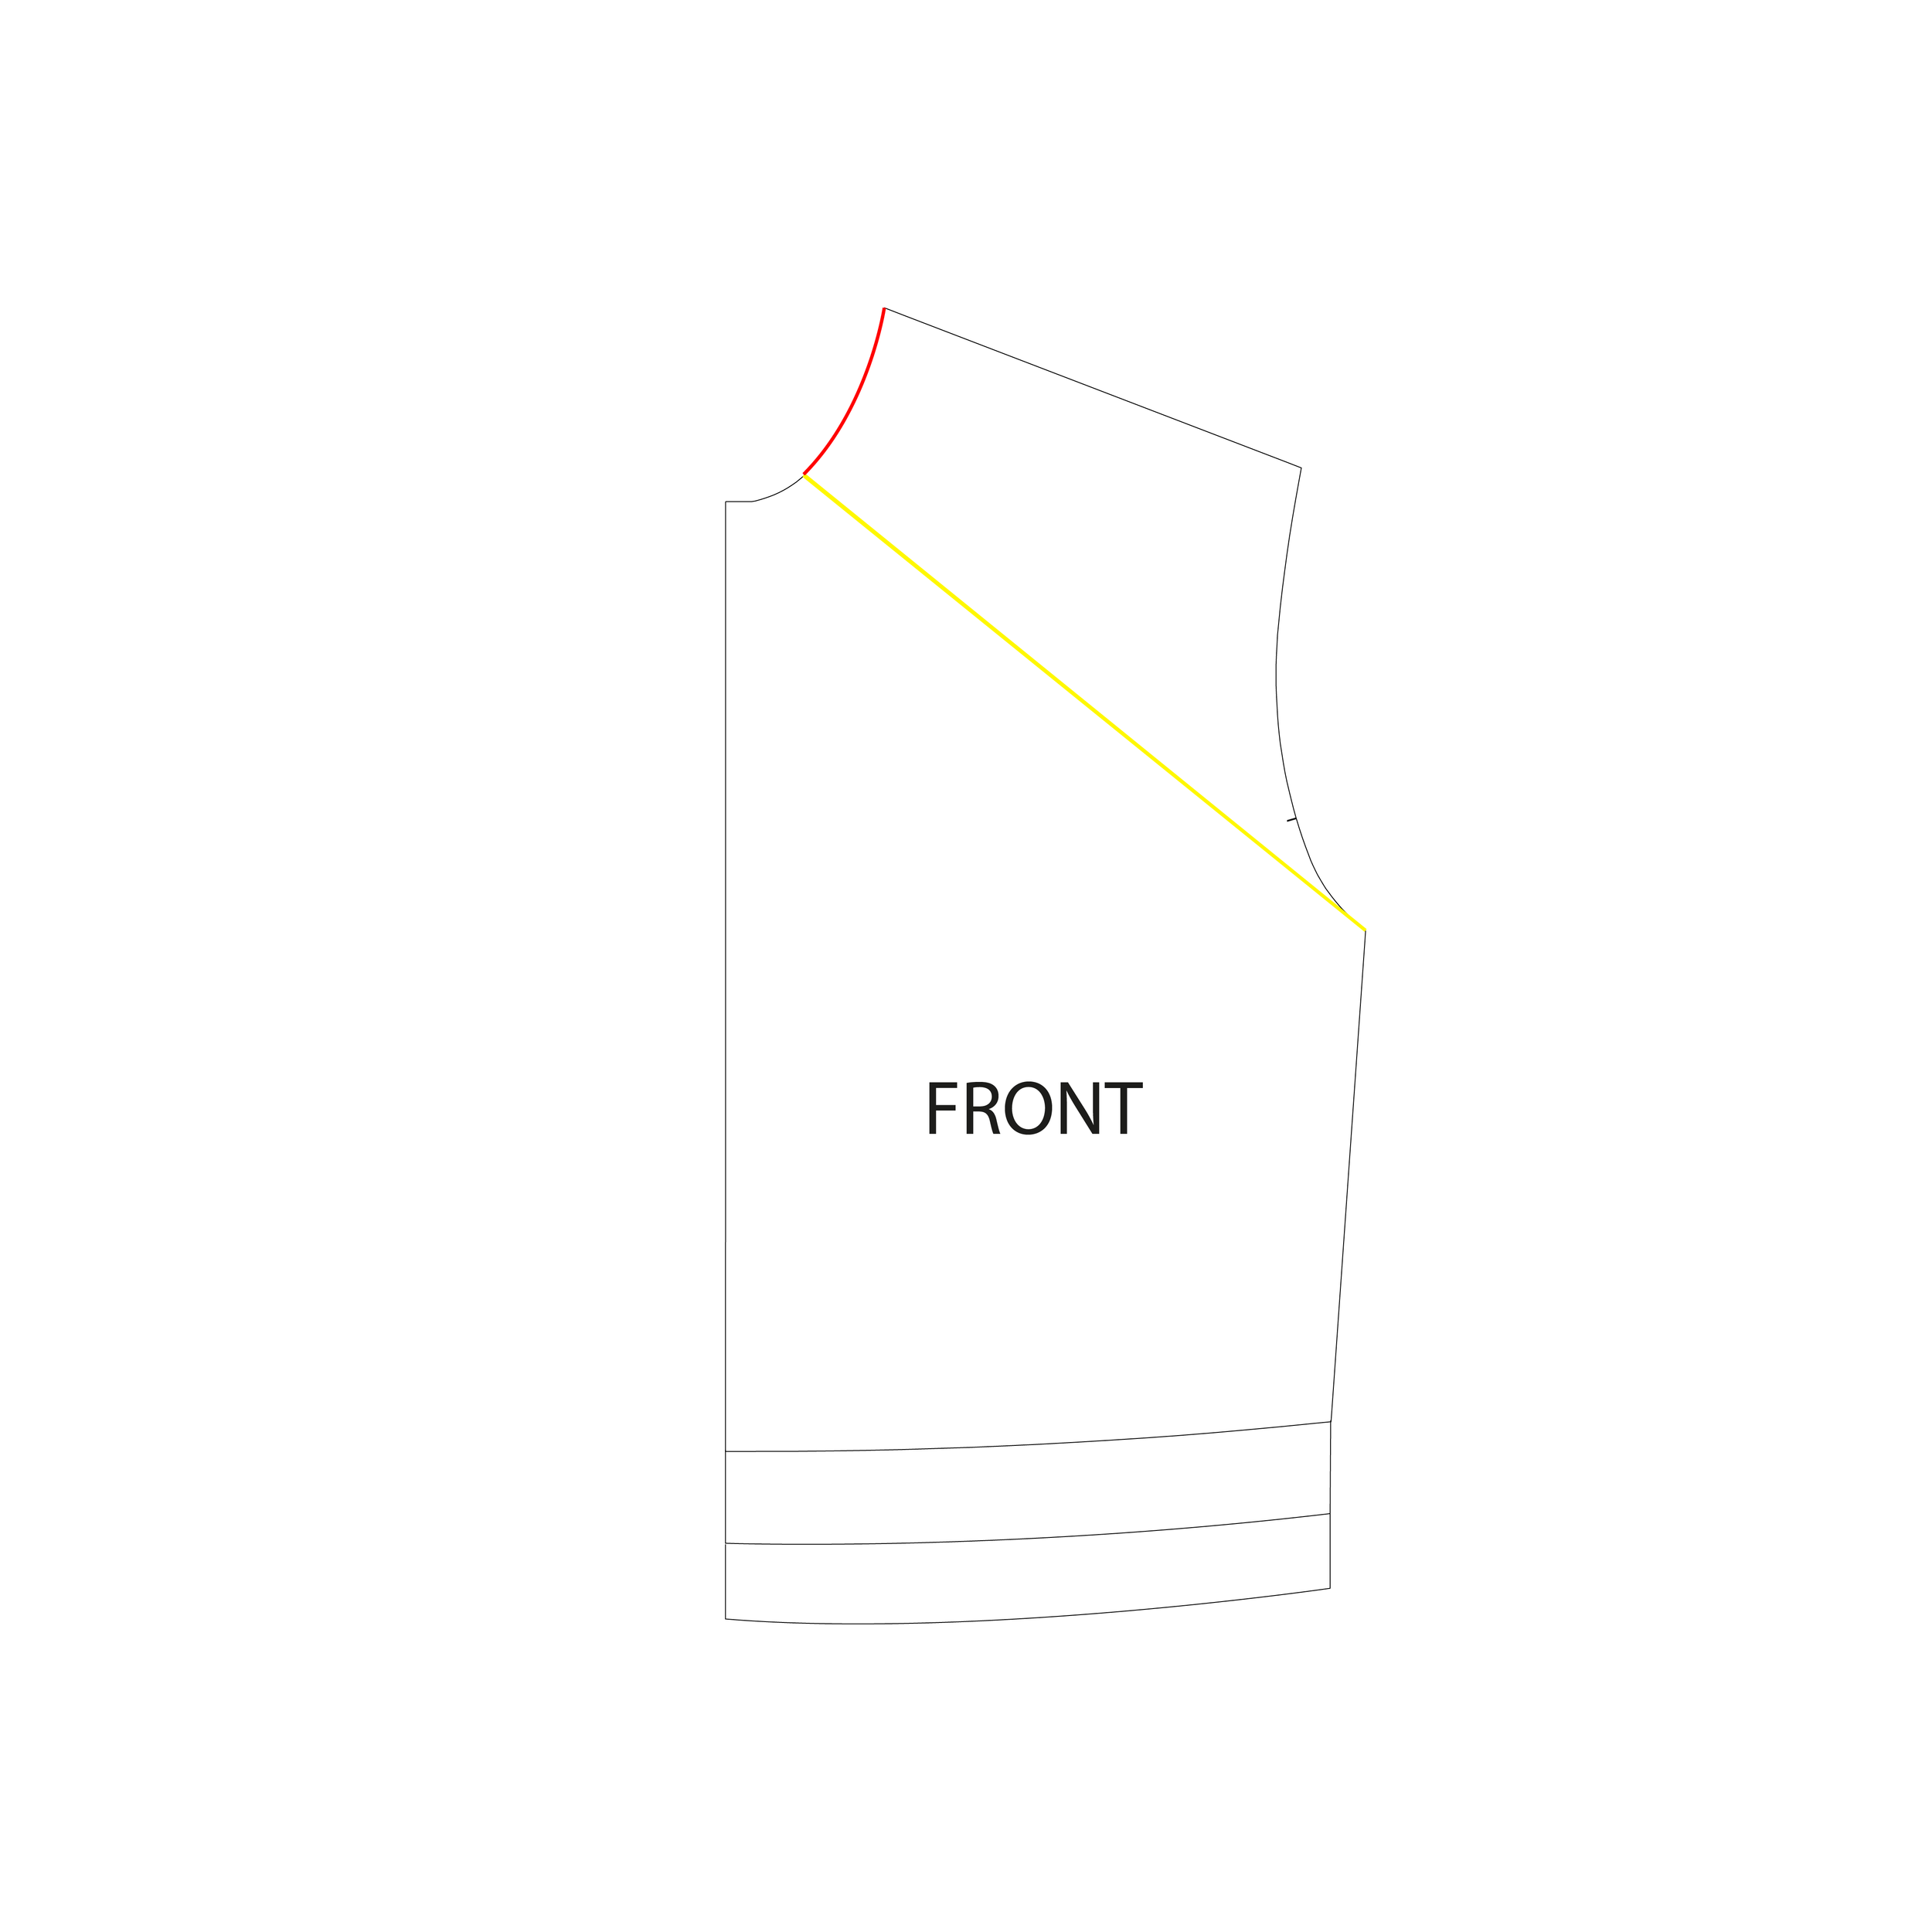
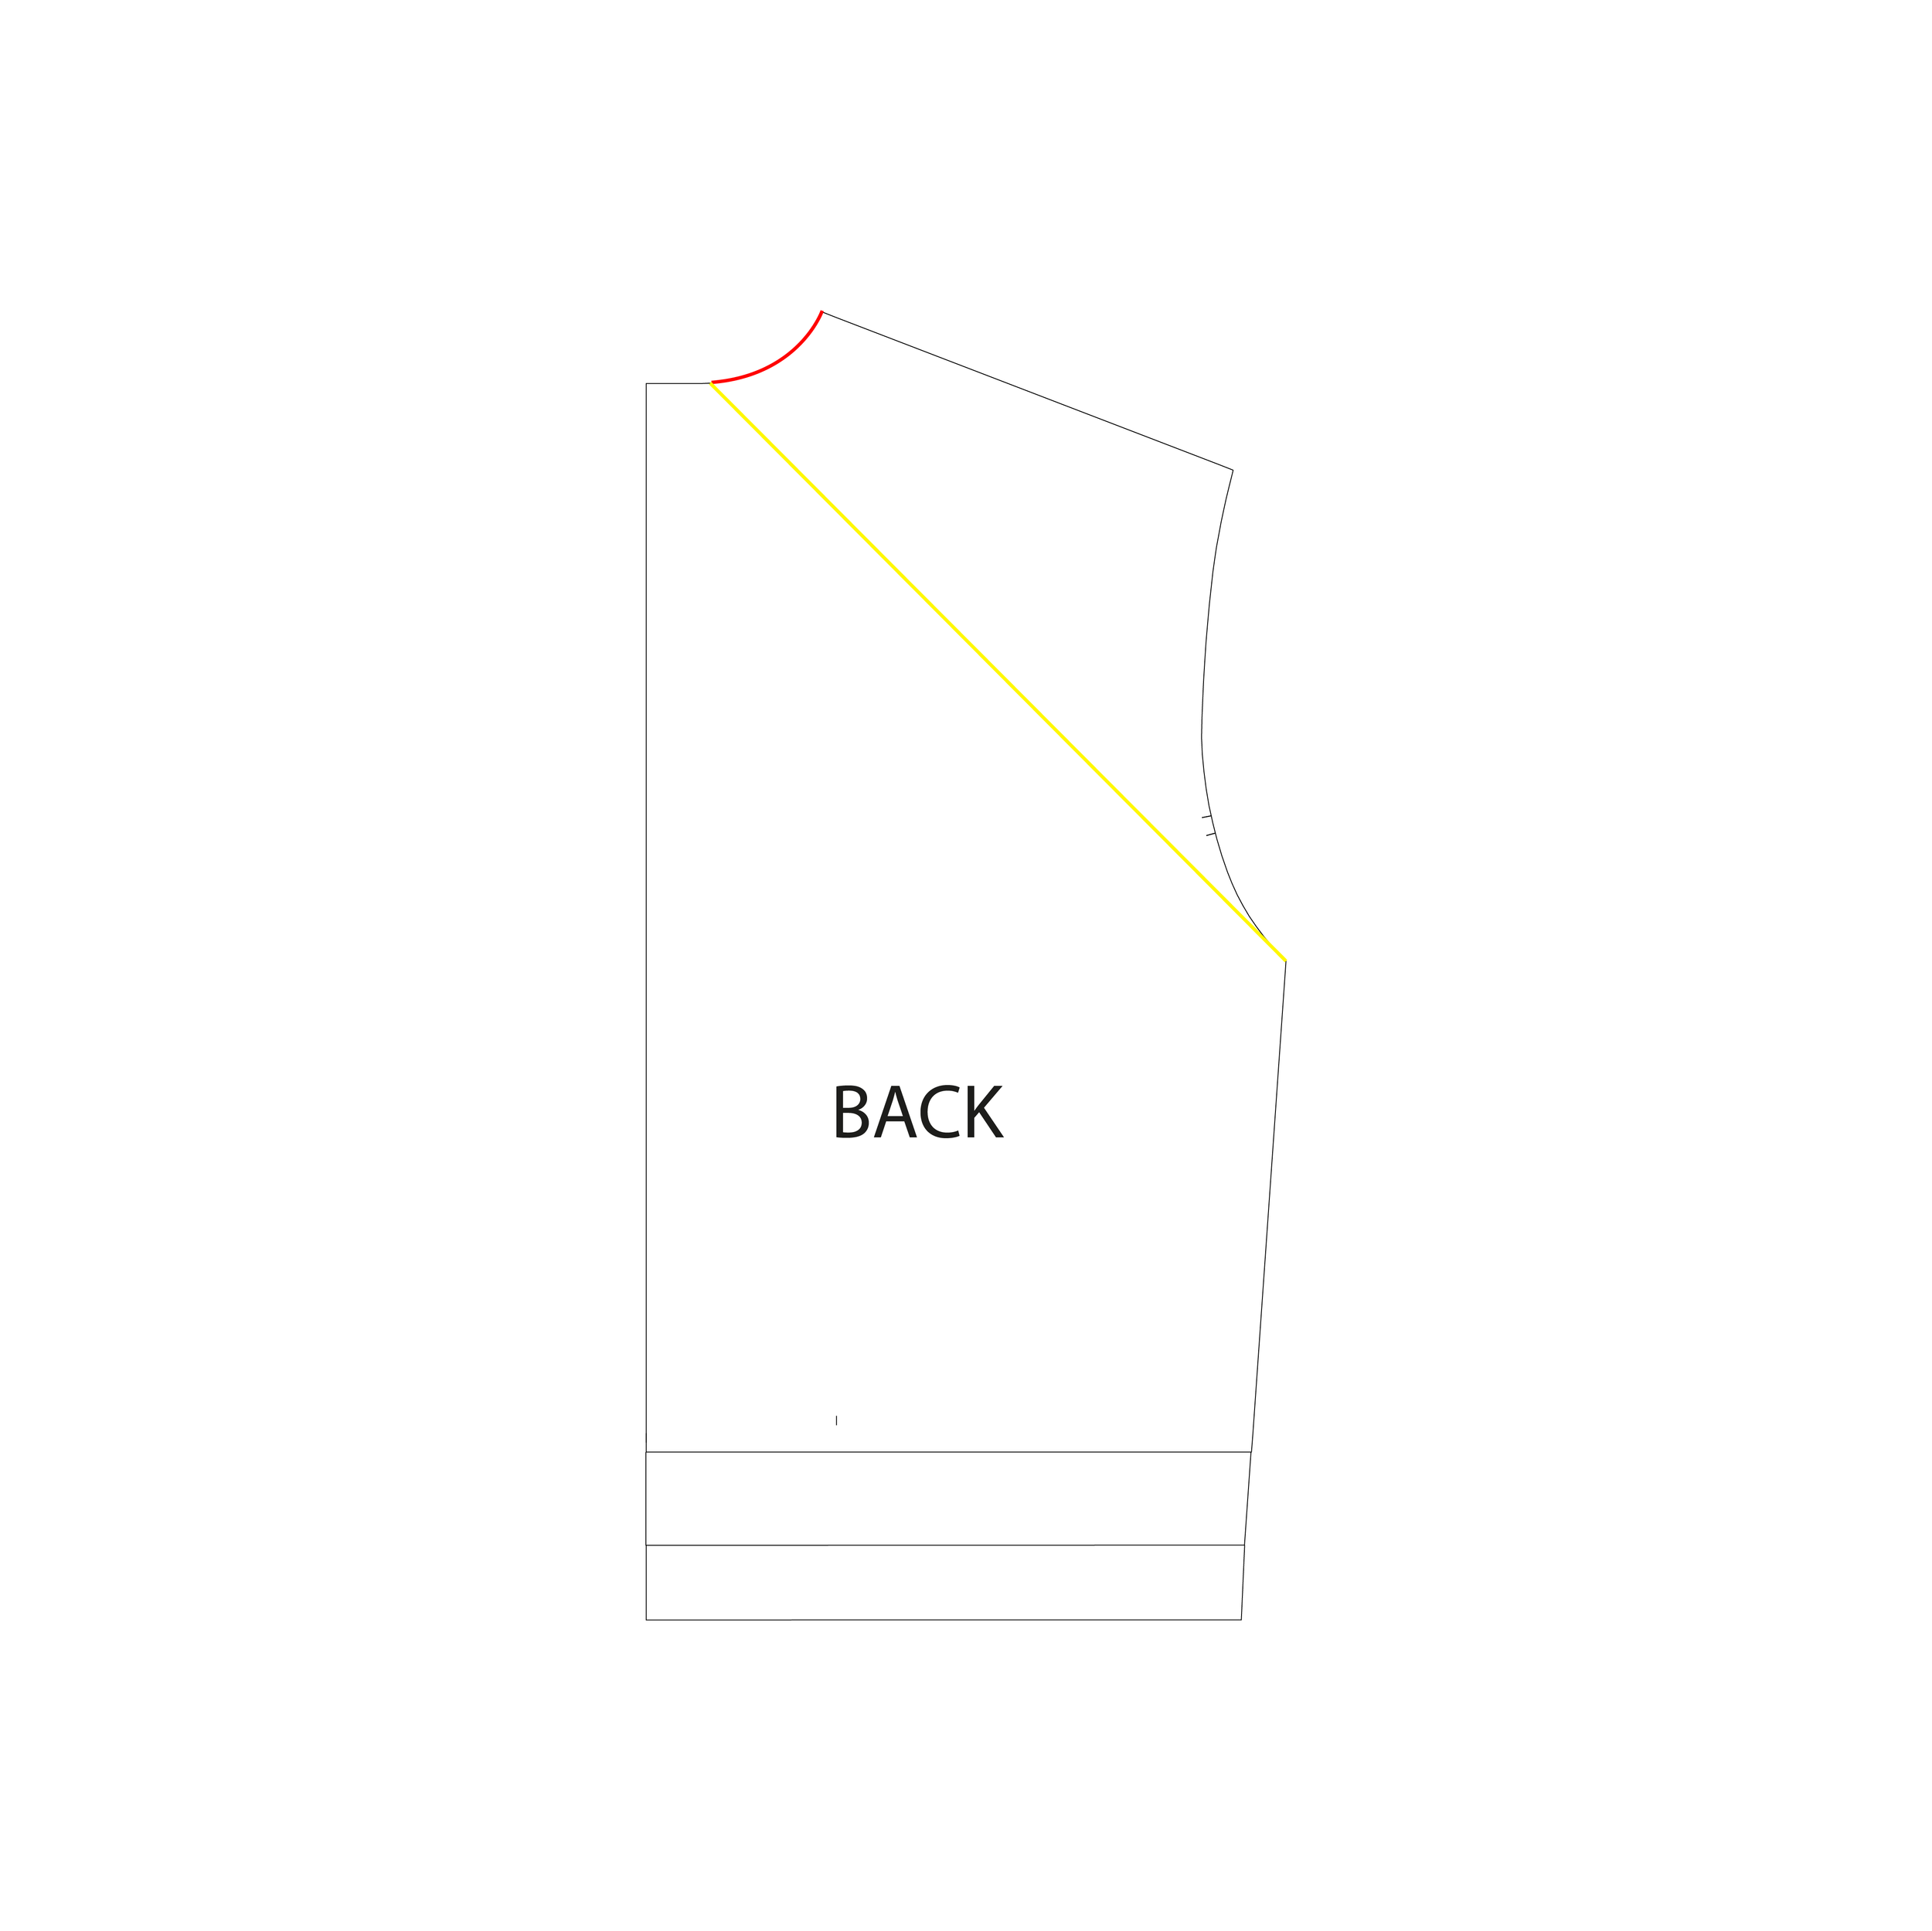
The first step is to determine where you’d like your new sleeve seam to sit on your body. I have several Siennas in my wardrobe, so I could draw the seam line on the fabric while he was wearing the sweatshirt. If you haven’t made it yet, you can look online for inspiration, or go into your closet and see how other raglan sleeves fit (if you have any raglan garments). Once you know where you’d like your sleeve seam, mark it on the front & back pattern. It’s marked in yellow in the images below. Mark the neckline as well (the red lines in the images). Cut the pattern at the yellow lines.
I added 5cm to the men’s pattern hemline to accommodate for my partner’s long torso, which is why you’re seeing three lines at the bottom.
Step 2 - creating the new sleeve
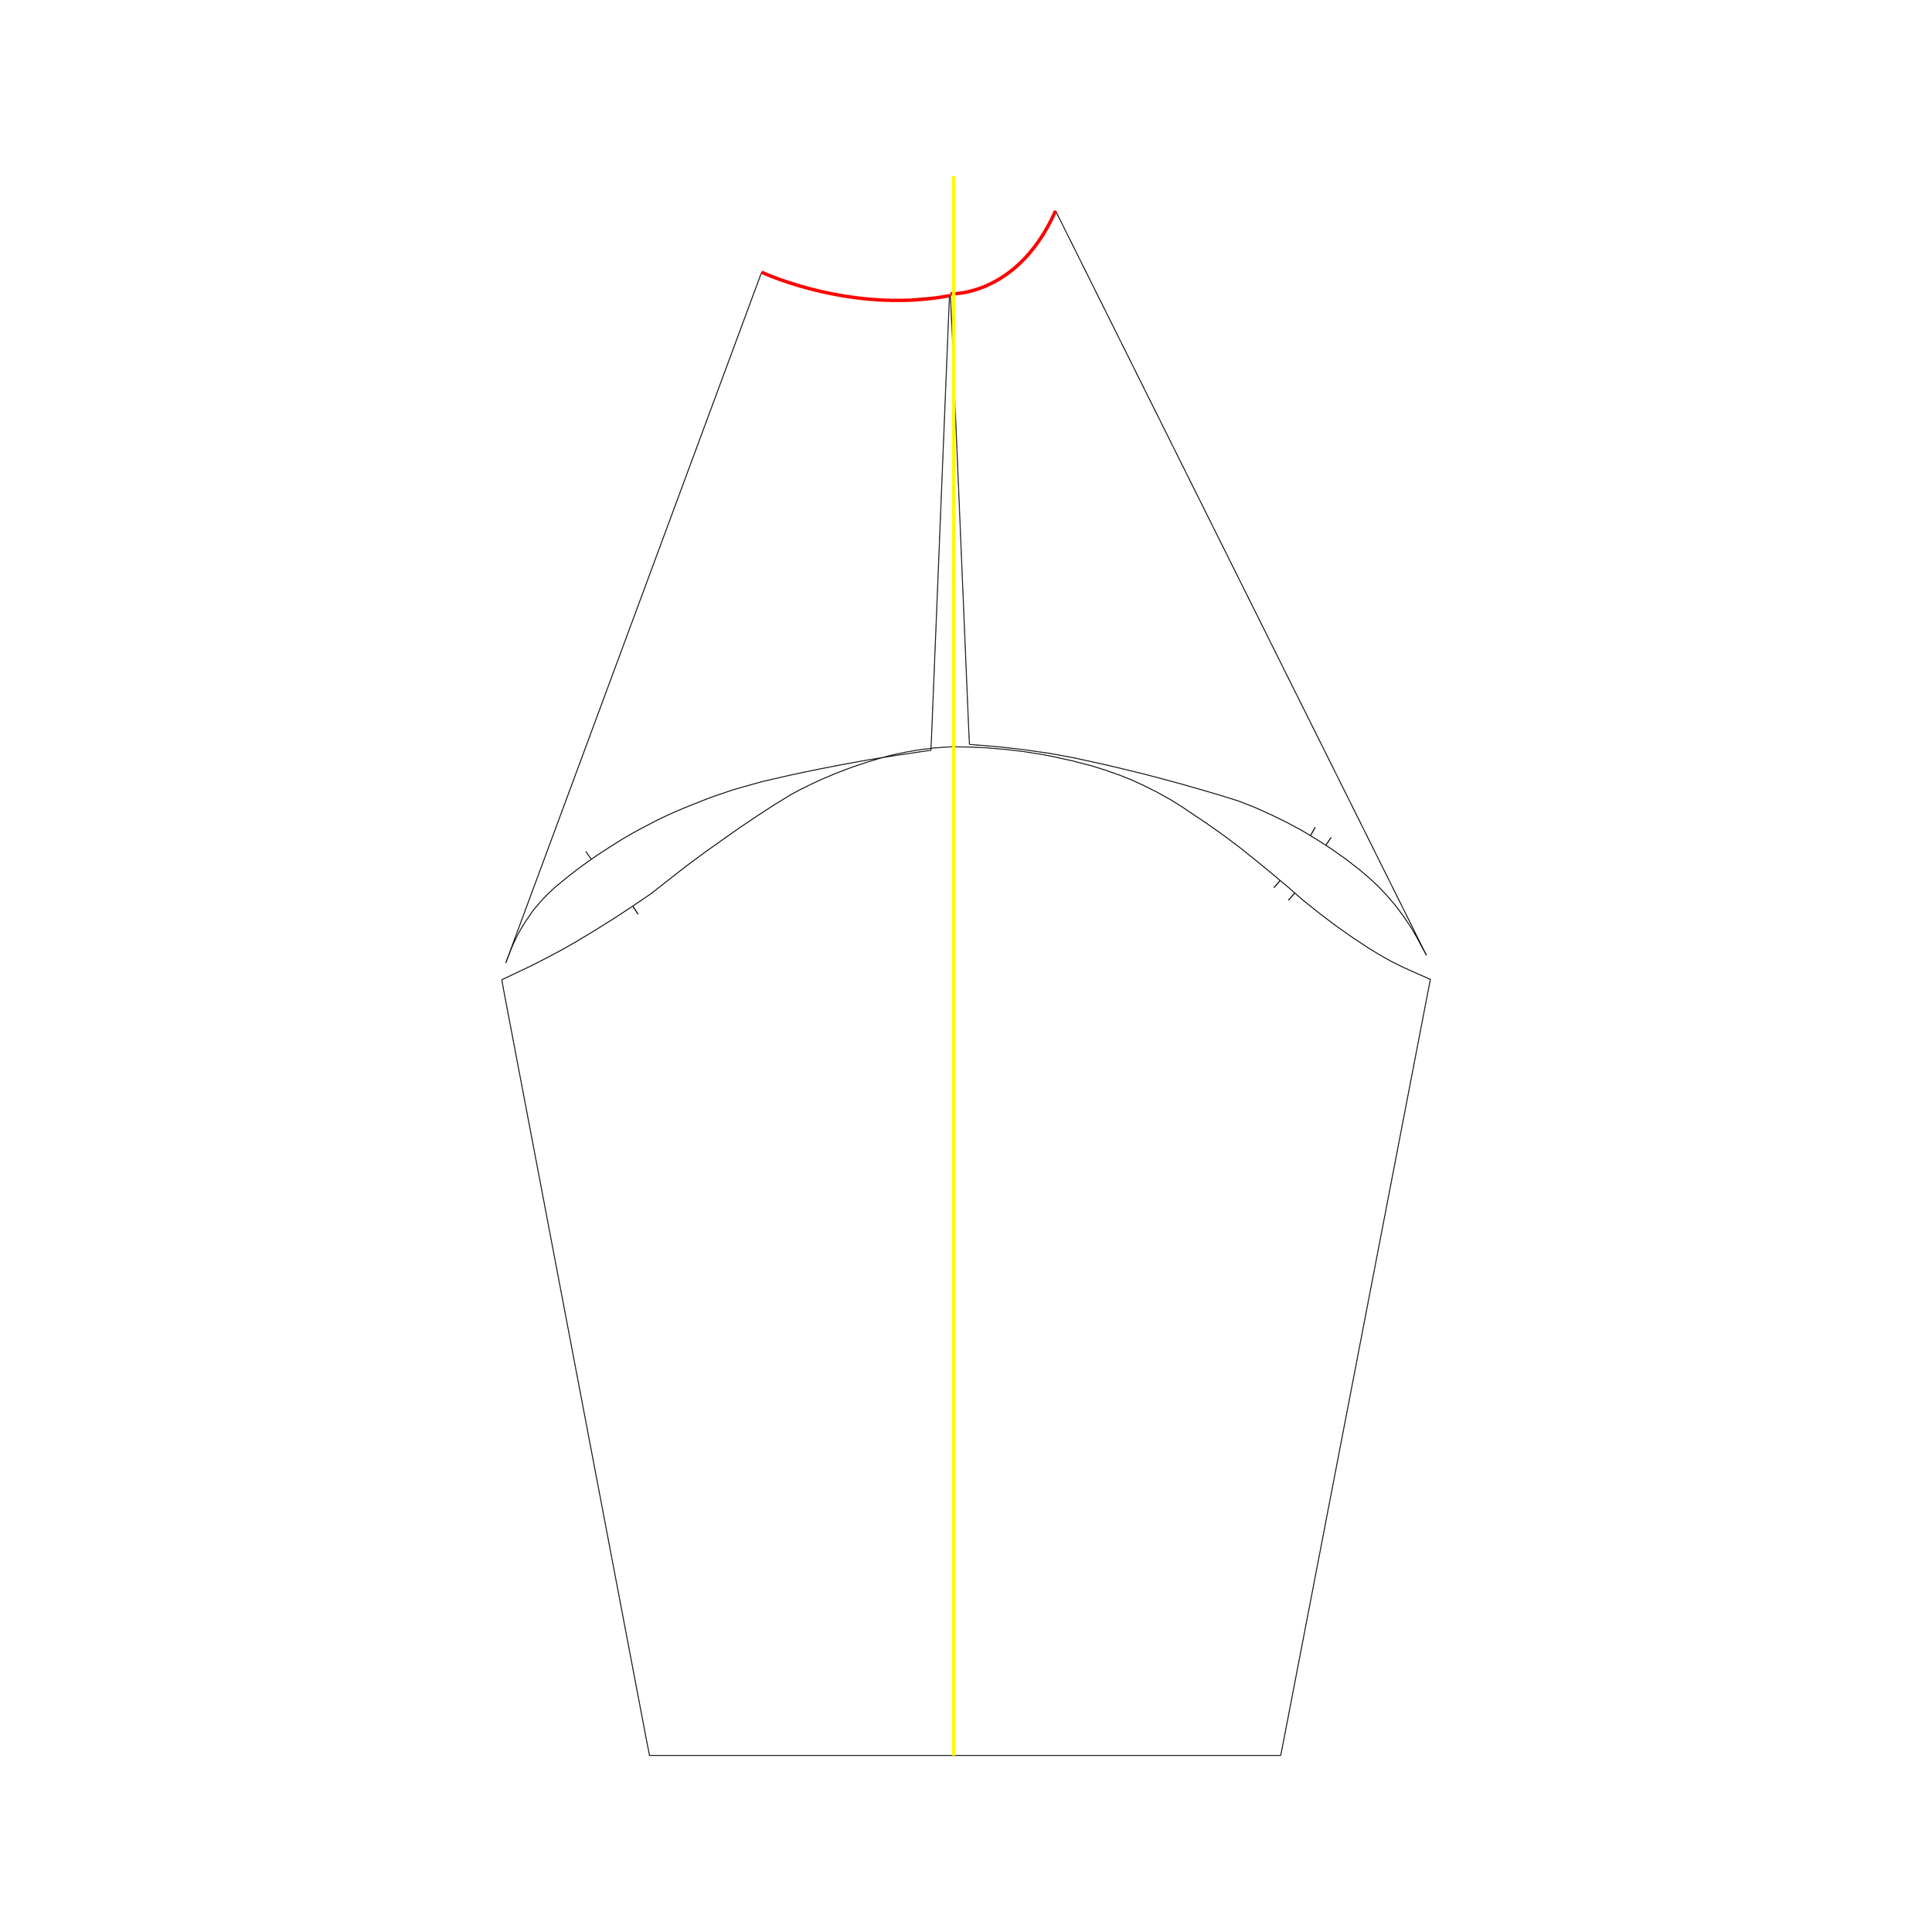
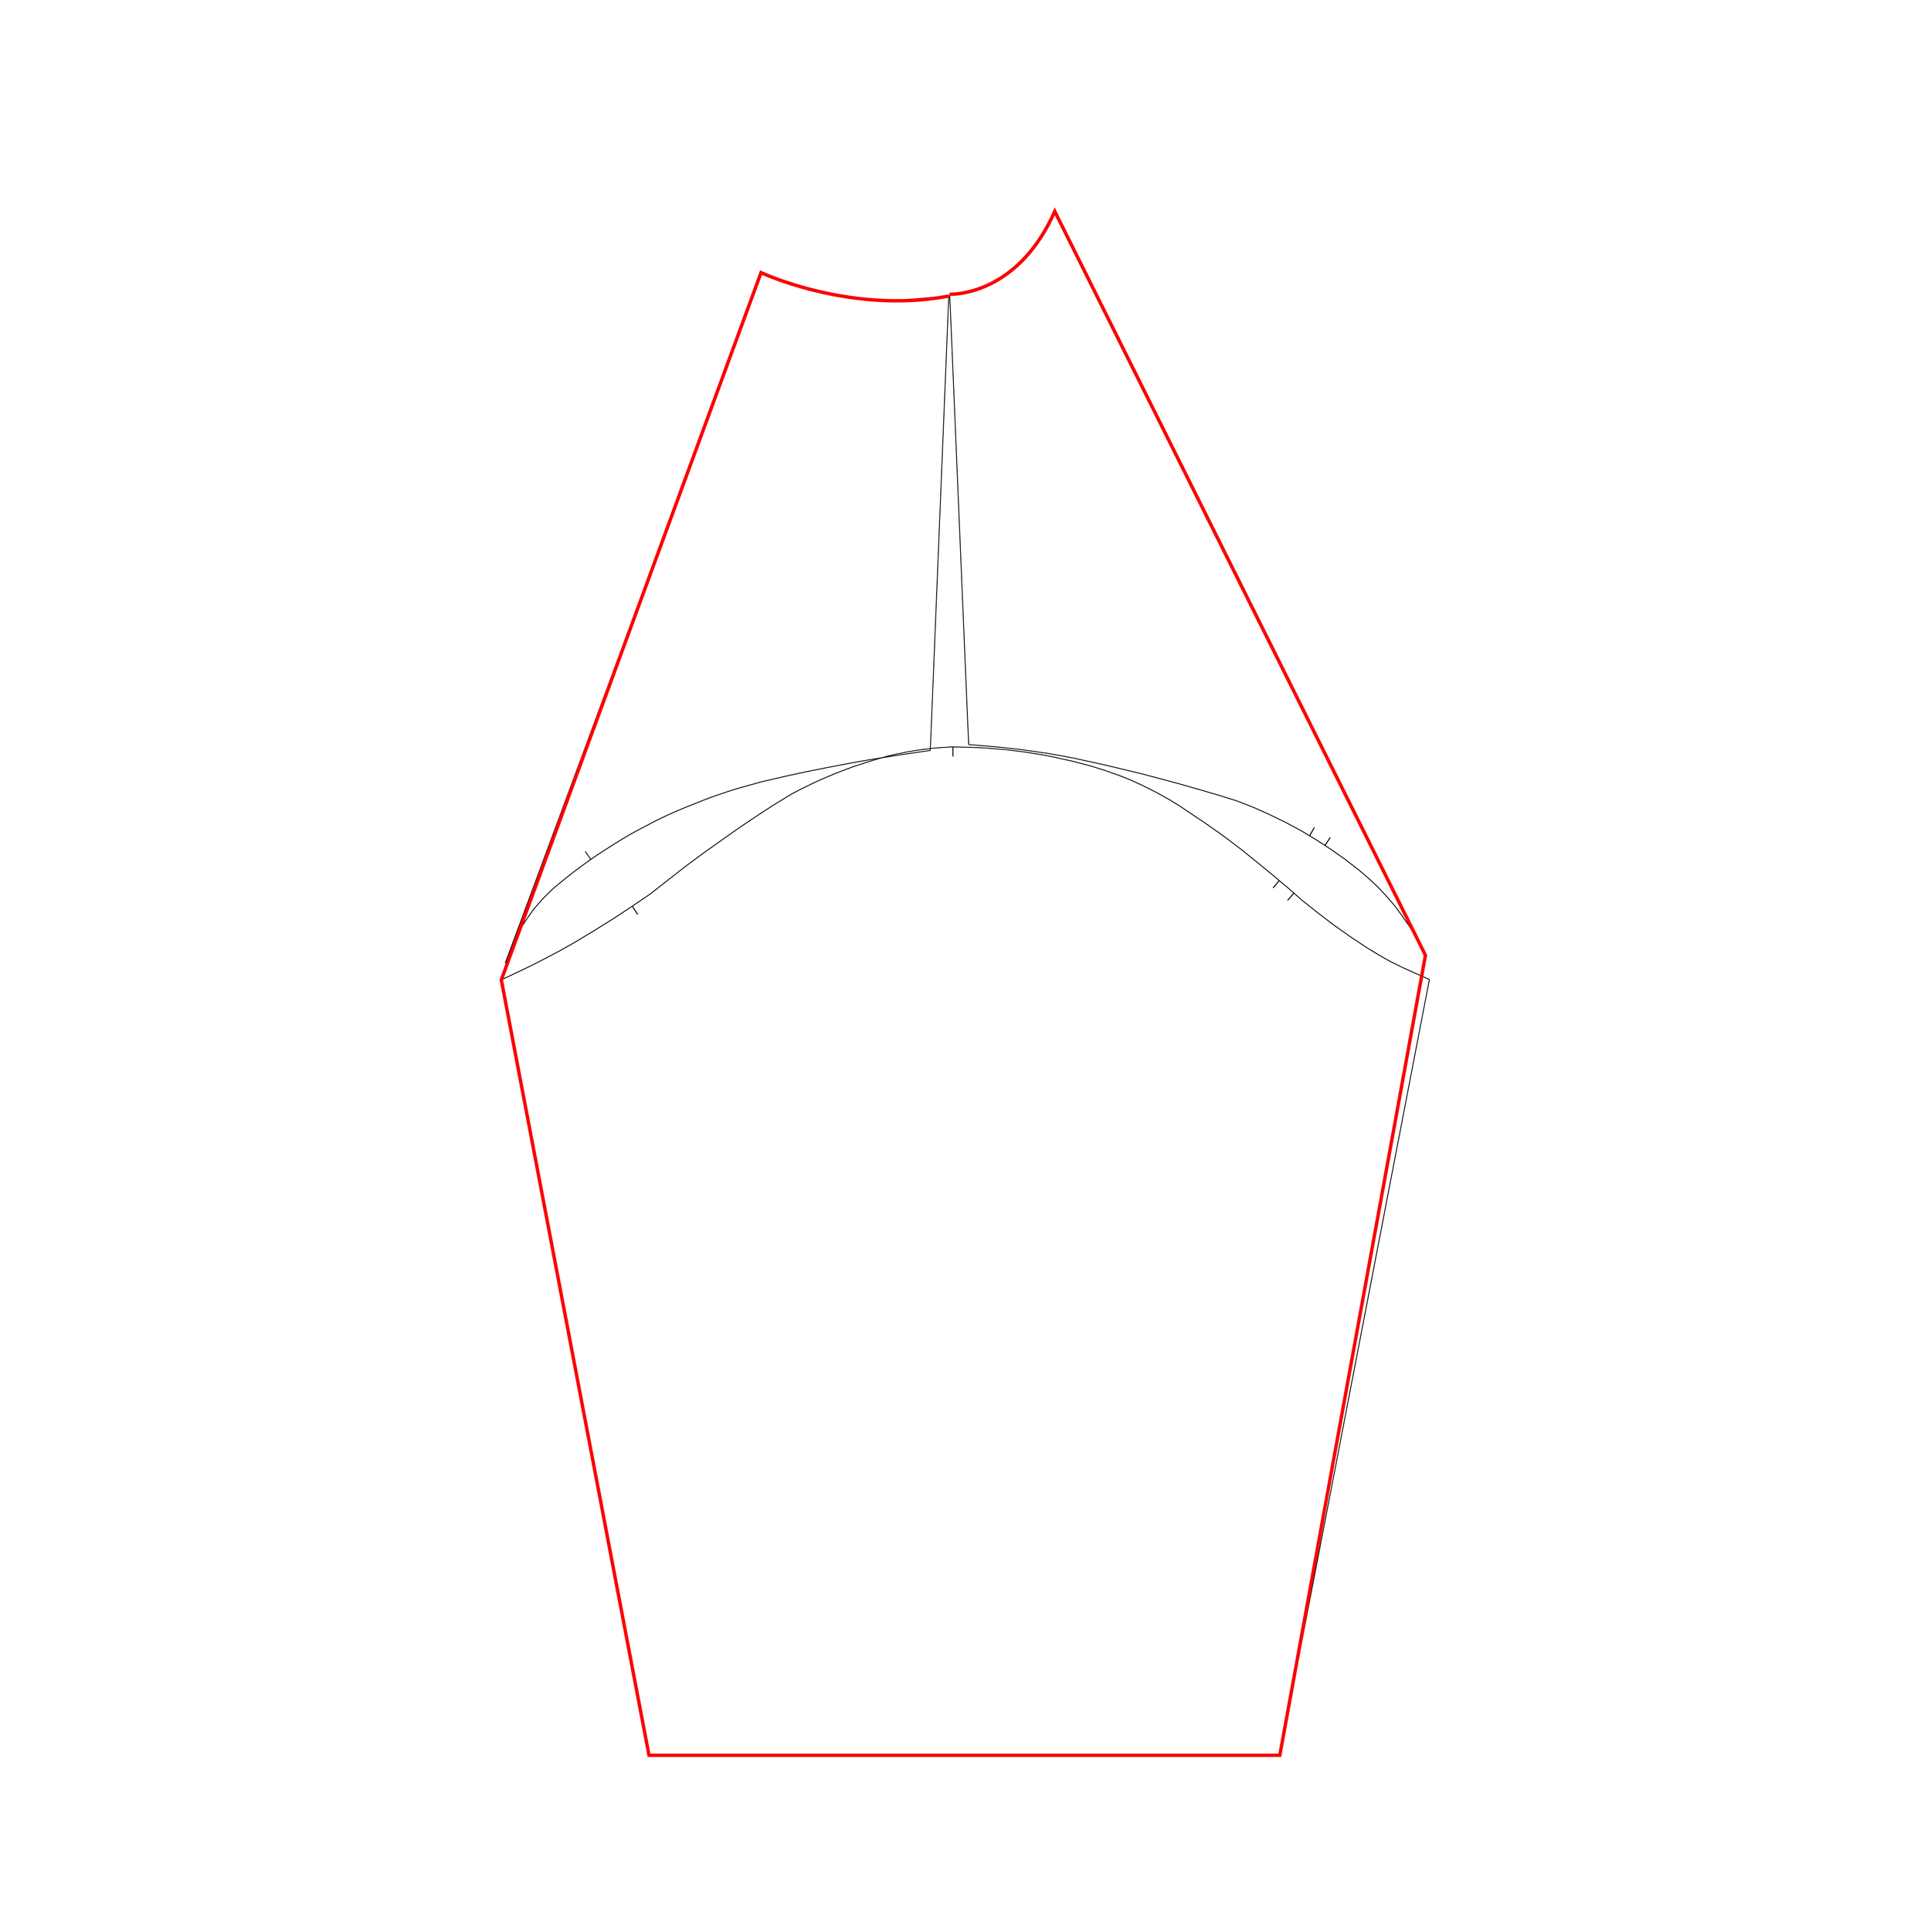
Next, you will add the pieces you’ve just cut away to your sleeve pattern piece. Mark a line at the notch at the sleeve head (the yellow line in the left image below). Align the middle of the neckline at that line. Trace your new sleeve pattern piece, marked in red in the illustration on the right. You can also glue the pattern pieces over some pattern paper, or whatever you have on hand.
Step 3 - sewing your new design

Now you’ve adjusted your pattern, you can go ahead and cut out your fabric & sew your new sweater! Do this by attaching the sleeves to the front panels first, then to the back panels & then you can stitch the side seams together.
2 - creating a side seam slit

Another thing you can do, is omitting the waistband and finishing the hem with a slit at the side. I sewed this version for myself and I love it.
Step 1 - decide on bodice length
Since you will lose 6cm of length at the bottom of your sweatshirt by omitting the waistband, you might want to lengthen the front & back pattern pieces.
Decide if you want to do a double fold hem, or if you want to zig-zag or overlock the edge and fold only once. I prefer the second method, as a double fold can get really bulky in sweatshirt fabric.
For the double fold hem, add 4 cm to your lengthened pattern piece for the hem. For the single fold hem finish, add 2cm to your lengthened pattern piece.
Step 2 - determine slit length
Next, decide how long you want your slit to be. Mark the desired length of your slit on the pattern piece. Keep your chosen method of finishing the hem in mind, and add that to the length you want. Cut out all your pattern pieces, except for the waistband.
Step 3 - sew the sweatshirt
You can go ahead and sew your sweatshirt like you normally would, except you finish (overlock or zig-zag stitch) the side seams of the front & back panel individually.
When you get to stitching the side seams, stop stitching a little bit above the point you marked in step 2. Backstitch a couple of extra times to reinforce your stitches.
Finish the bottom edge (the hem) using an overlock or a zig-zag stitch. Turn up the hem by 2cm, press well & stitch. I used a twin needle on my machine to stitch the hem down, I recommend doing that because it looks really professional.
step 4 - sewing the slit

Press the side seam open. Mark how wide you’d like your stitches to go around the opening. I prefer to stitch right at the edge of the seam allowance, but you can go closer to the opening if you like.
Stop a few mm above the top of your slit, put your needle down into your fabric. Lift the foot on your sewing machine, pivot the fabric so you can stitch to the other side of the slit. Stop & pivot once again when you get there. Stitch all the way down toward the hem.
And that’s it! I hope you’ll have fun hacking this super classic sweatshirt pattern to your taste!